
Defined Schoology Integration Guide
Fairfax County Public Schools: Integrating Defined Learning with Schoology (LTI 1.3)
This article provides a comprehensive guide for educators on how to use the Defined Learning integration within Schoology. Follow these steps to create assignments, customize tasks, and manage grading.
Table of Contents
- Creating a Defined Learning Assignment
- Enabling Grade Passback (Required)
- Customizing Tasks and Projects
- Assigning Projects to Teams of Students
- Student Experience & Submission
- Grading & Syncing Scores
1. Creating a Defined Learning Assignment
To add a "ready-to-use" Defined Learning project to your course:
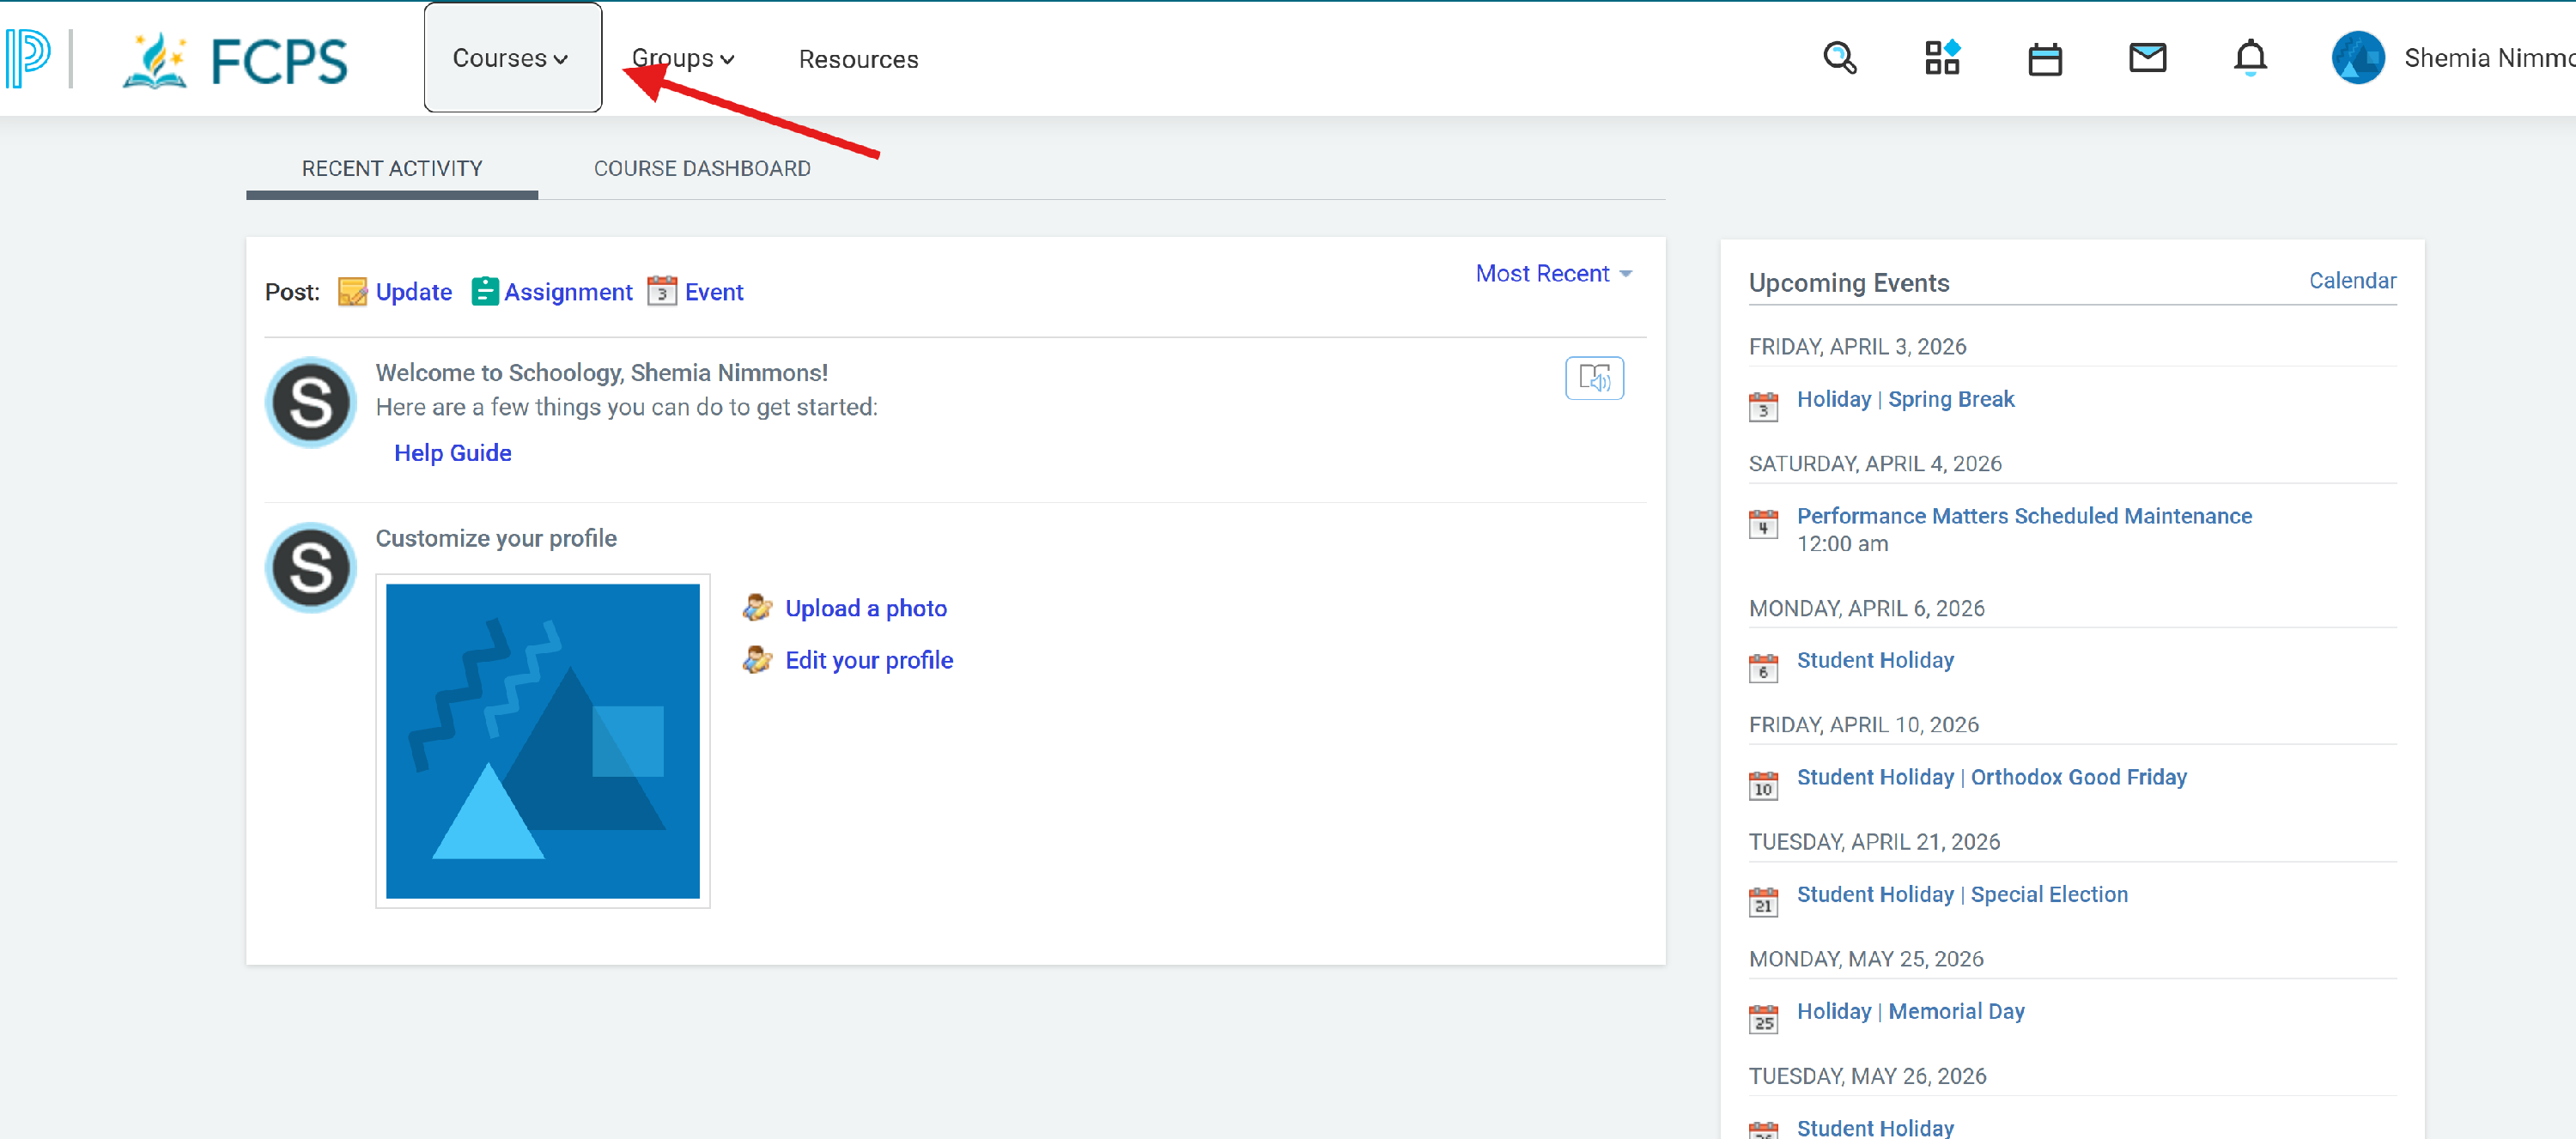
Click on your Schoology Courses and choose your course.
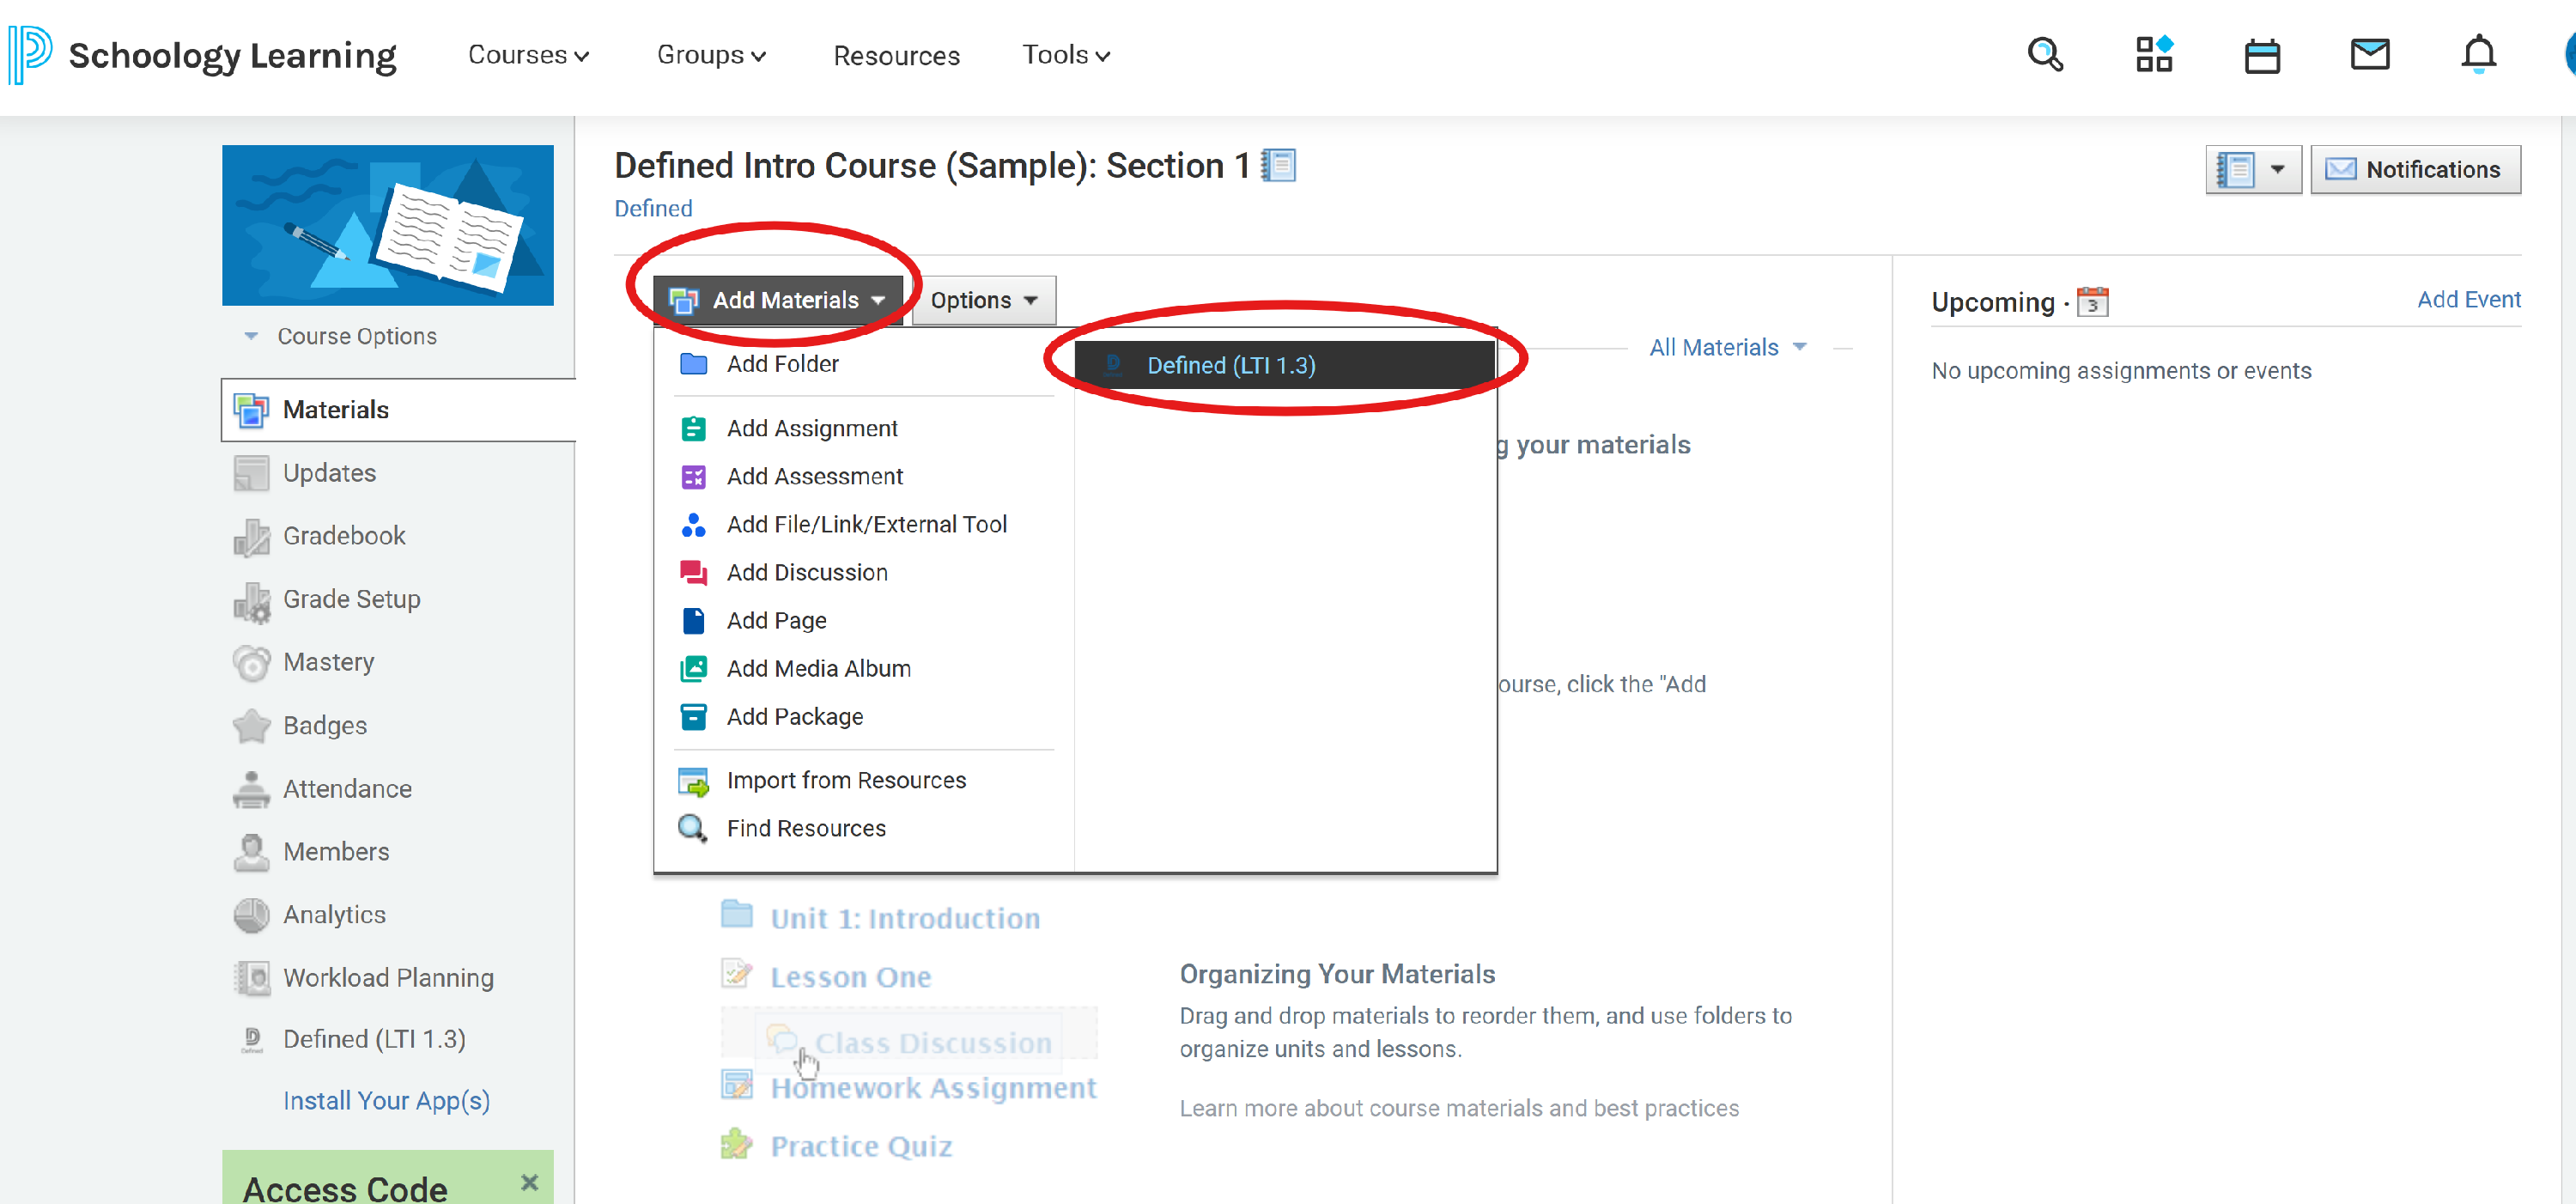
Click Add Materials and select Defined (LTI 1.3) from the dropdown.
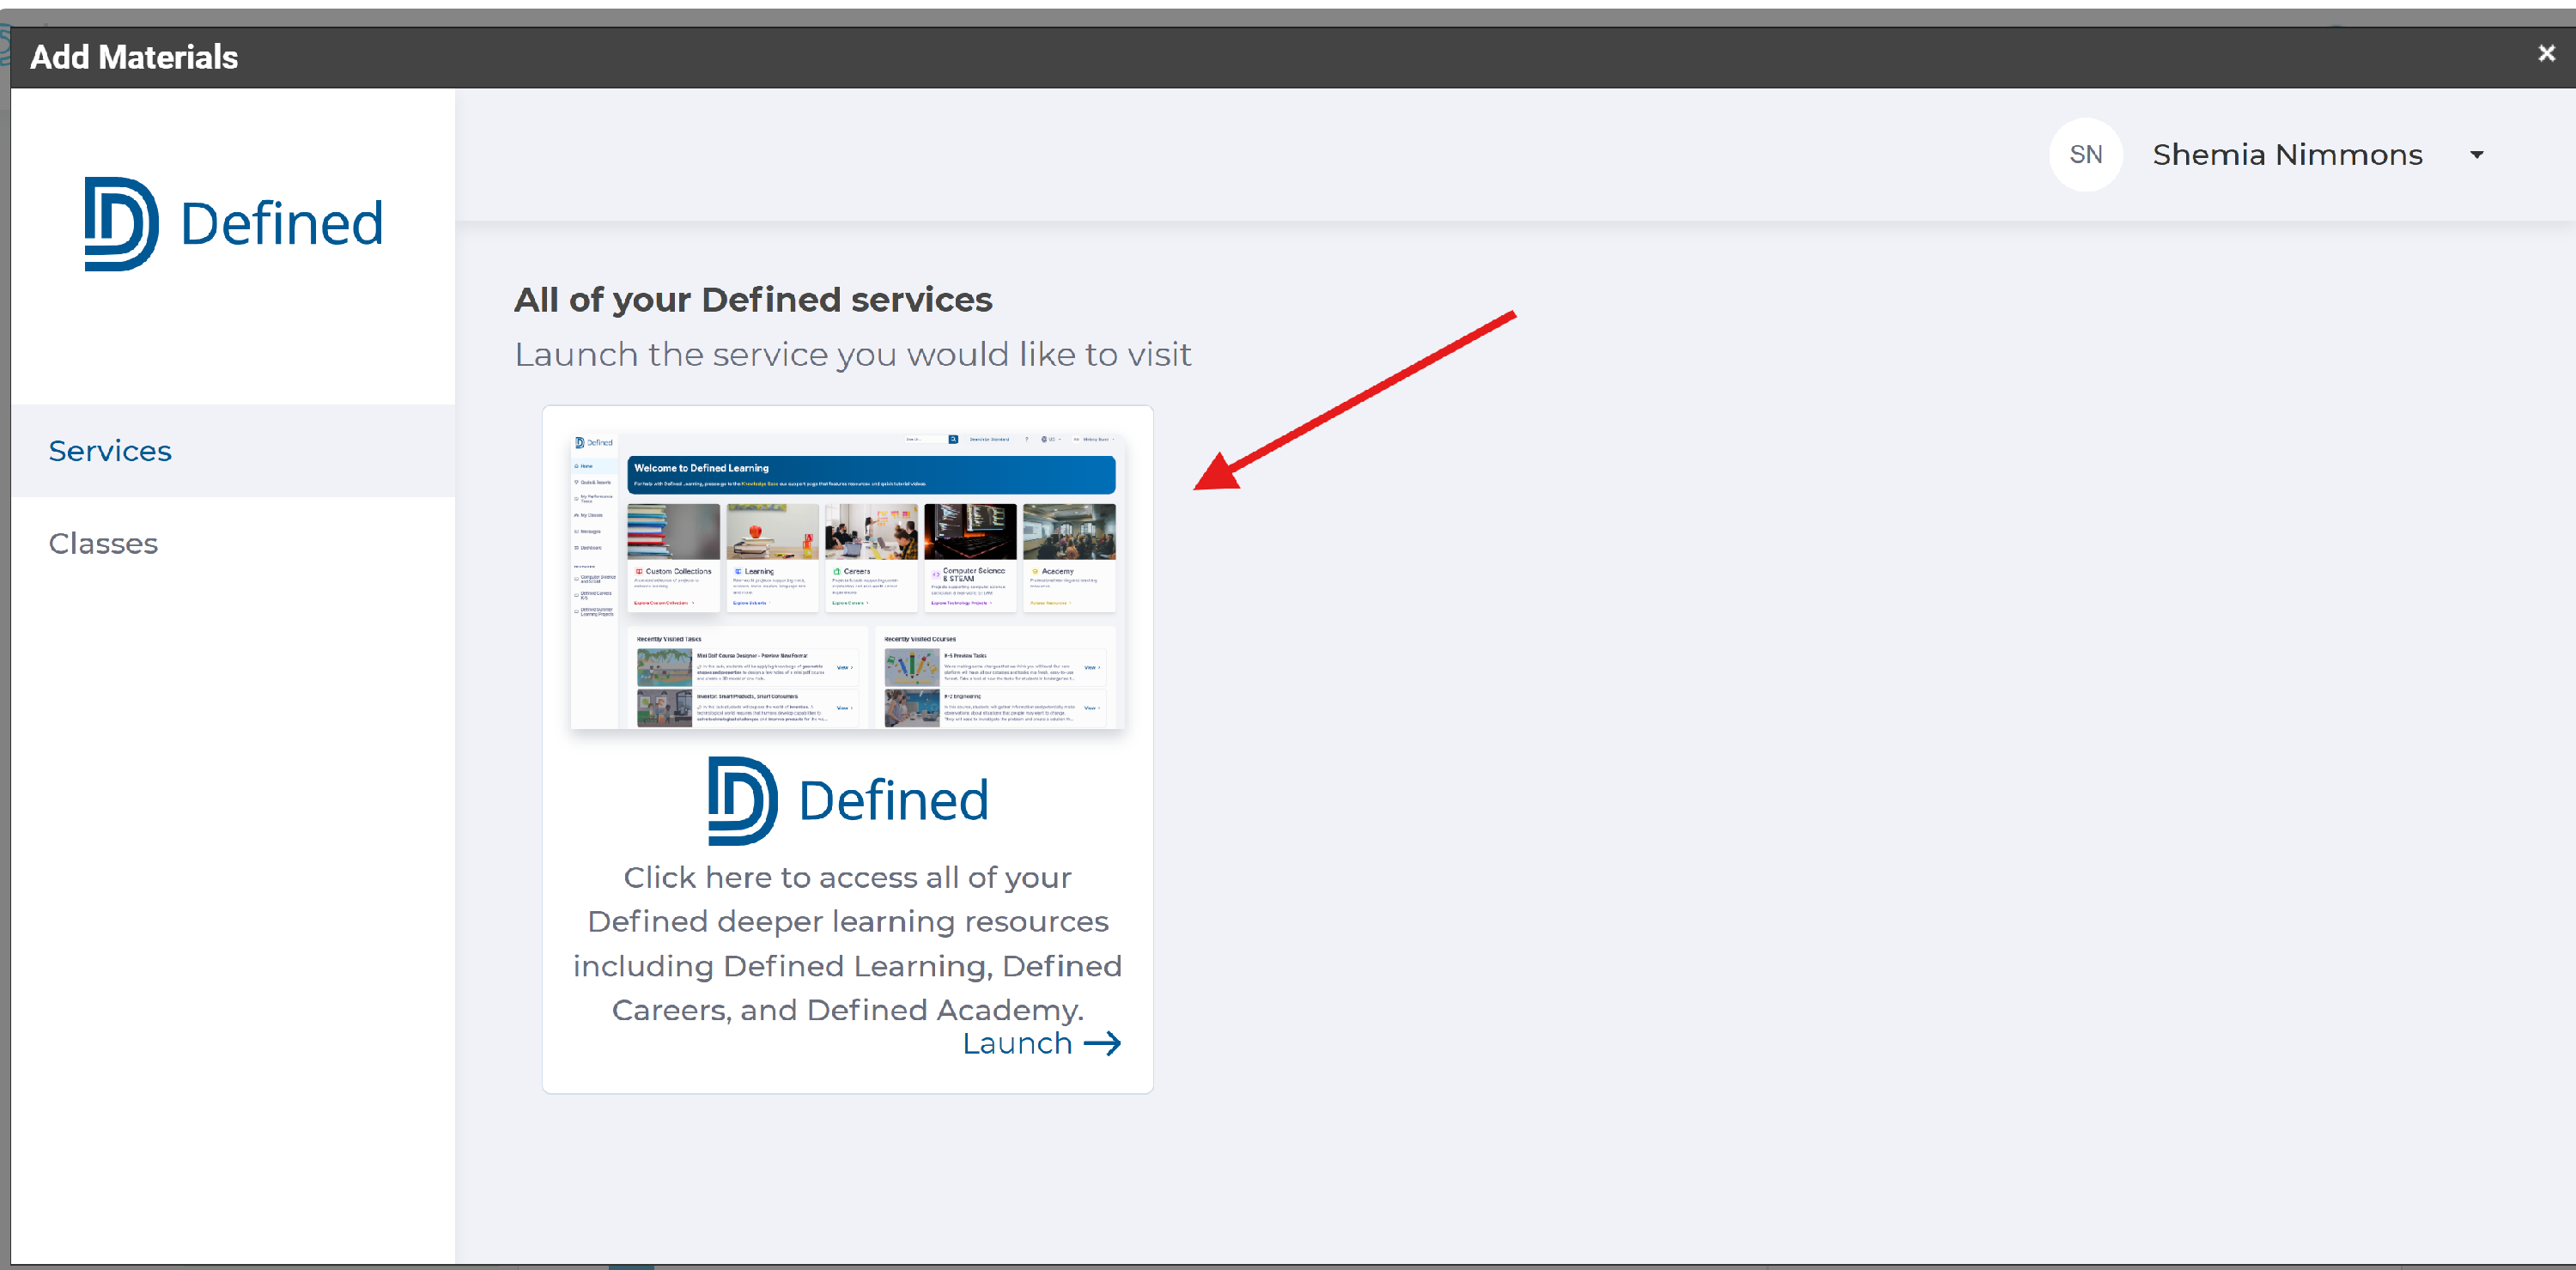
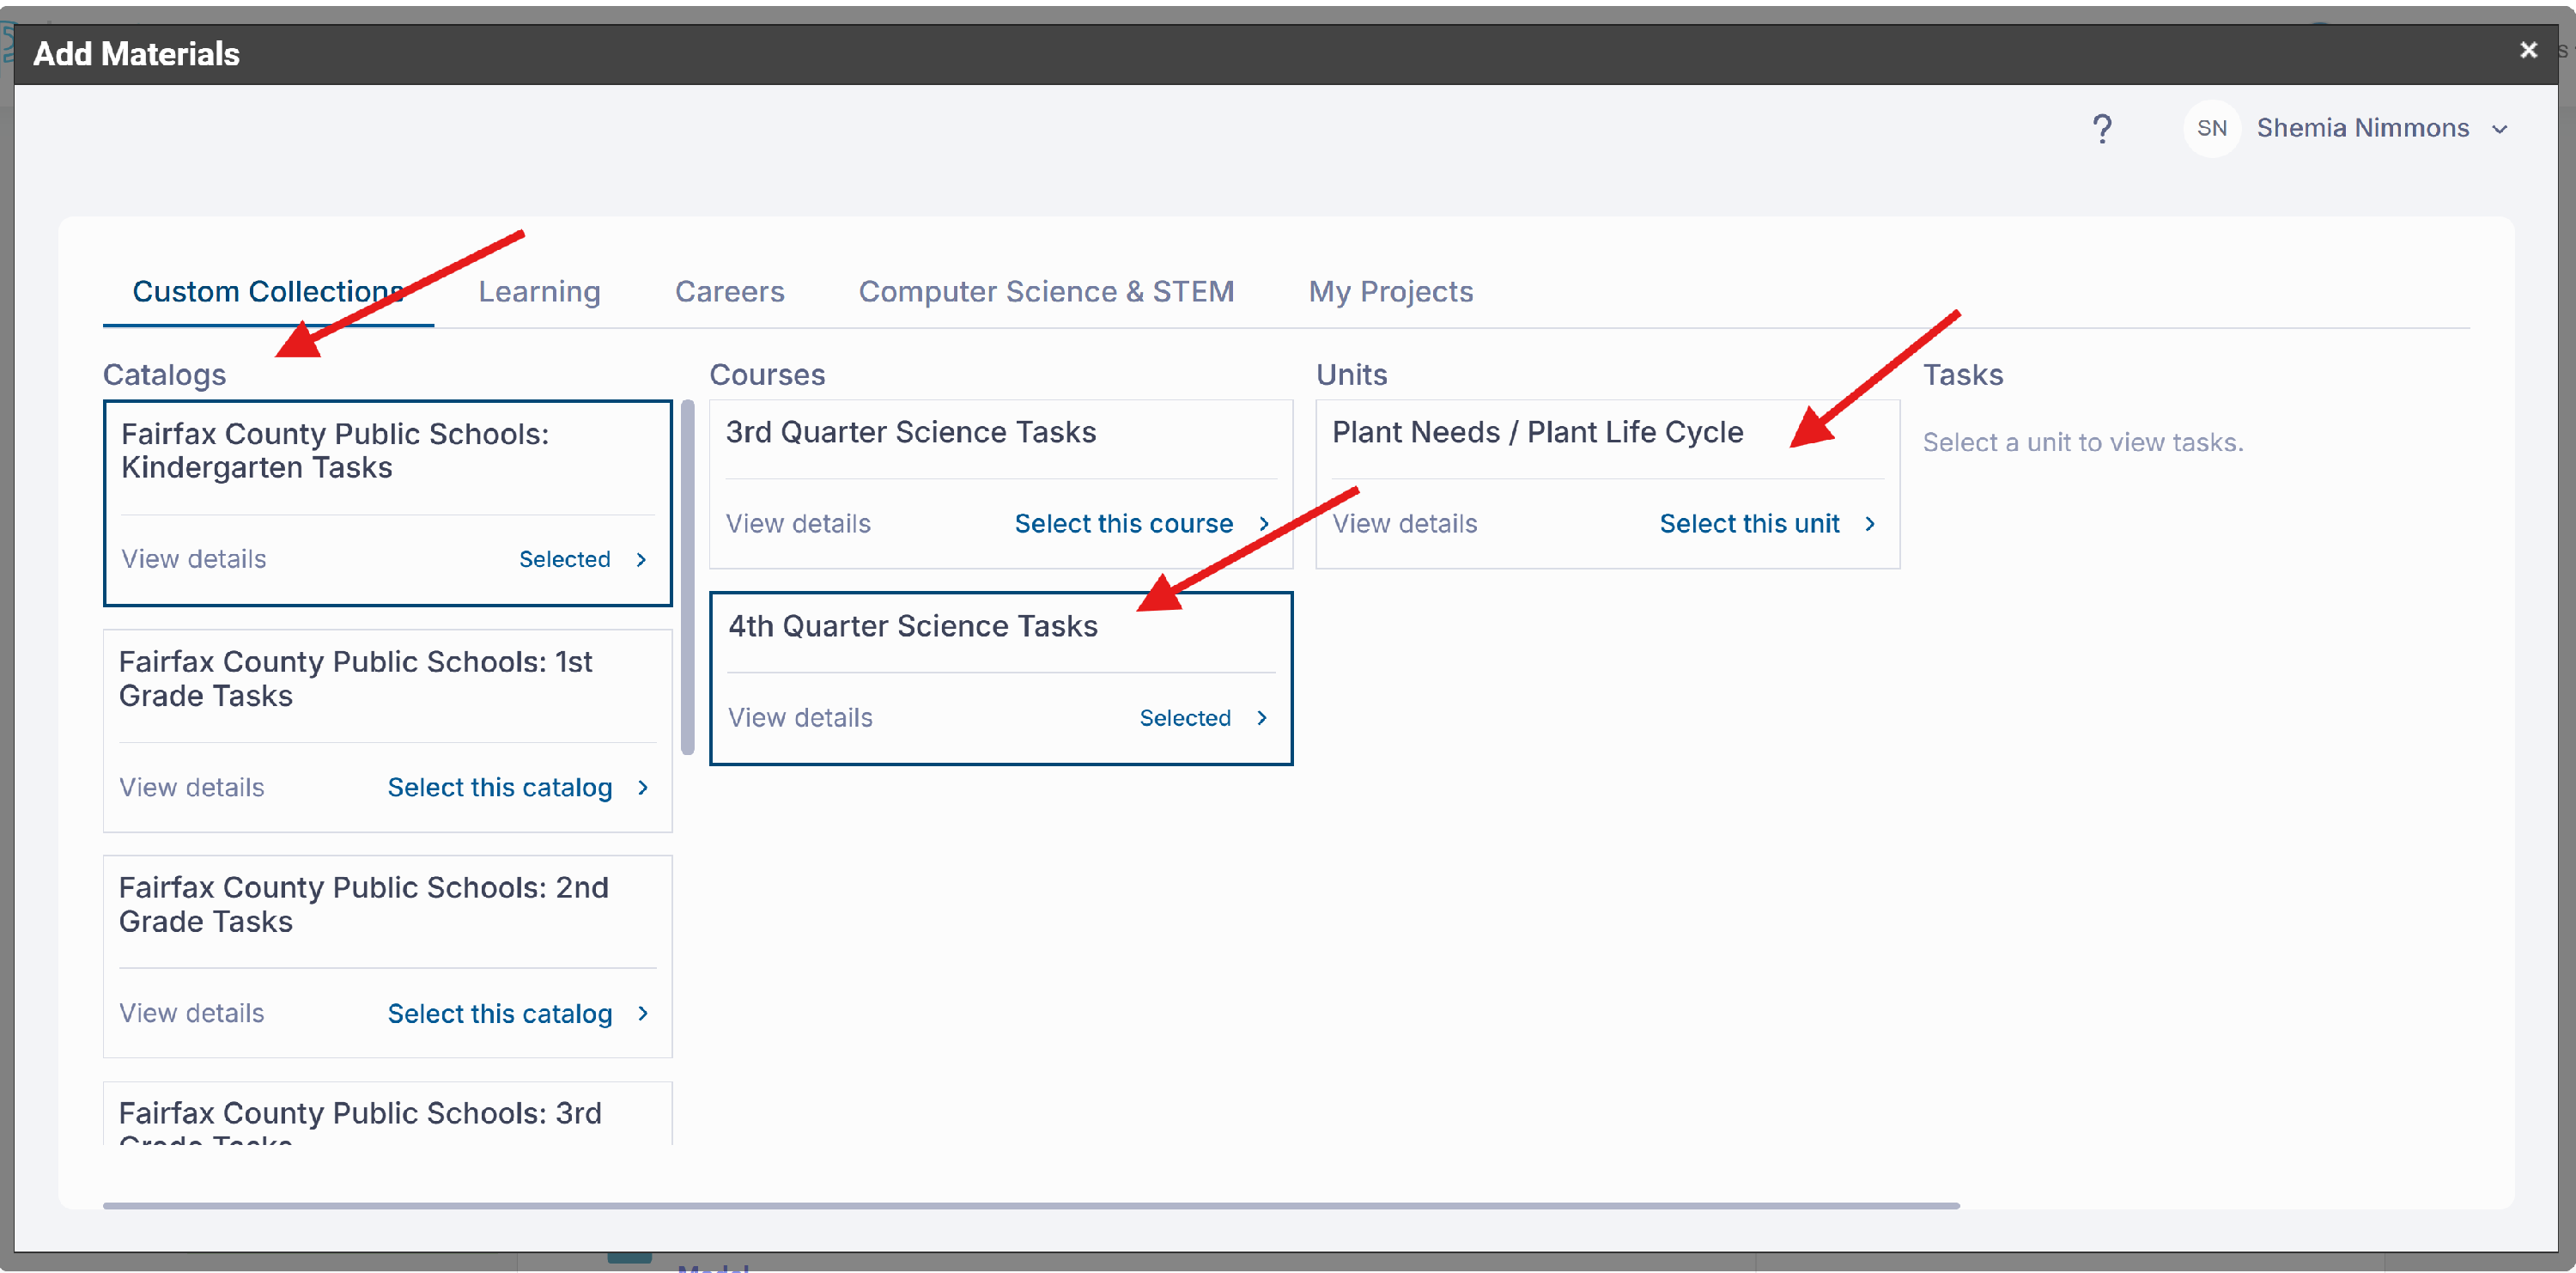
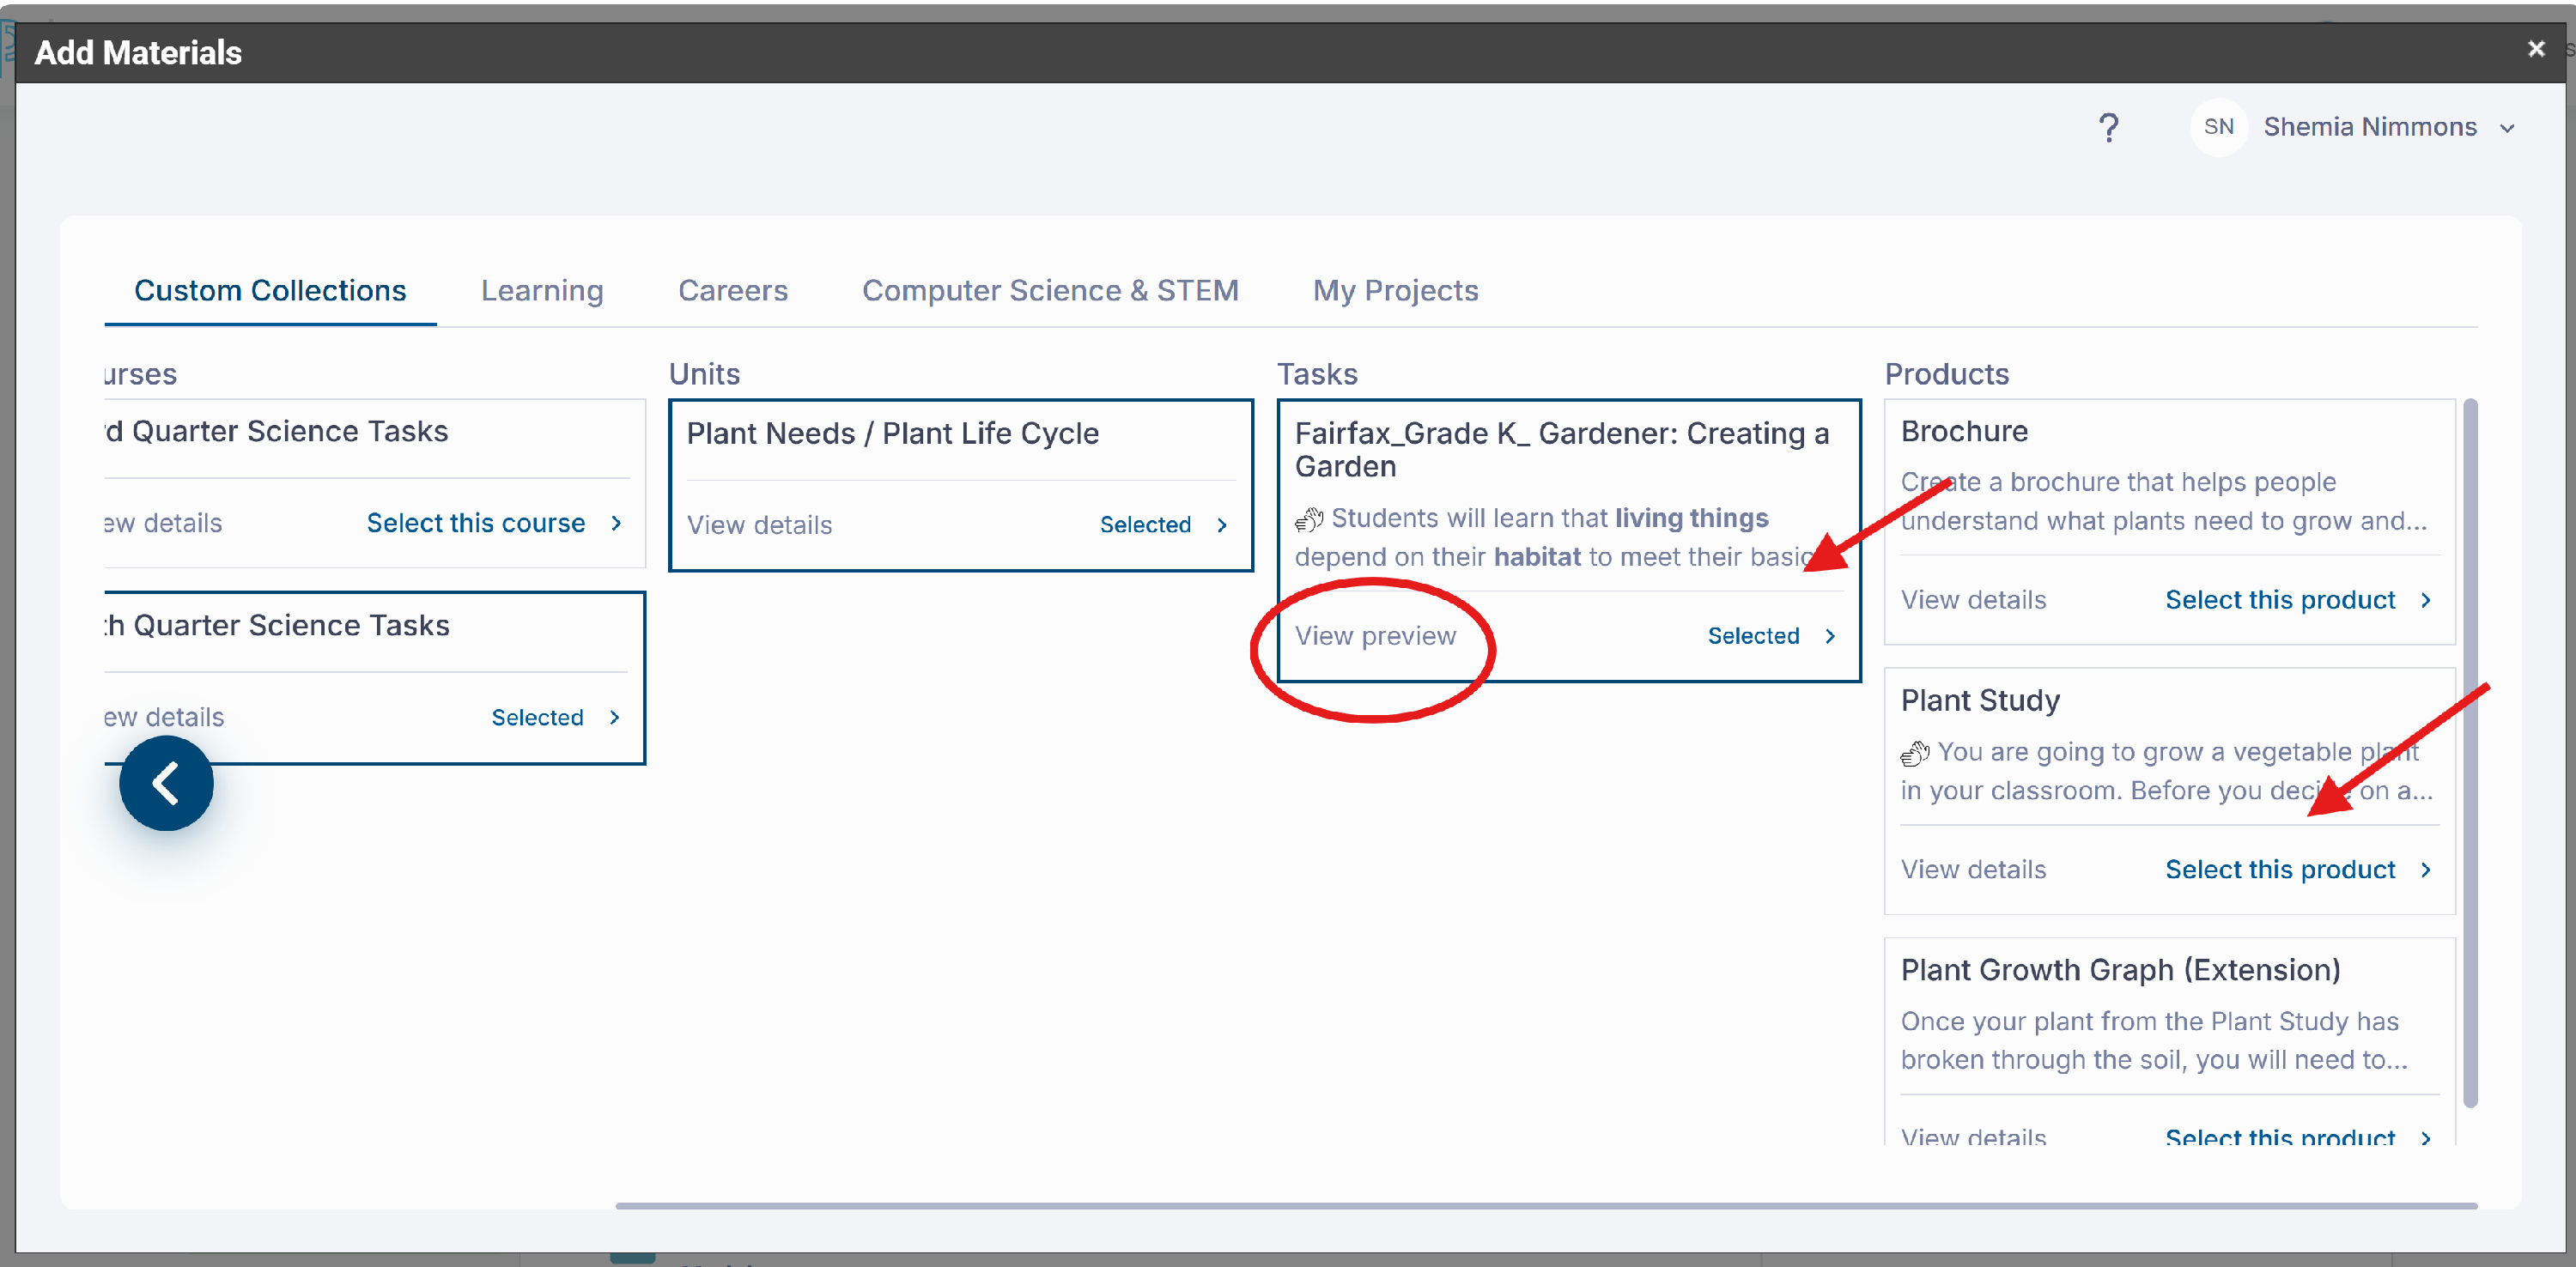
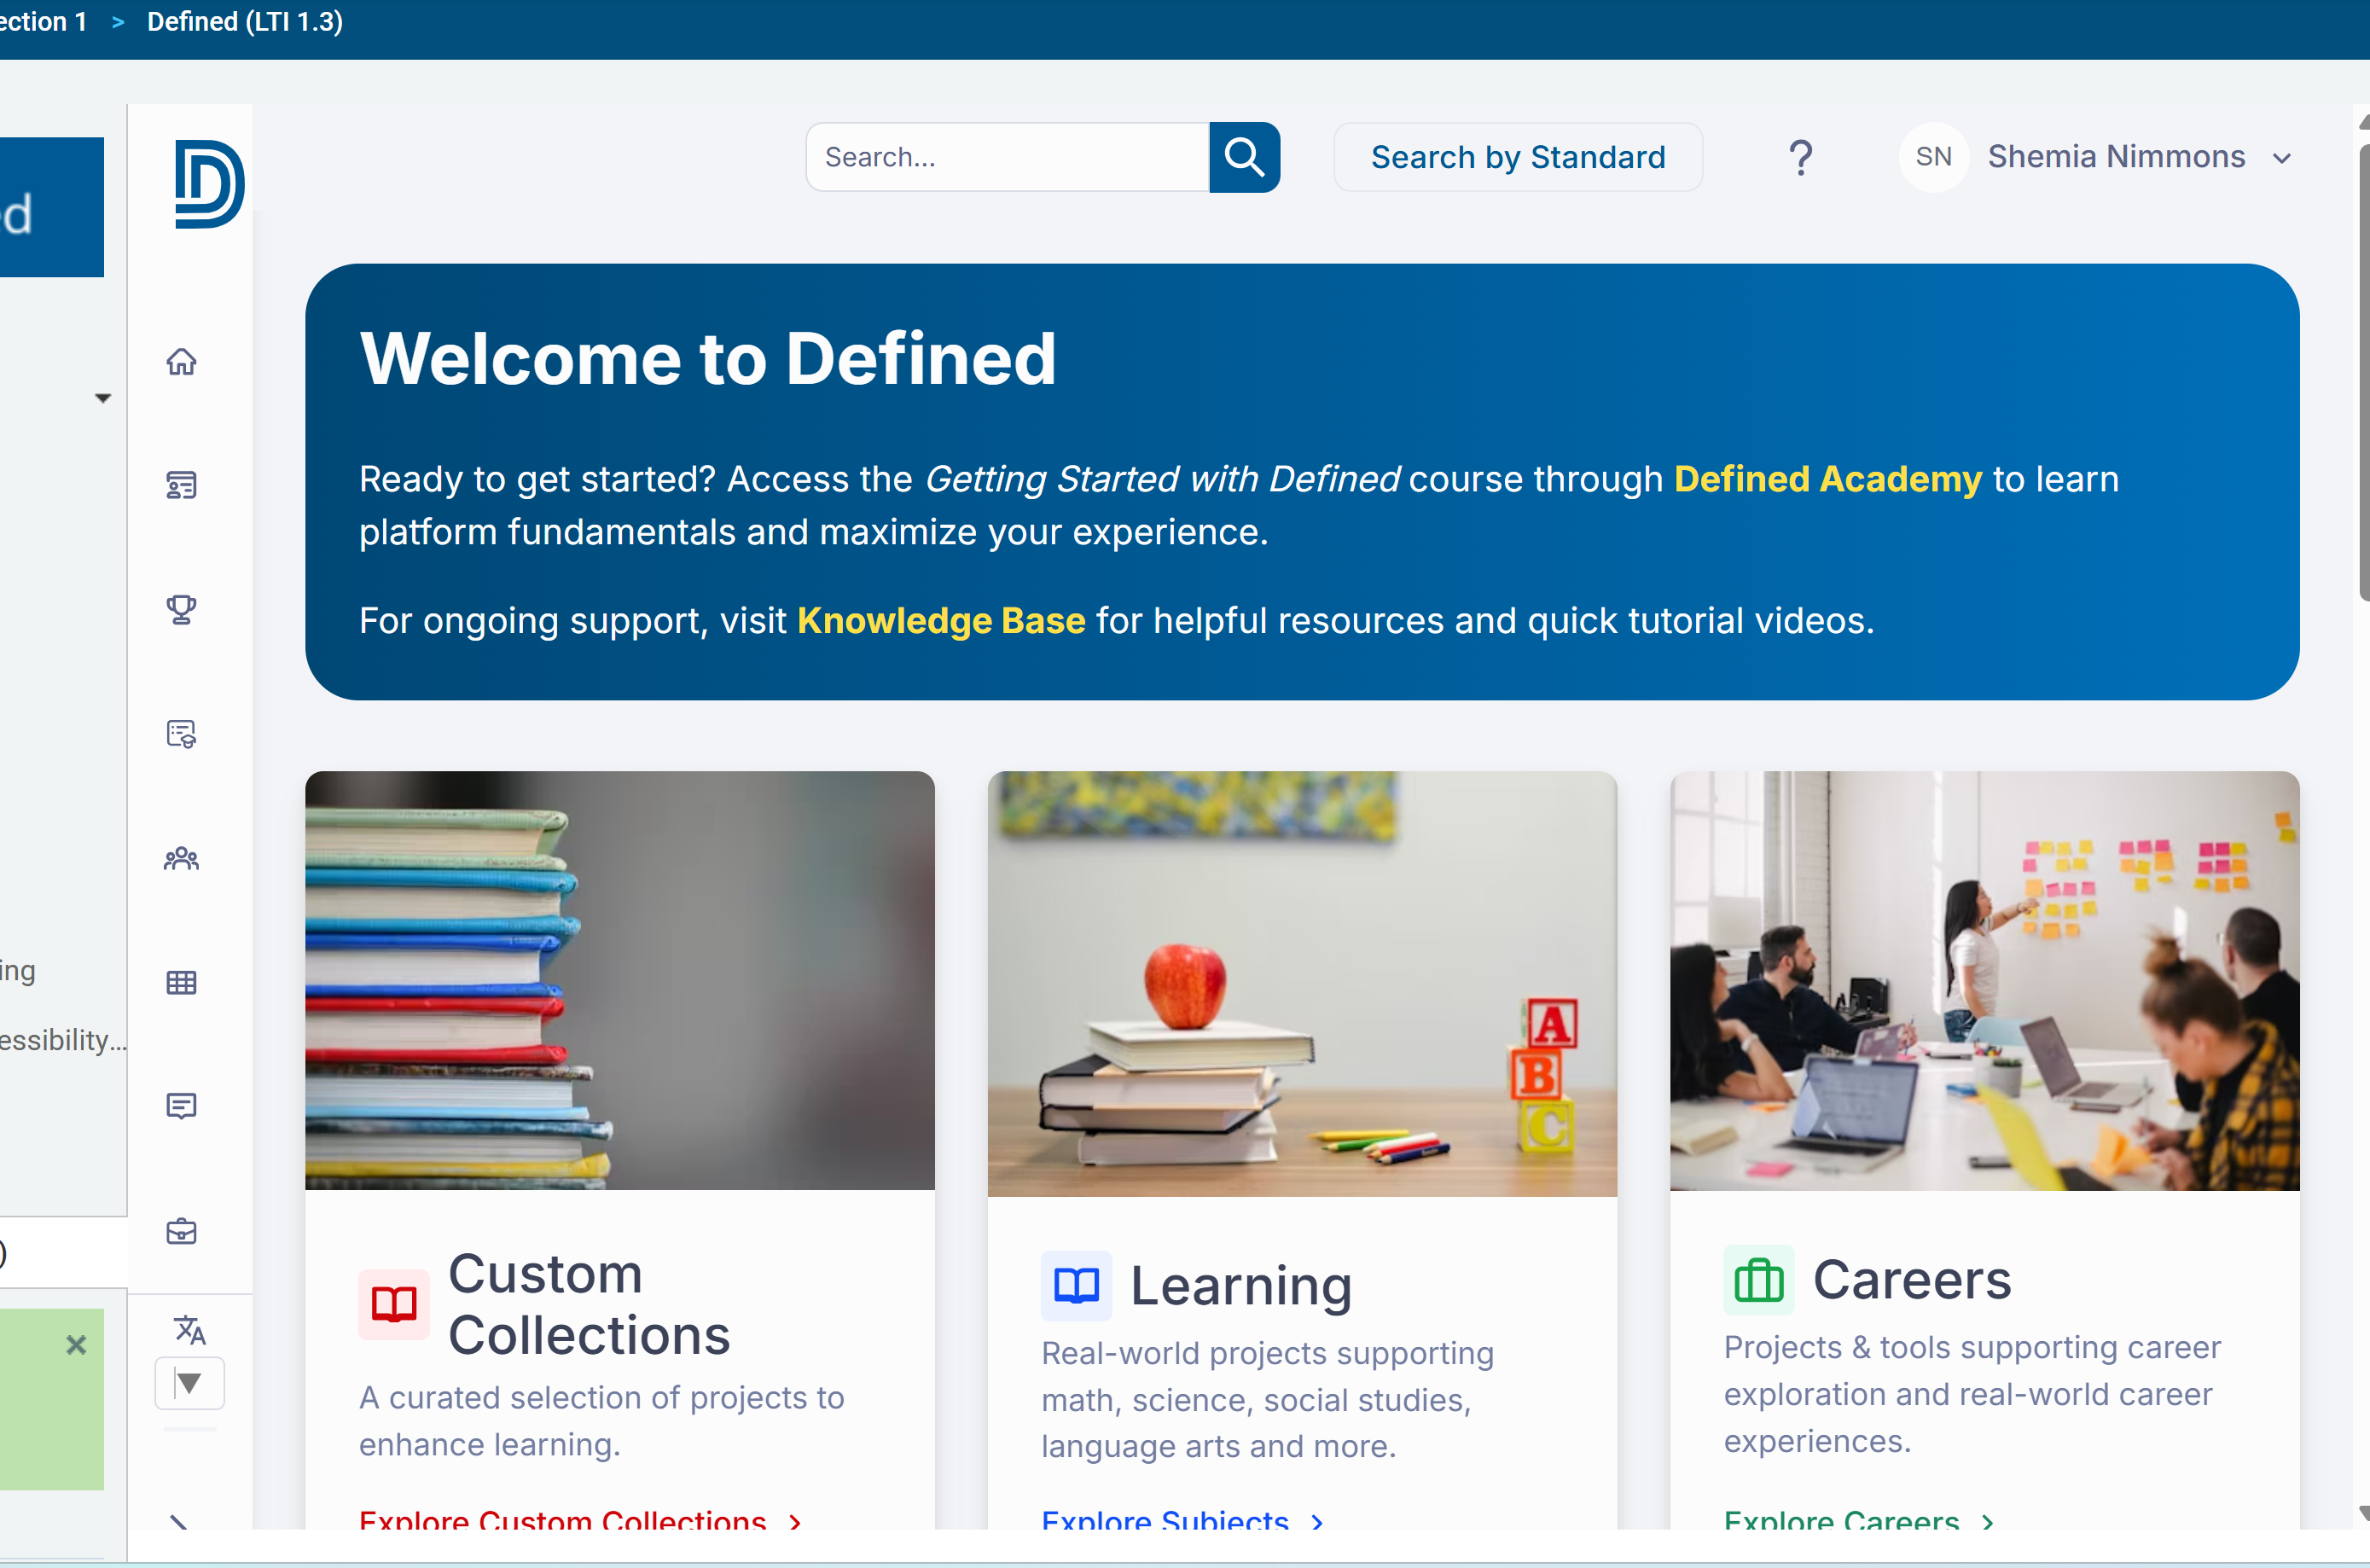
Click on the Defined Tile which will open the Defined platform right inside your Schoology window. From here, you can select Custom Collections to see projects curated by your district.
Follow the selection path:
- Catalog → Course → Unit → Task → Product.
- You can see a preview or the project by clicking "View Preview"
- Select the product you would like to share with students
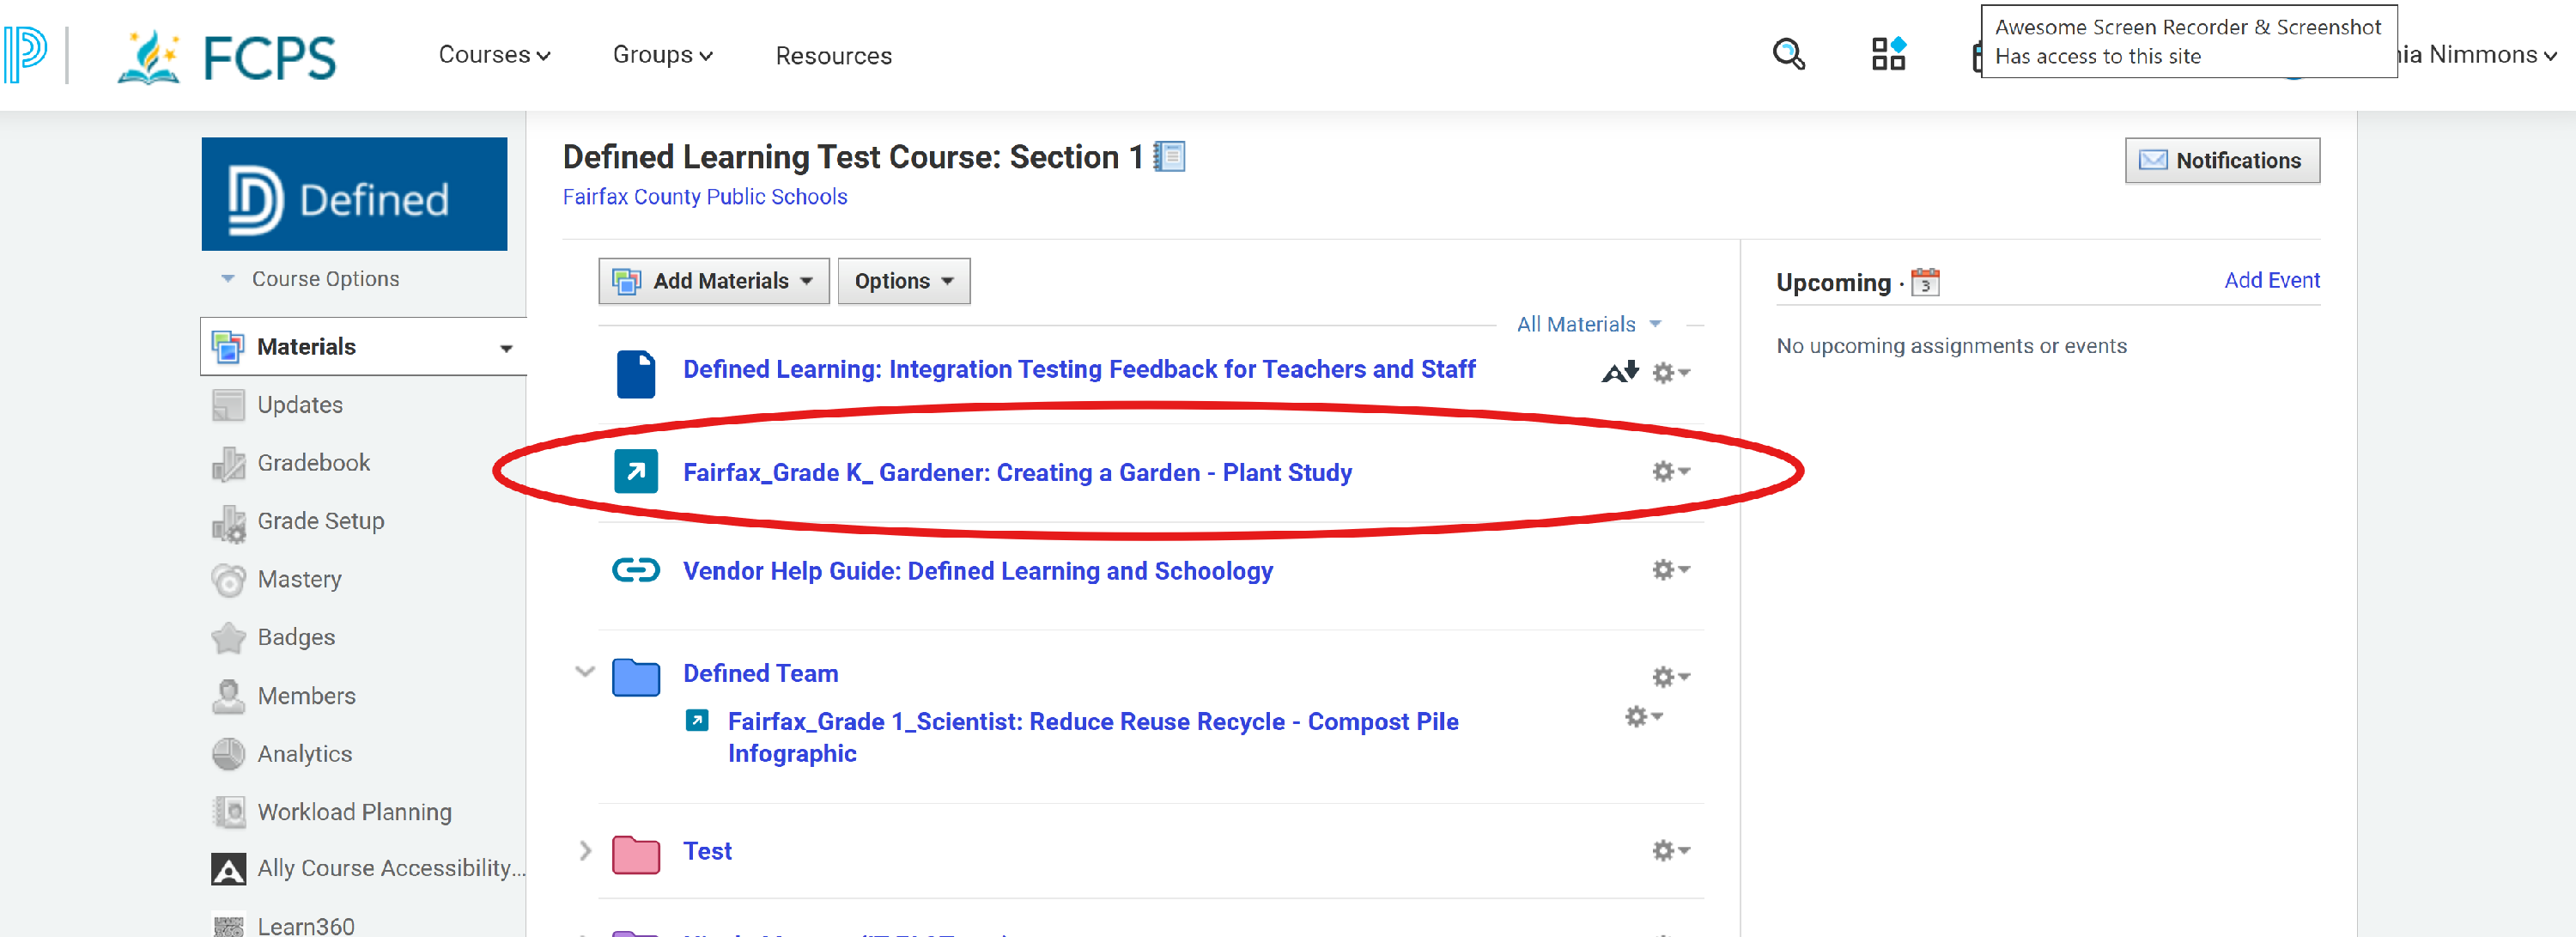
- Once the product is selected, the assignment will automatically appear in your Schoology materials list.
- Note that newly created assignments default to the bottom of your existing materials folder or course page.
2. Enabling Grade Passback
Important: You must complete this step for grades to sync from Defined to the Schoology Gradebook.
- Locate the newly created assignment in Schoology.
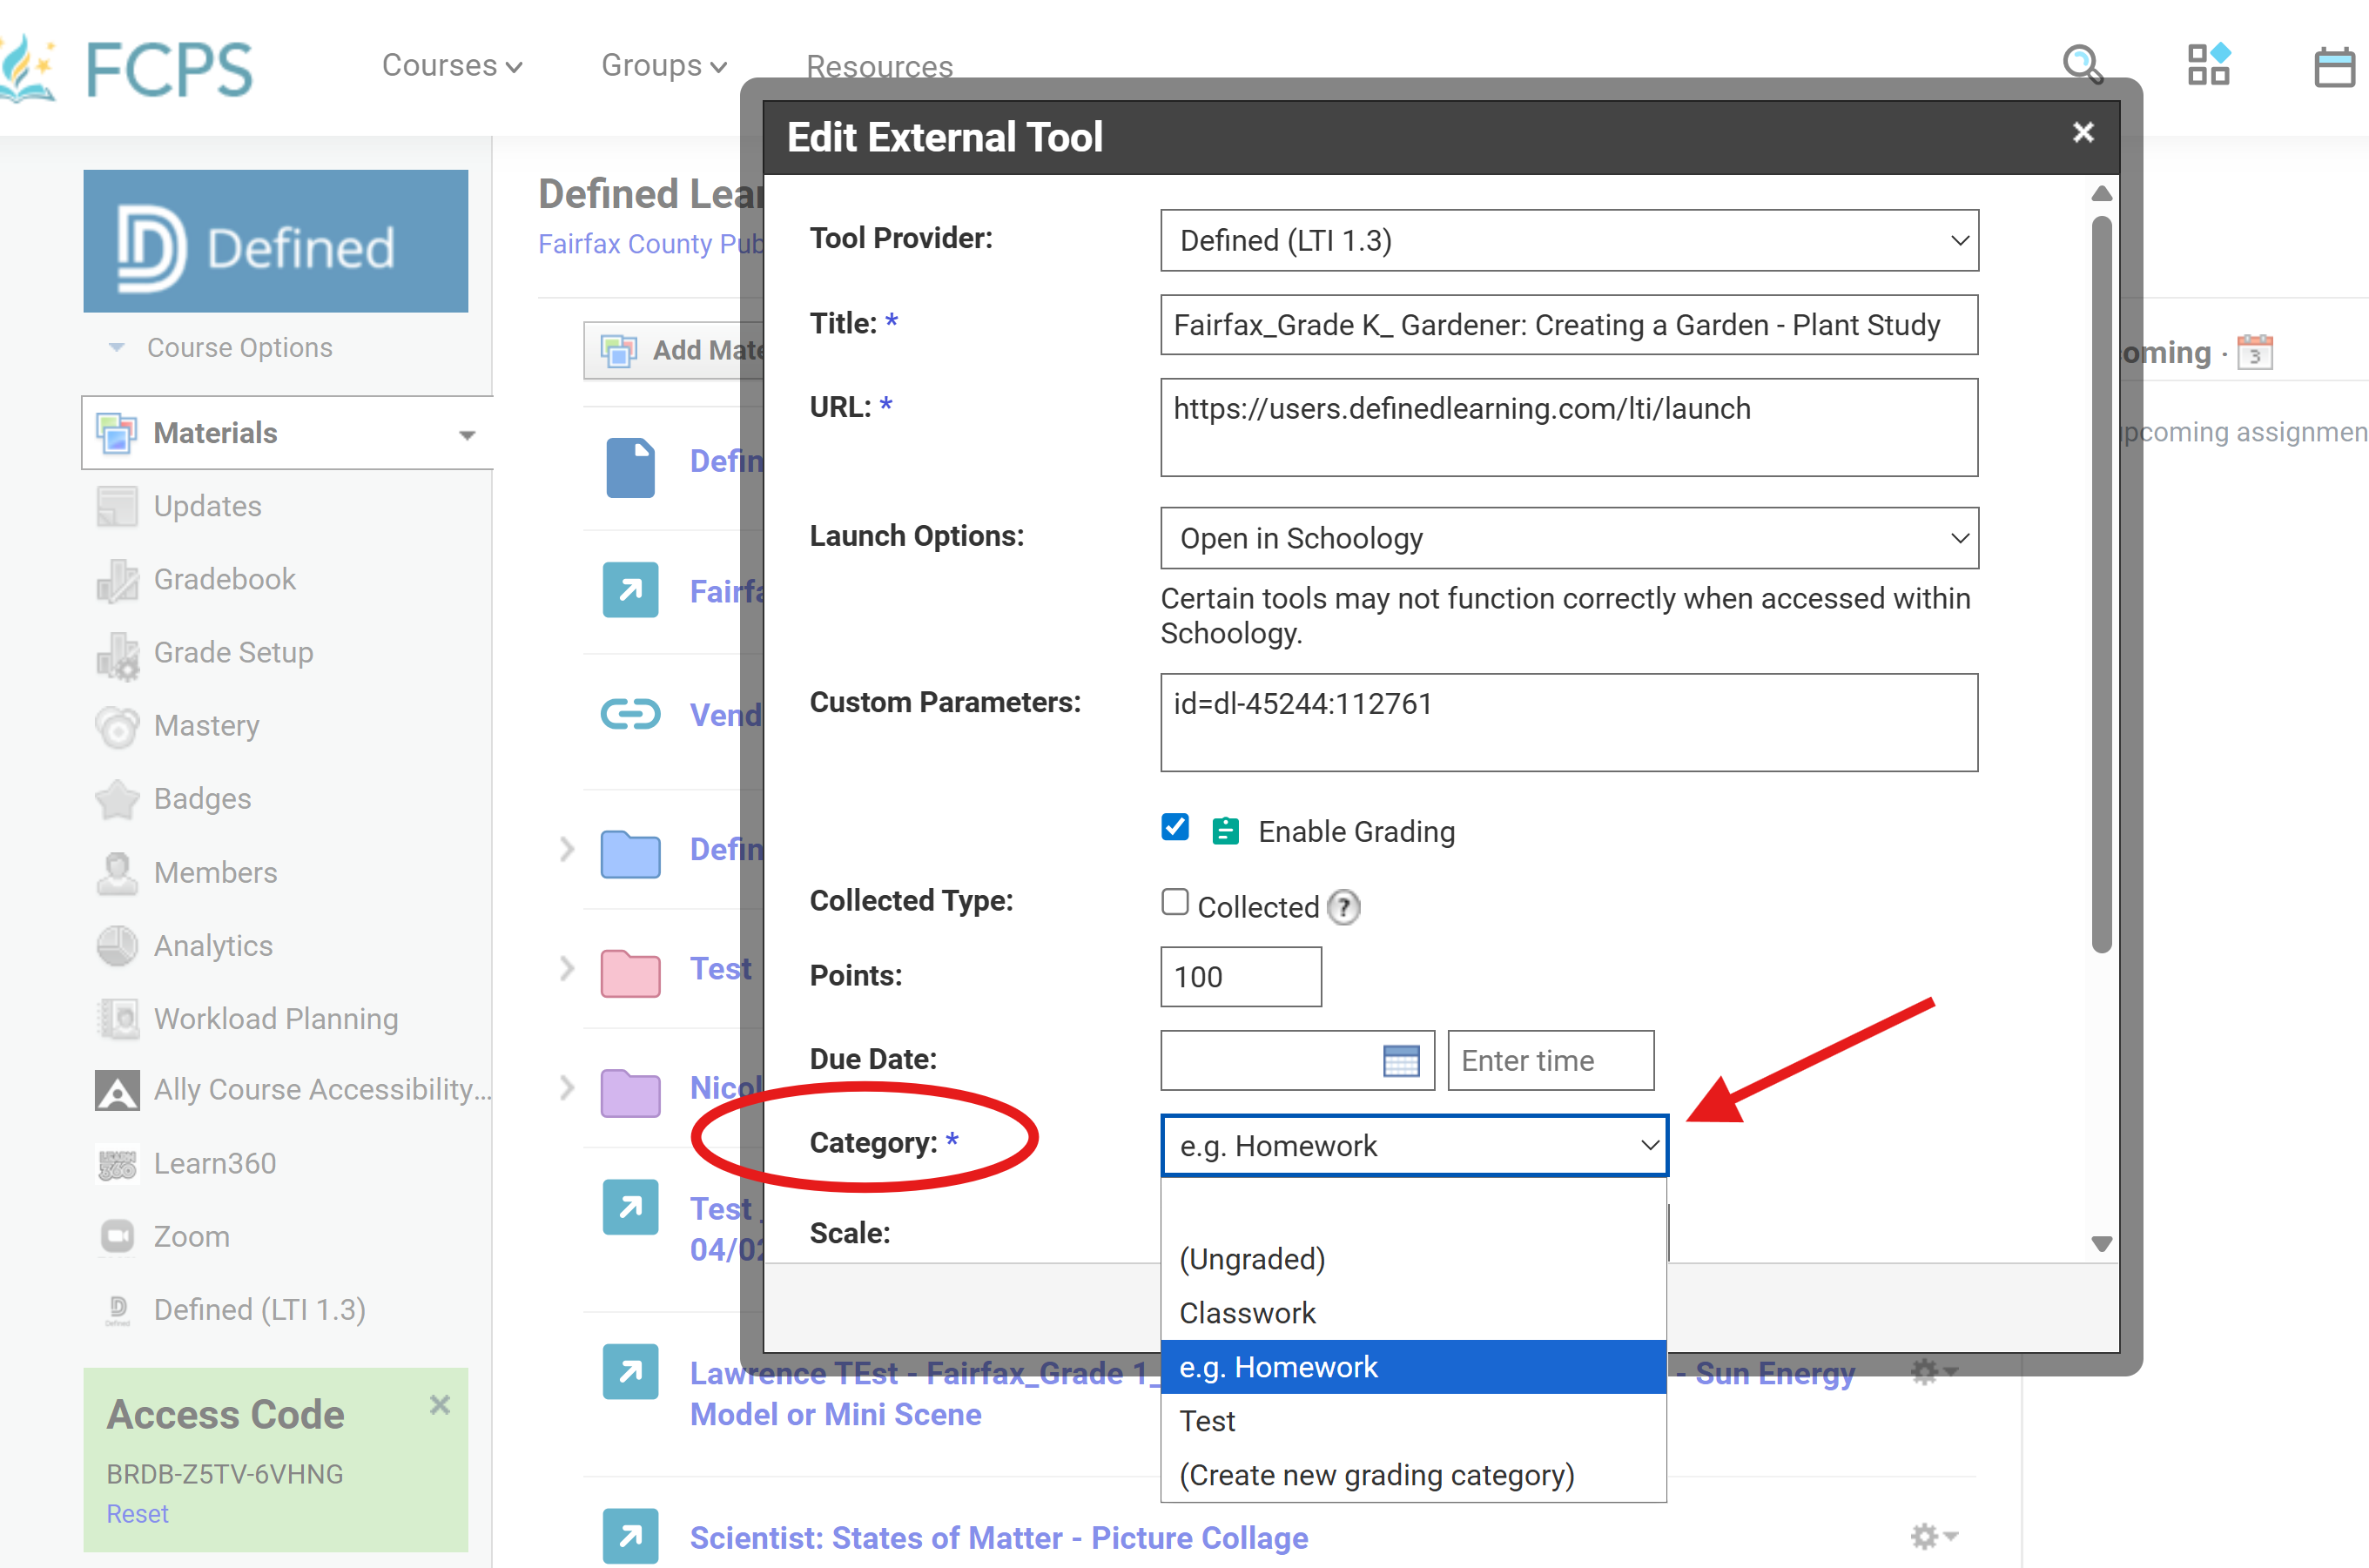
- Click the Gear Icon to the right and select Edit.
- Under the Category dropdown, you must select a grading category (e.g., Homework, Projects).
- Click Save Changes.
- If a category is not assigned, the Defined platform will not be able to "pass" the grade back to your Schoology gradebook.
3. Customizing Projects
If you wish to modify a project—such as renaming it, adjusting rubrics, or editing content—before assigning it to students, follow these steps:
Step 1: Customize Your Project
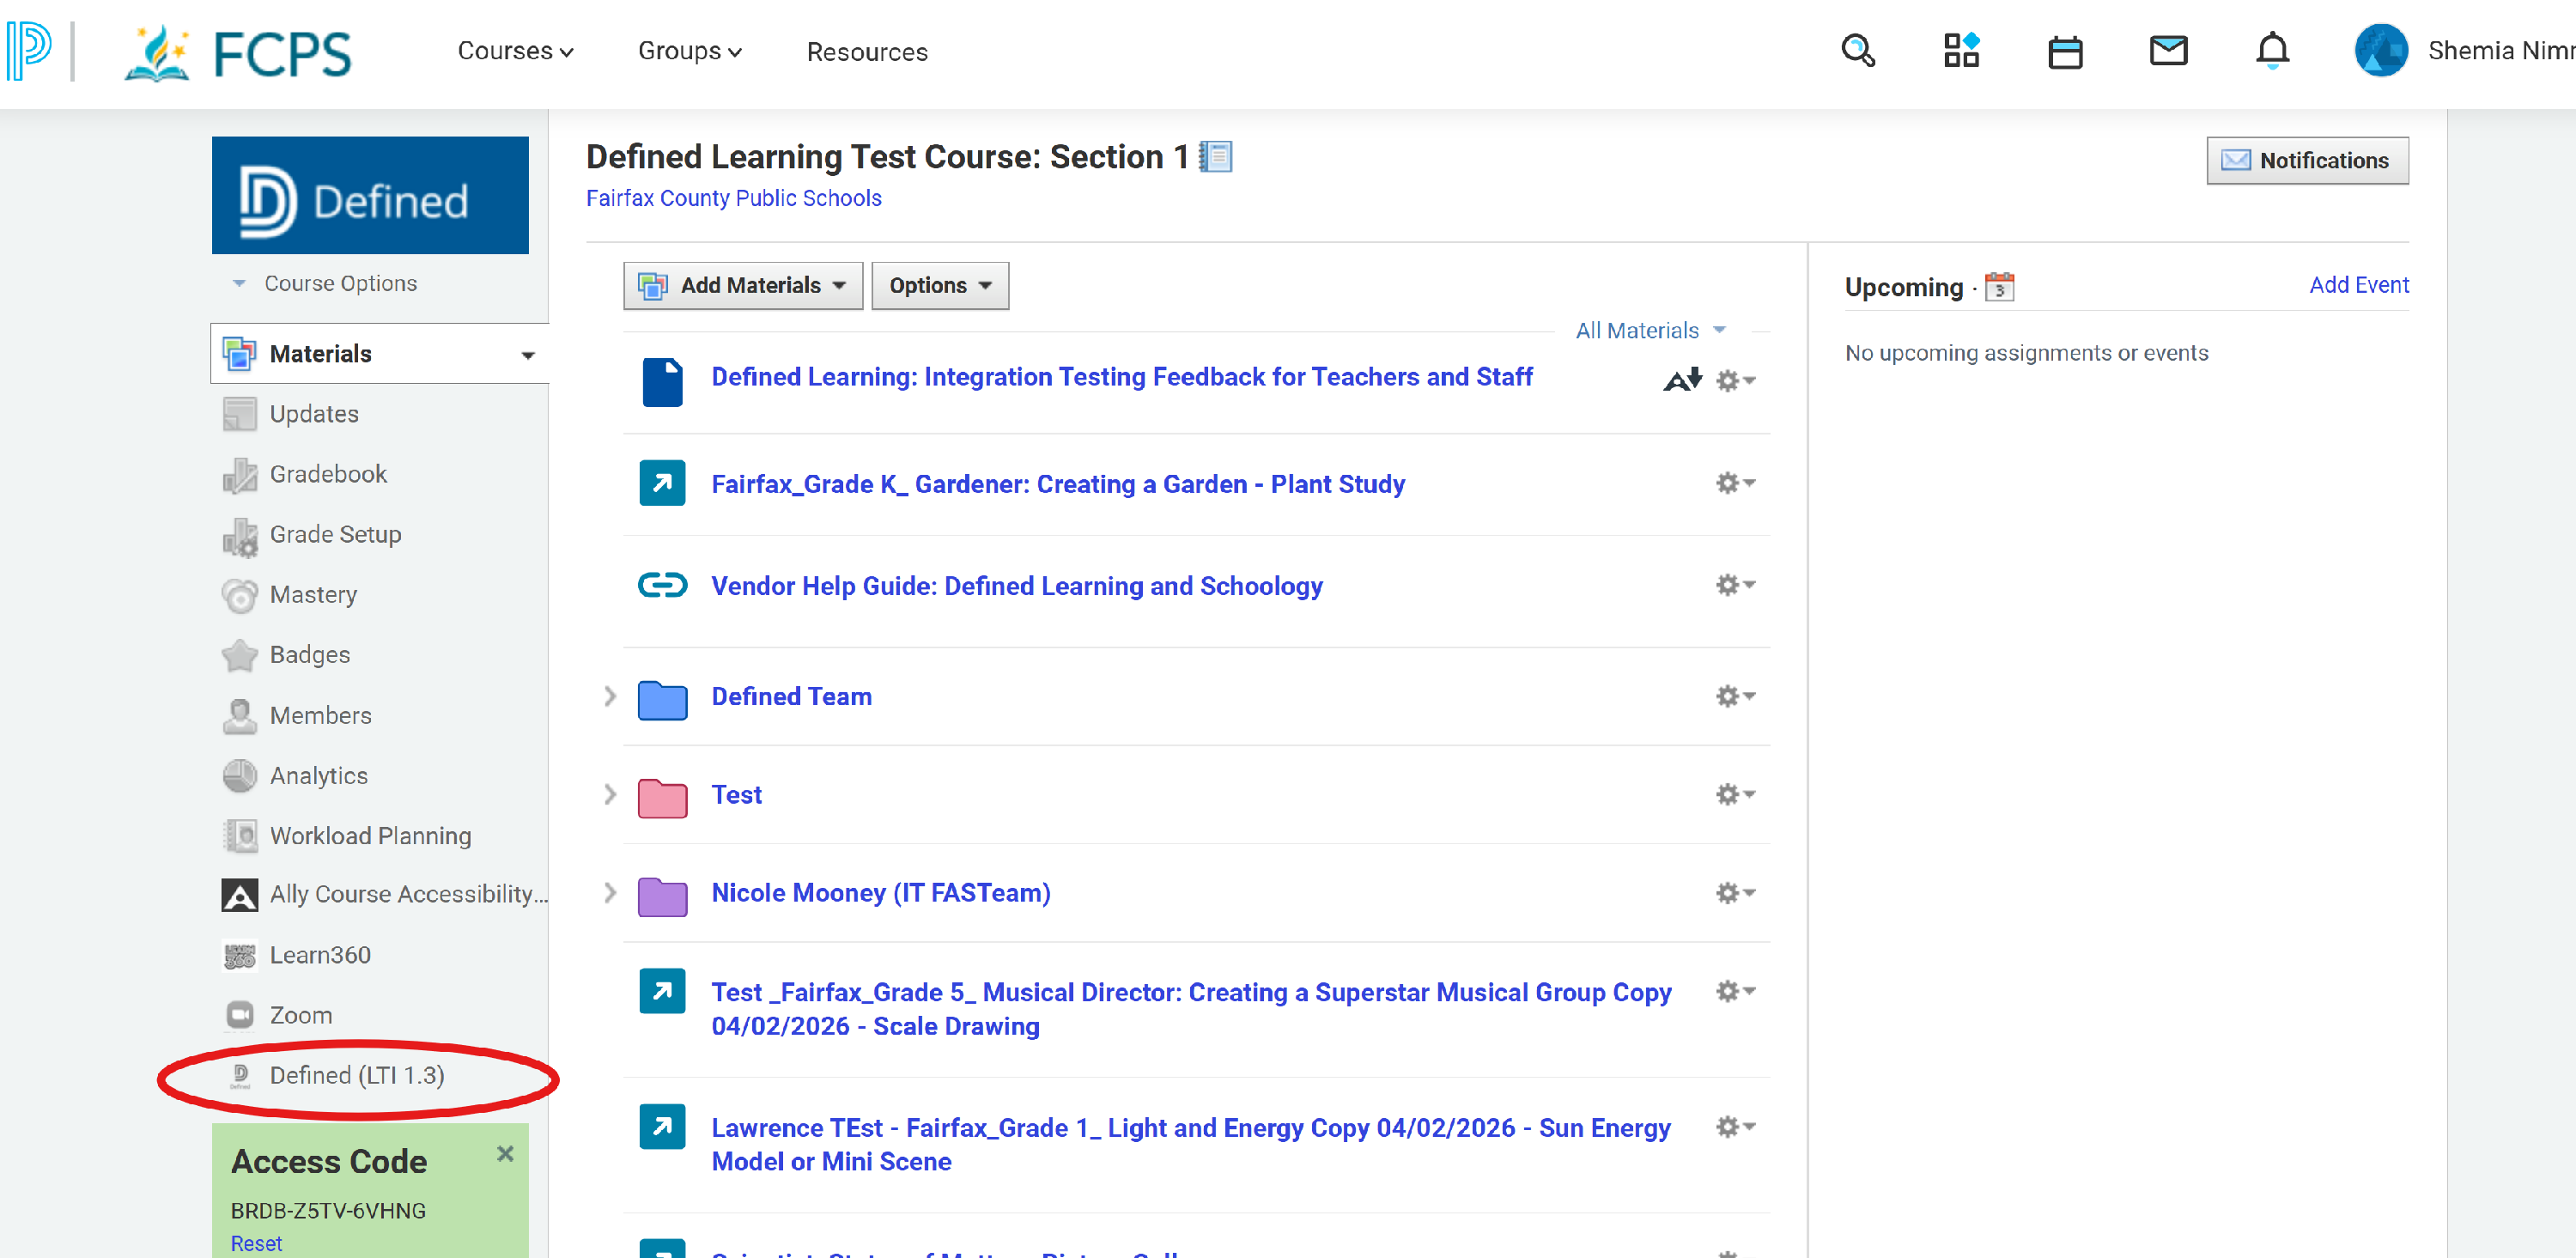
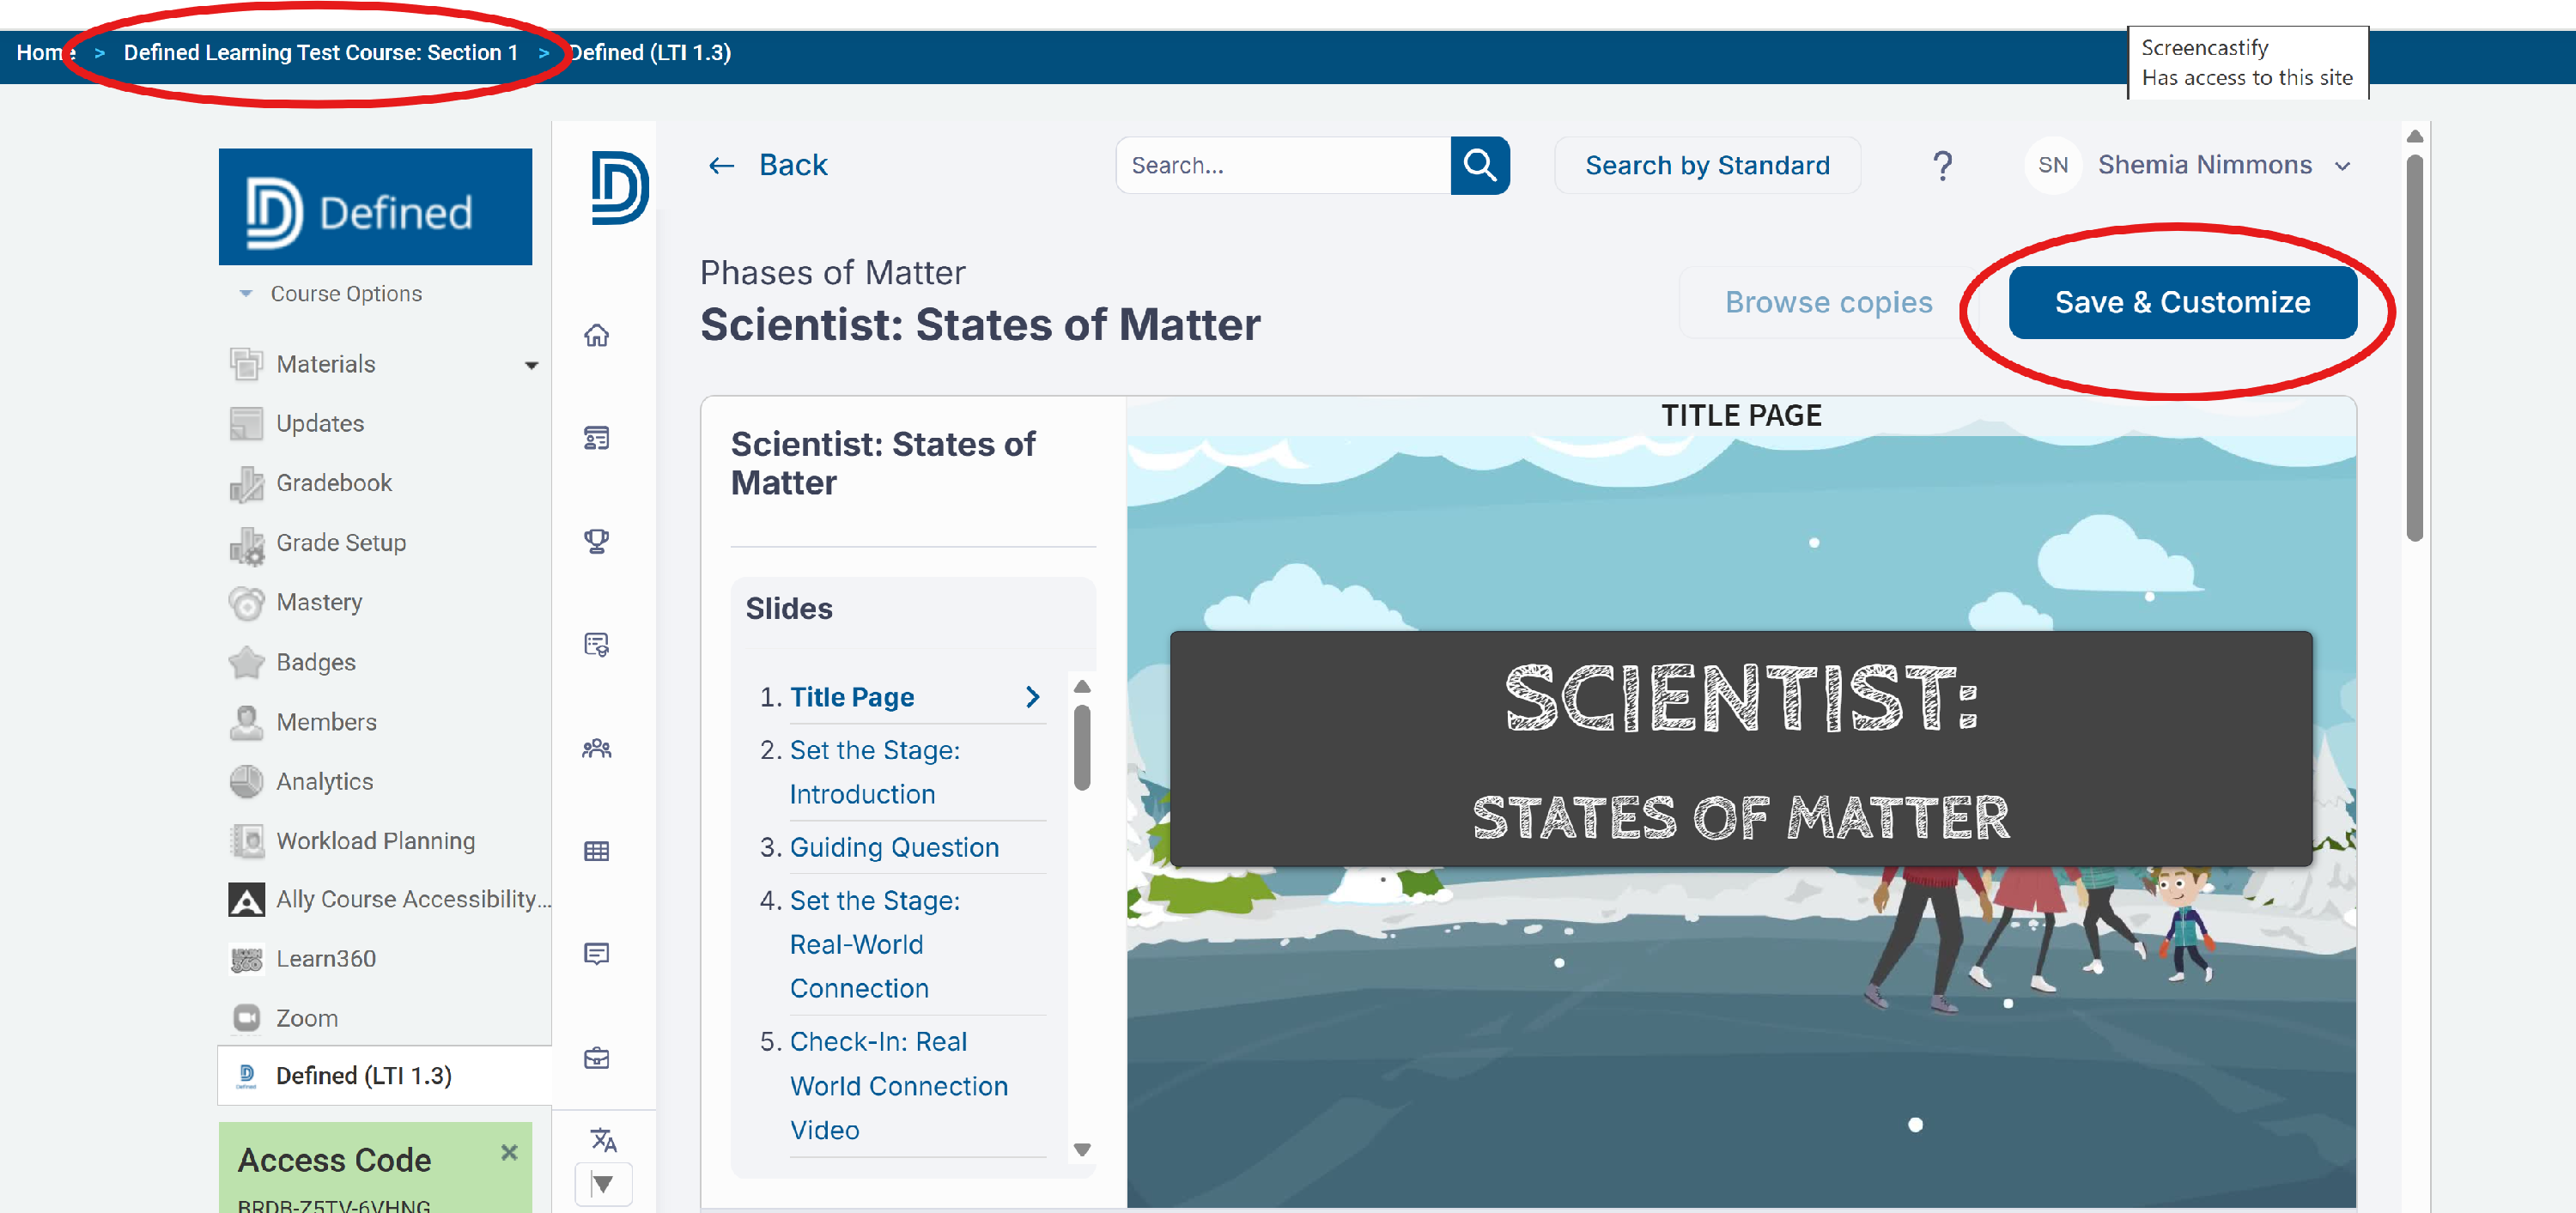
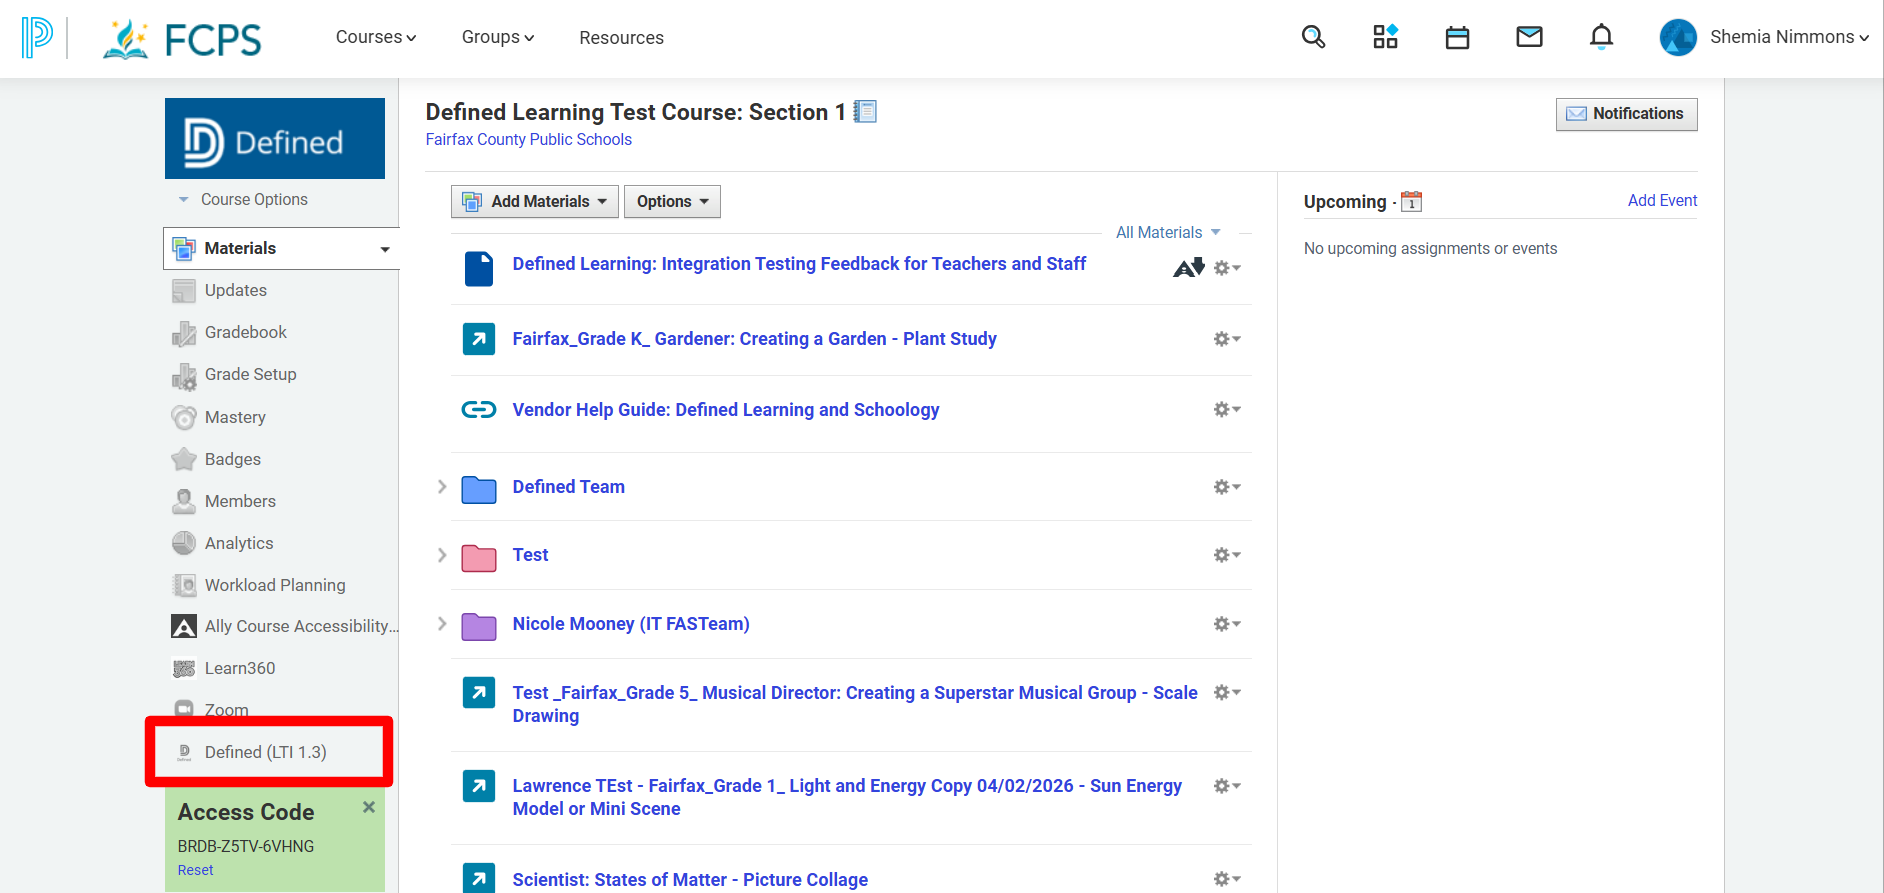
- In the left-hand navigation bar of your Schoology course, click Defined (LTI 1.3).
- Find the project you’d like to edit and click the Save & Customize tab. This creates a copy that you can rename and edit to fit your specific needs.
- Once you’ve completed your edits, you can go back to your Schoology Course (You can quickly navigate back by clicking your Course Name at the top of the left-hand sidebar).
Step 2: Assign the Customized Task
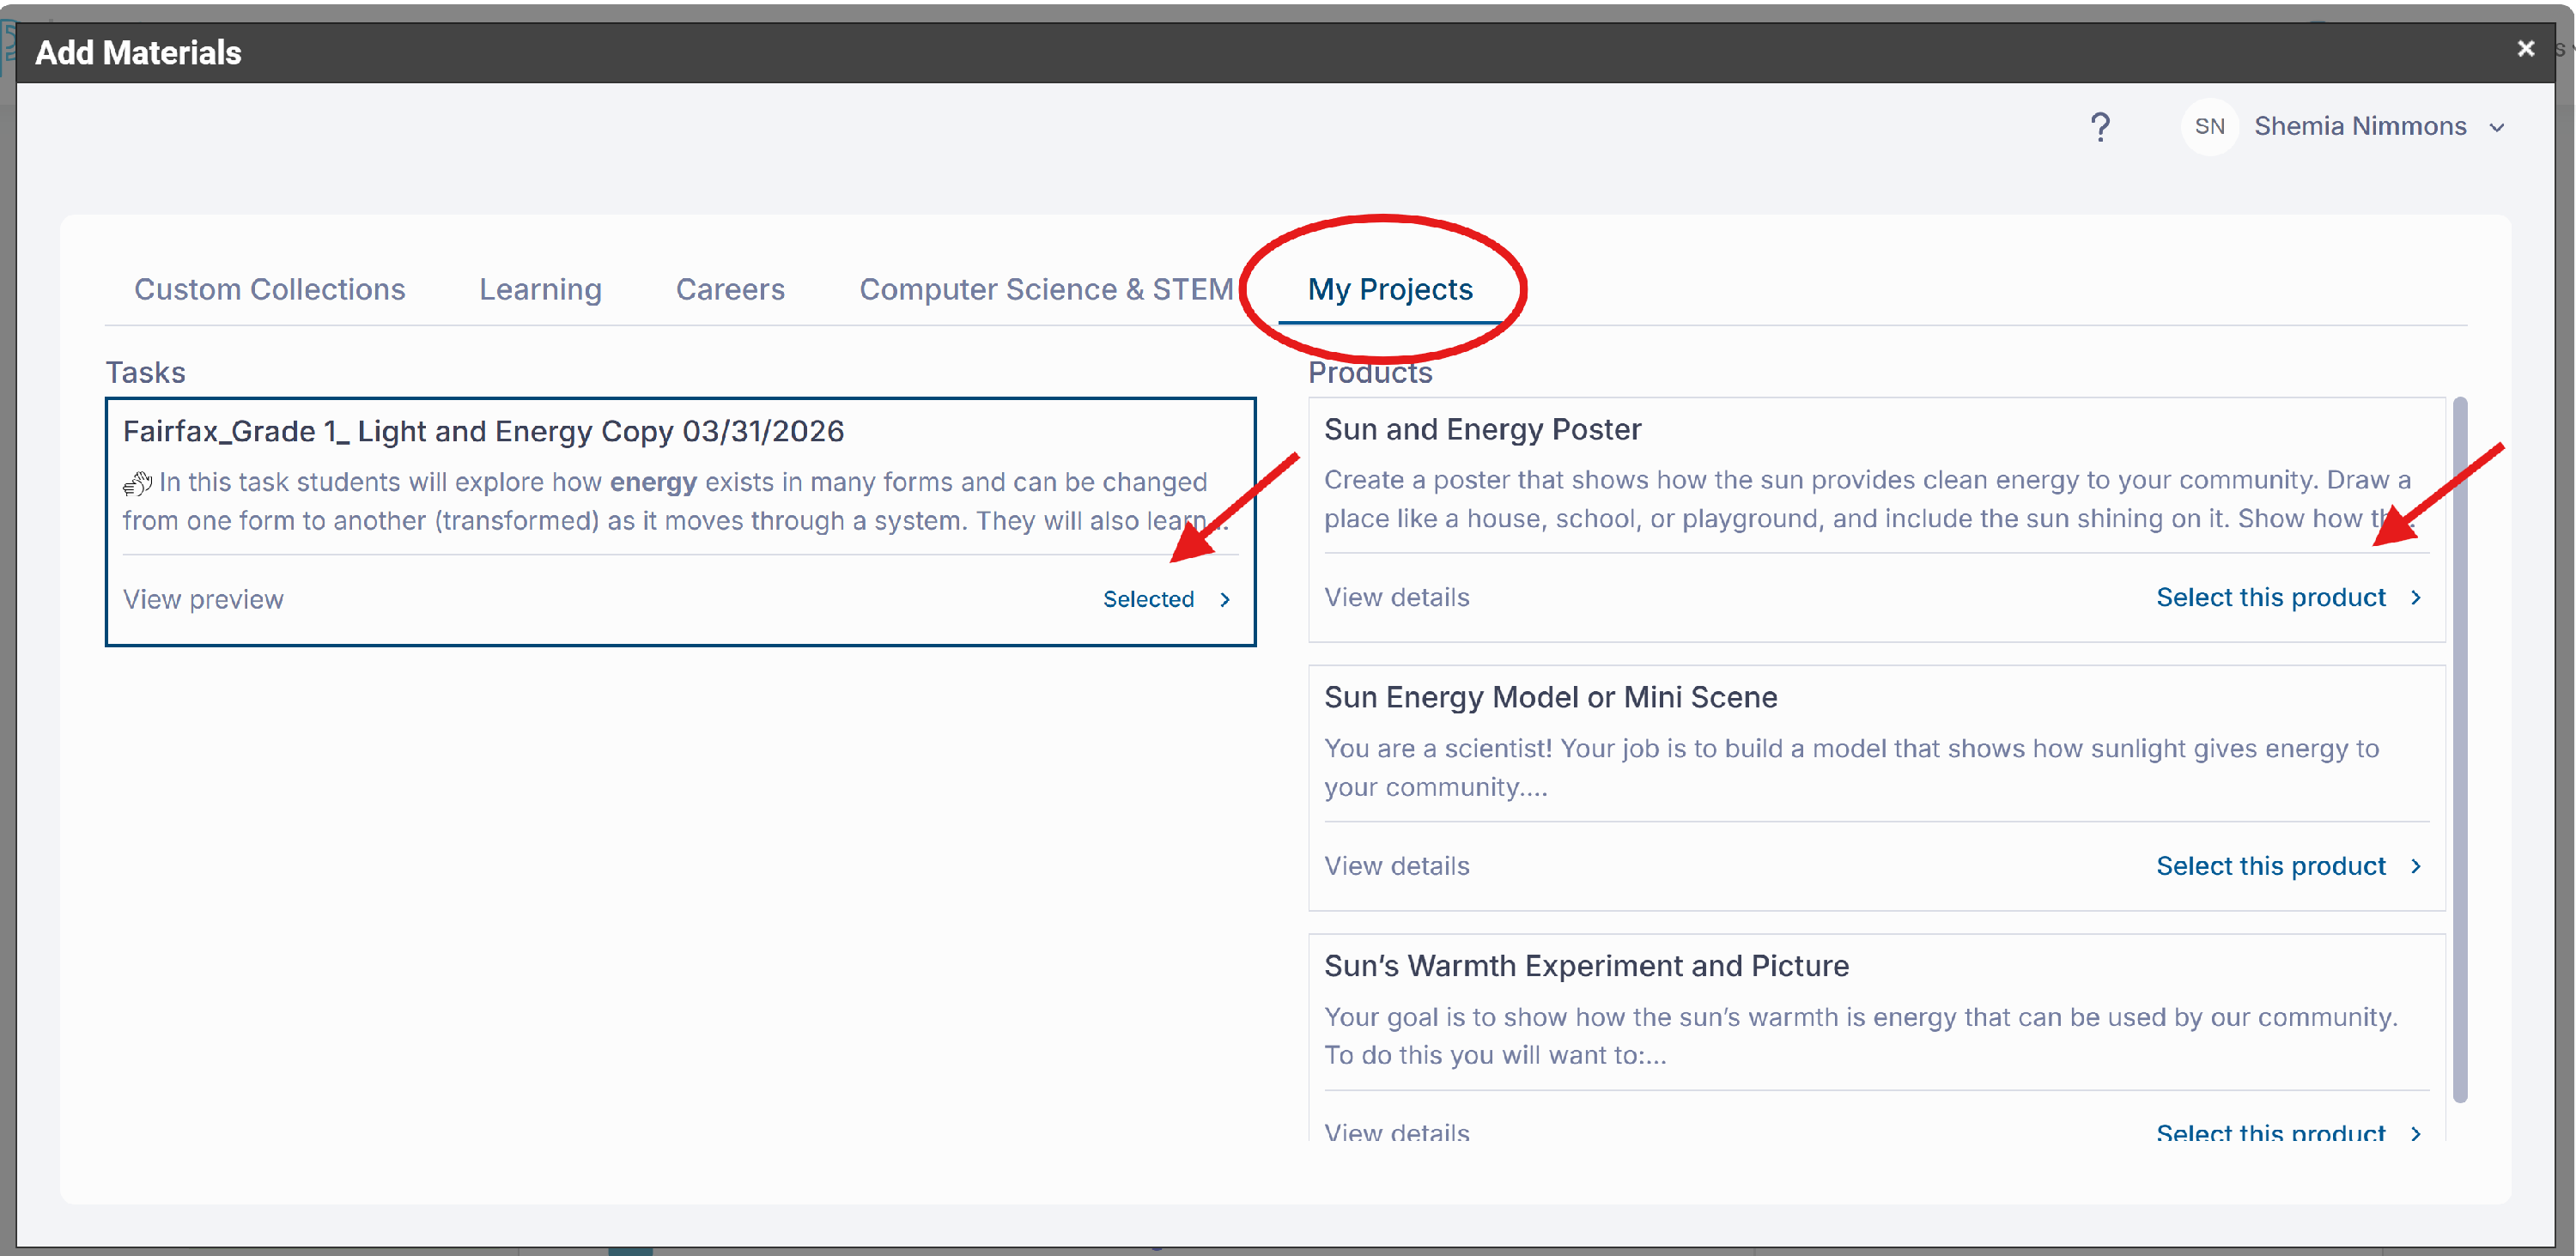
- Click Add Materials > Defined (LTI 1.3).
- Select the My Projects tab to find your newly customized version.
- Select the specific task and product, then follow the standard steps to Enable Grade Passback.
- For additional information, see the article: Saving & Customizing Tasks
4. Assigning Projects to Teams of Students
Defined Learning allows educators to assign projects to teams of students for collaborative work.
- Team assignments use a shared workspace.
- Responses, uploads, and edits made by one team member are visible to all team members, and the most recent edits may overwrite previous work.
- Schoology assignment settings and visibility are managed separately within Schoology, and a Schoology assignment must still be created to enable grade passback.
Step 1: Create Student Teams
Before assigning a project to a team, you must first create student teams within Defined Learning.
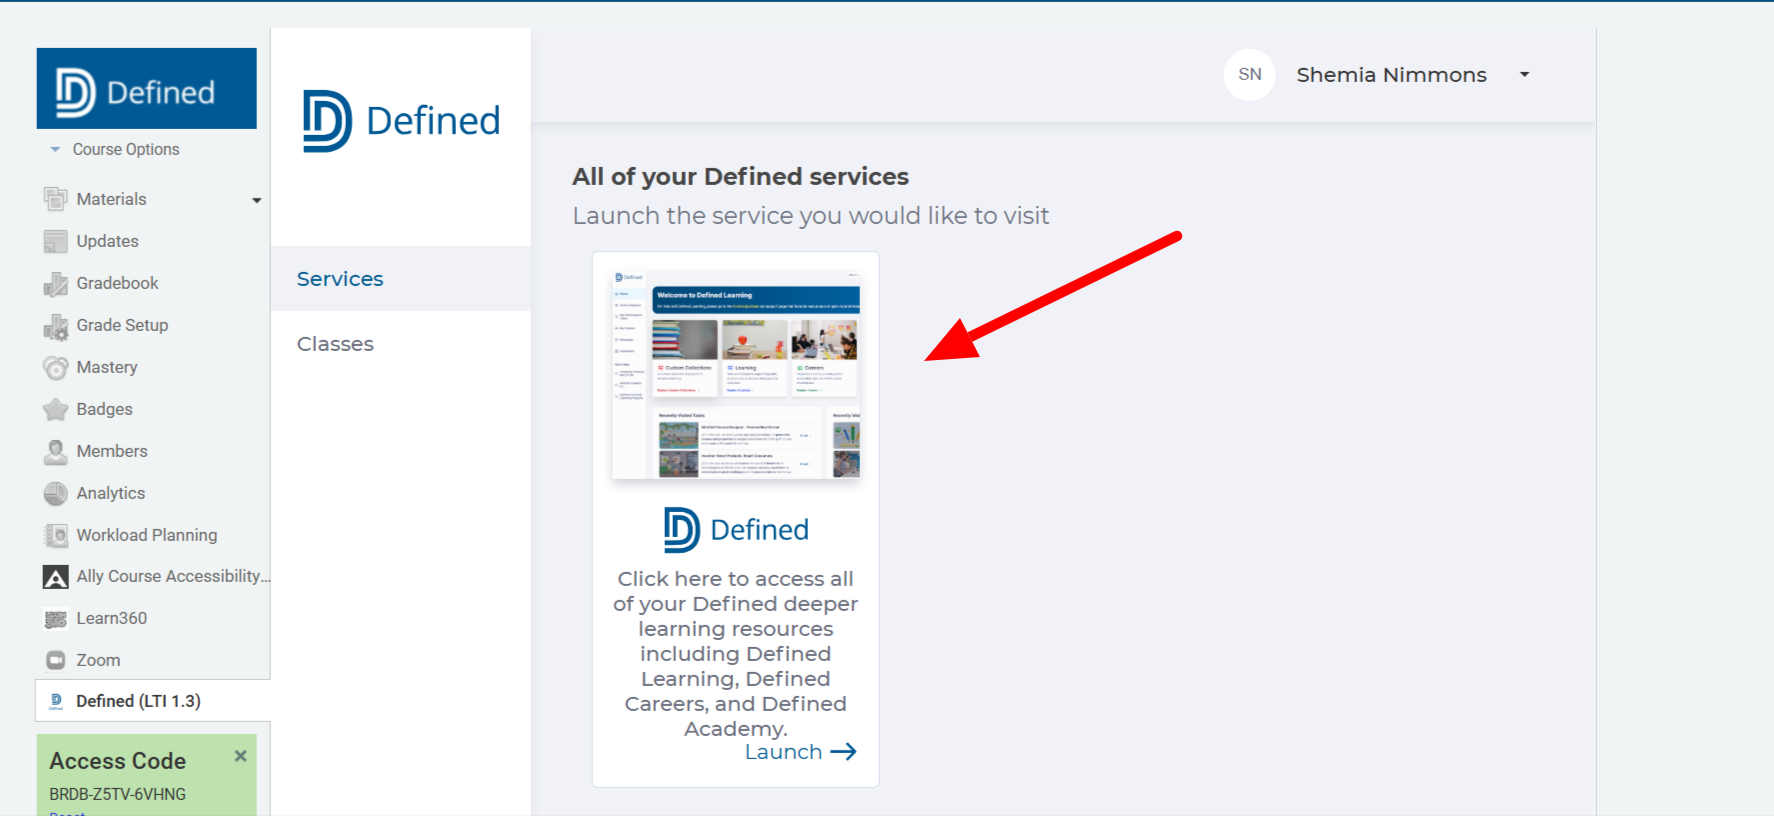
- In the left-hand navigation bar of your Schoology course, click Defined (LTI 1.3).
- Click on the Defined tile.
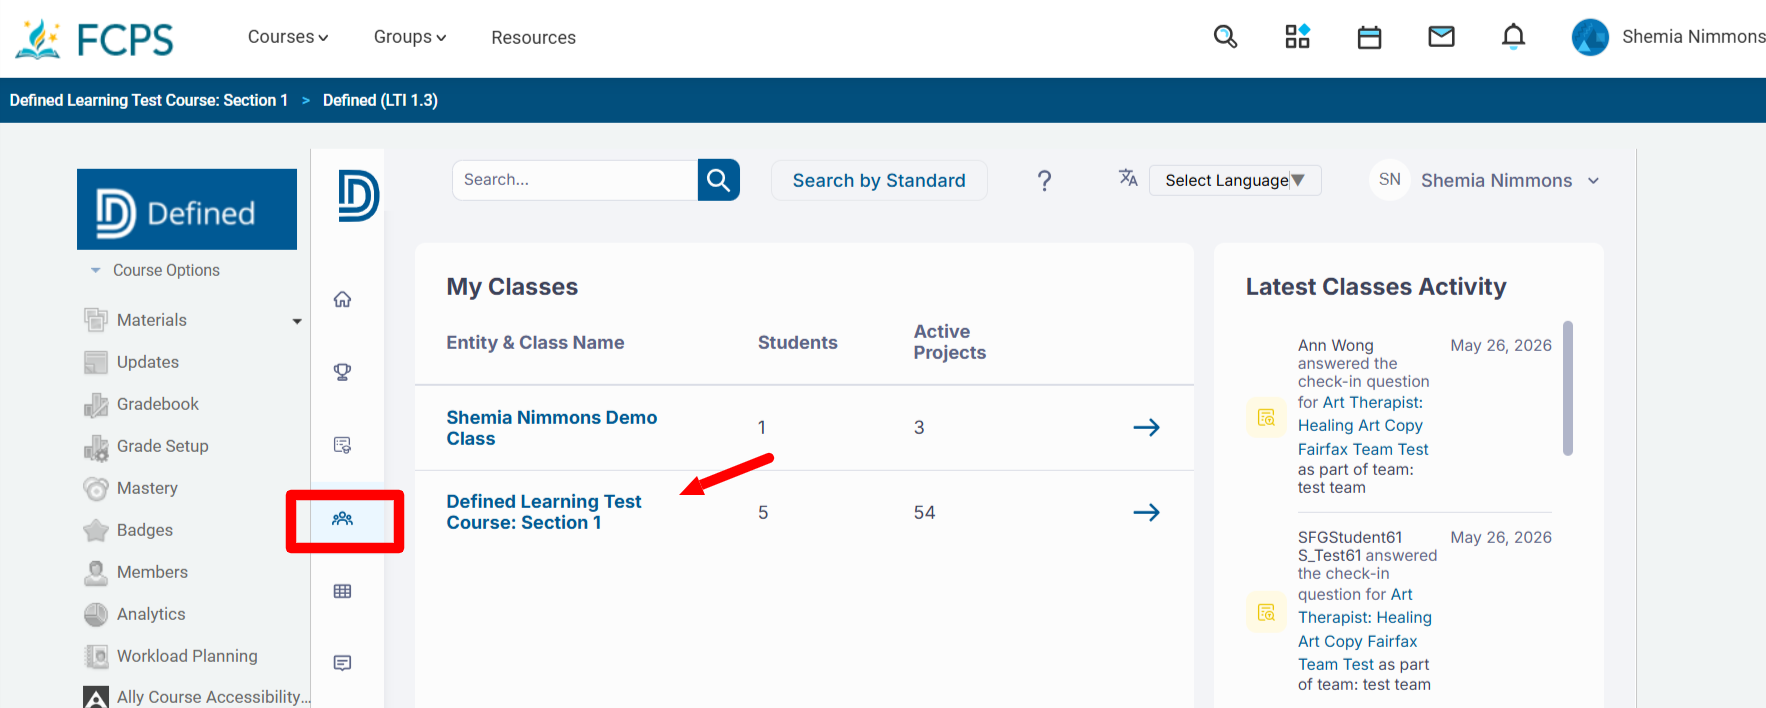
- Click the My Classes icon.
- Select the class where you would like to create student teams.
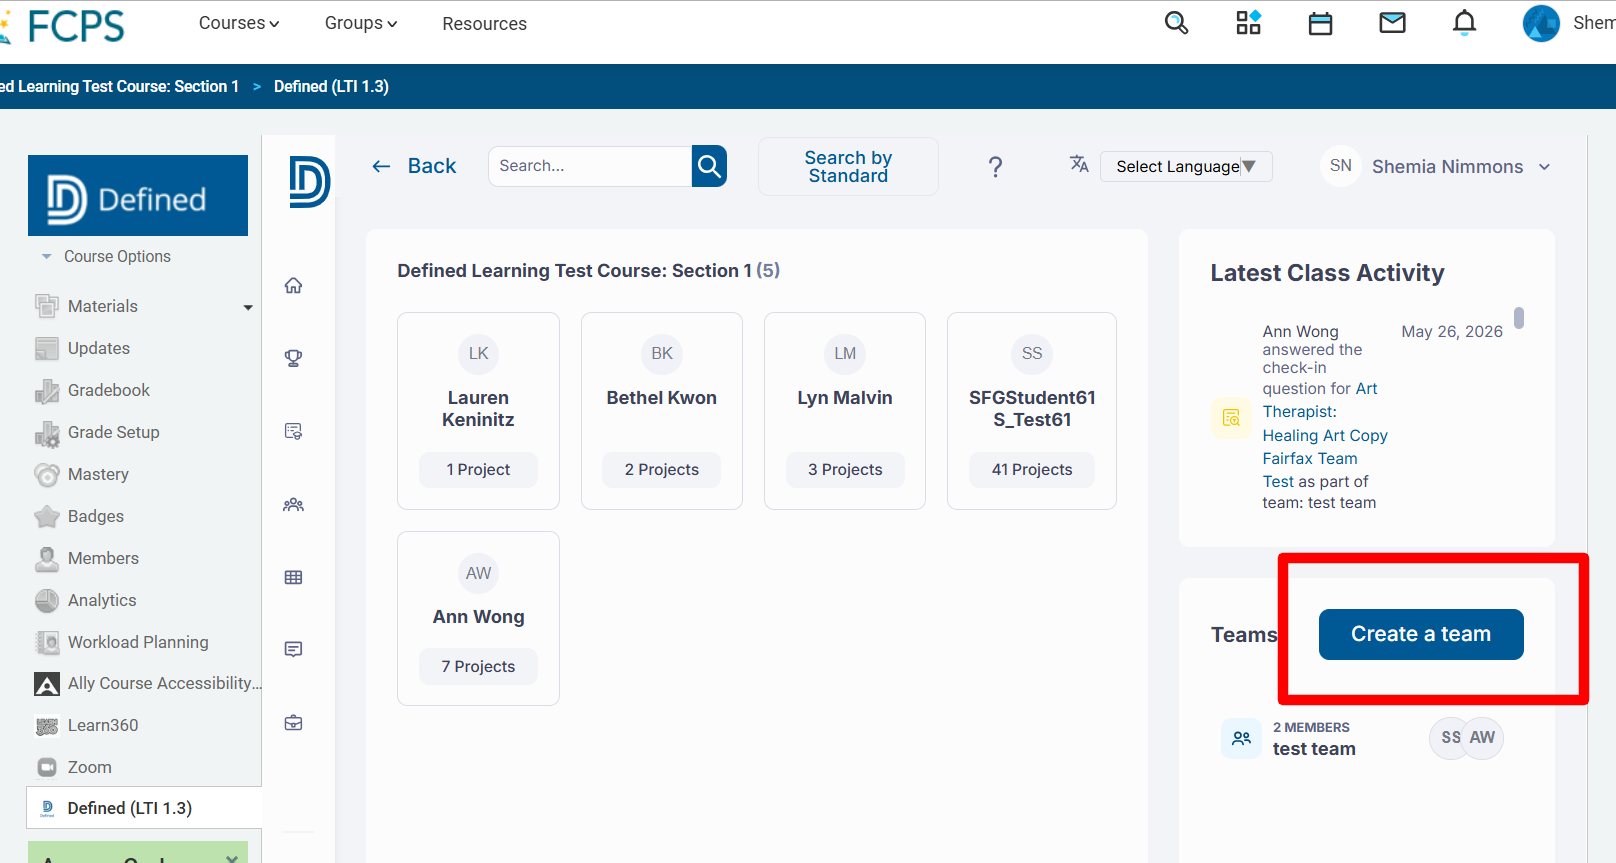
- Click Create a Team.
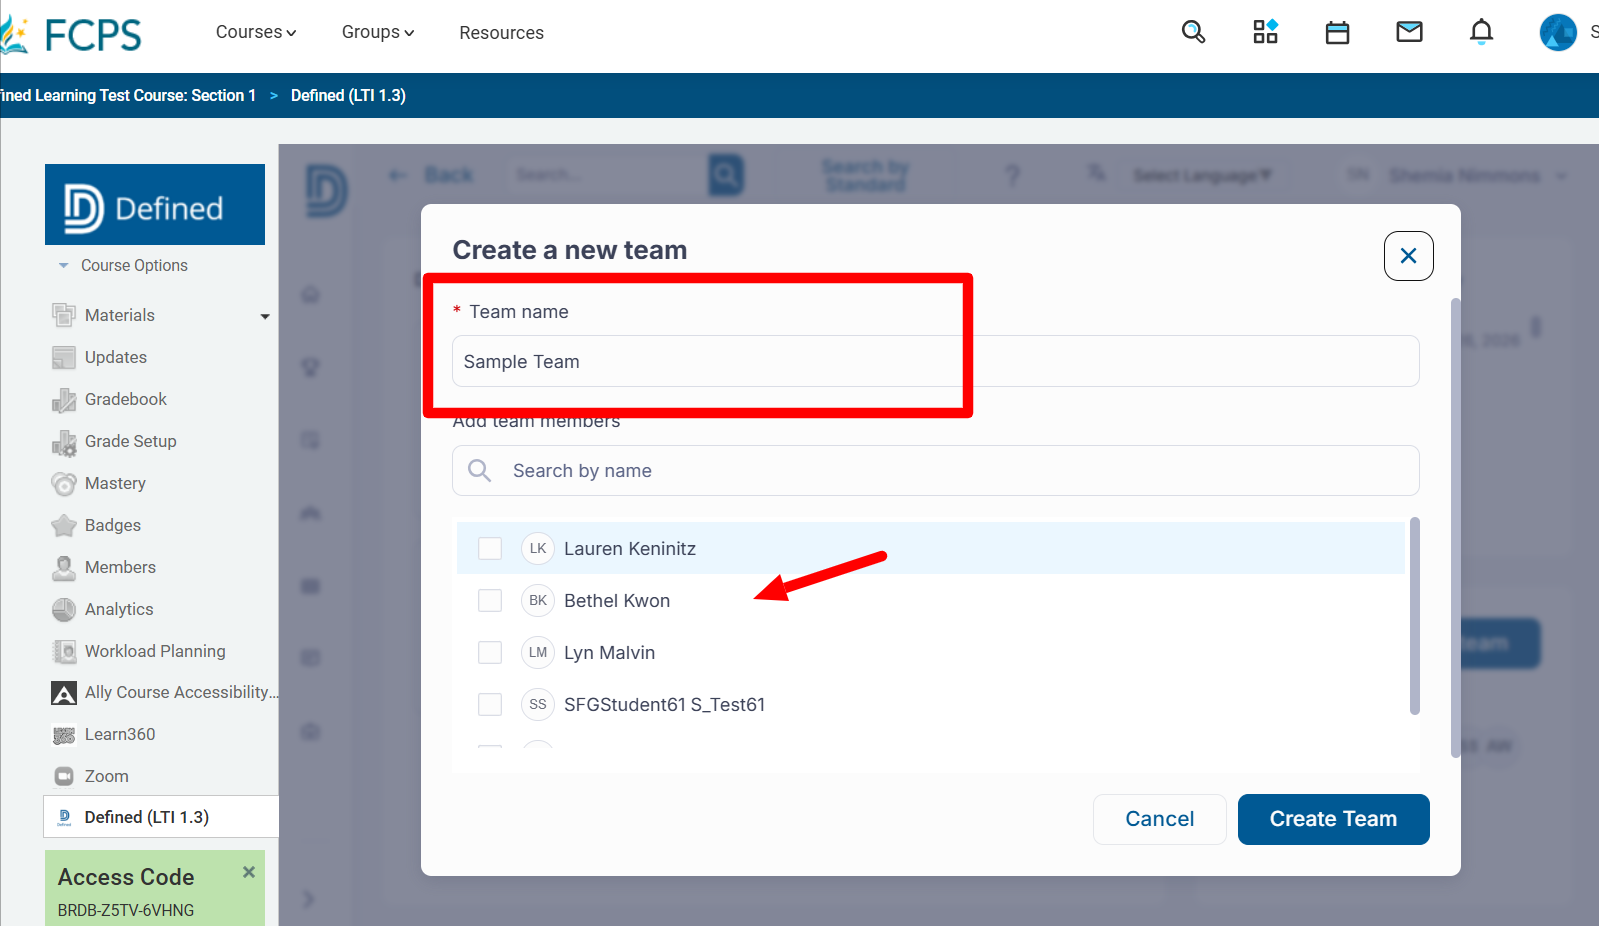
- Enter a Team Name.
- Select the students you would like to add to the team.
- Click Save.
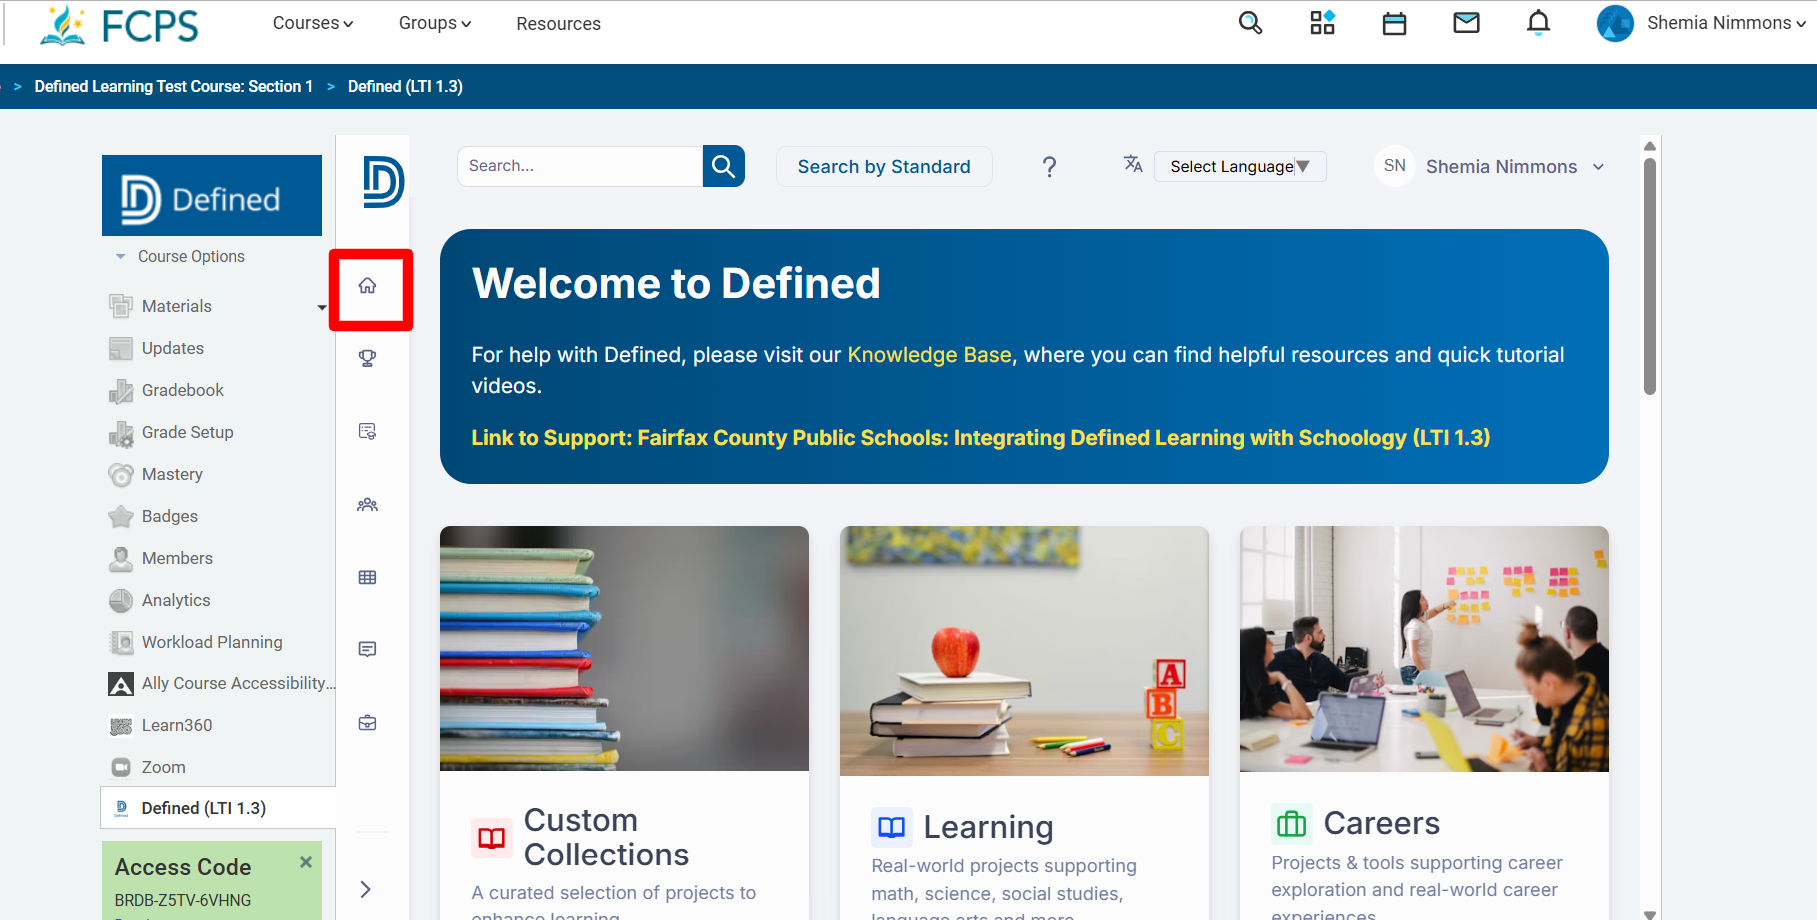
Once your student teams have been created, click the Home icon to return to the Defined Learning landing page.
Step 2: Customize and Assign the Project to a Team
Projects must be customized before they can be assigned directly to student teams.
- Locate the project you would like to assign.
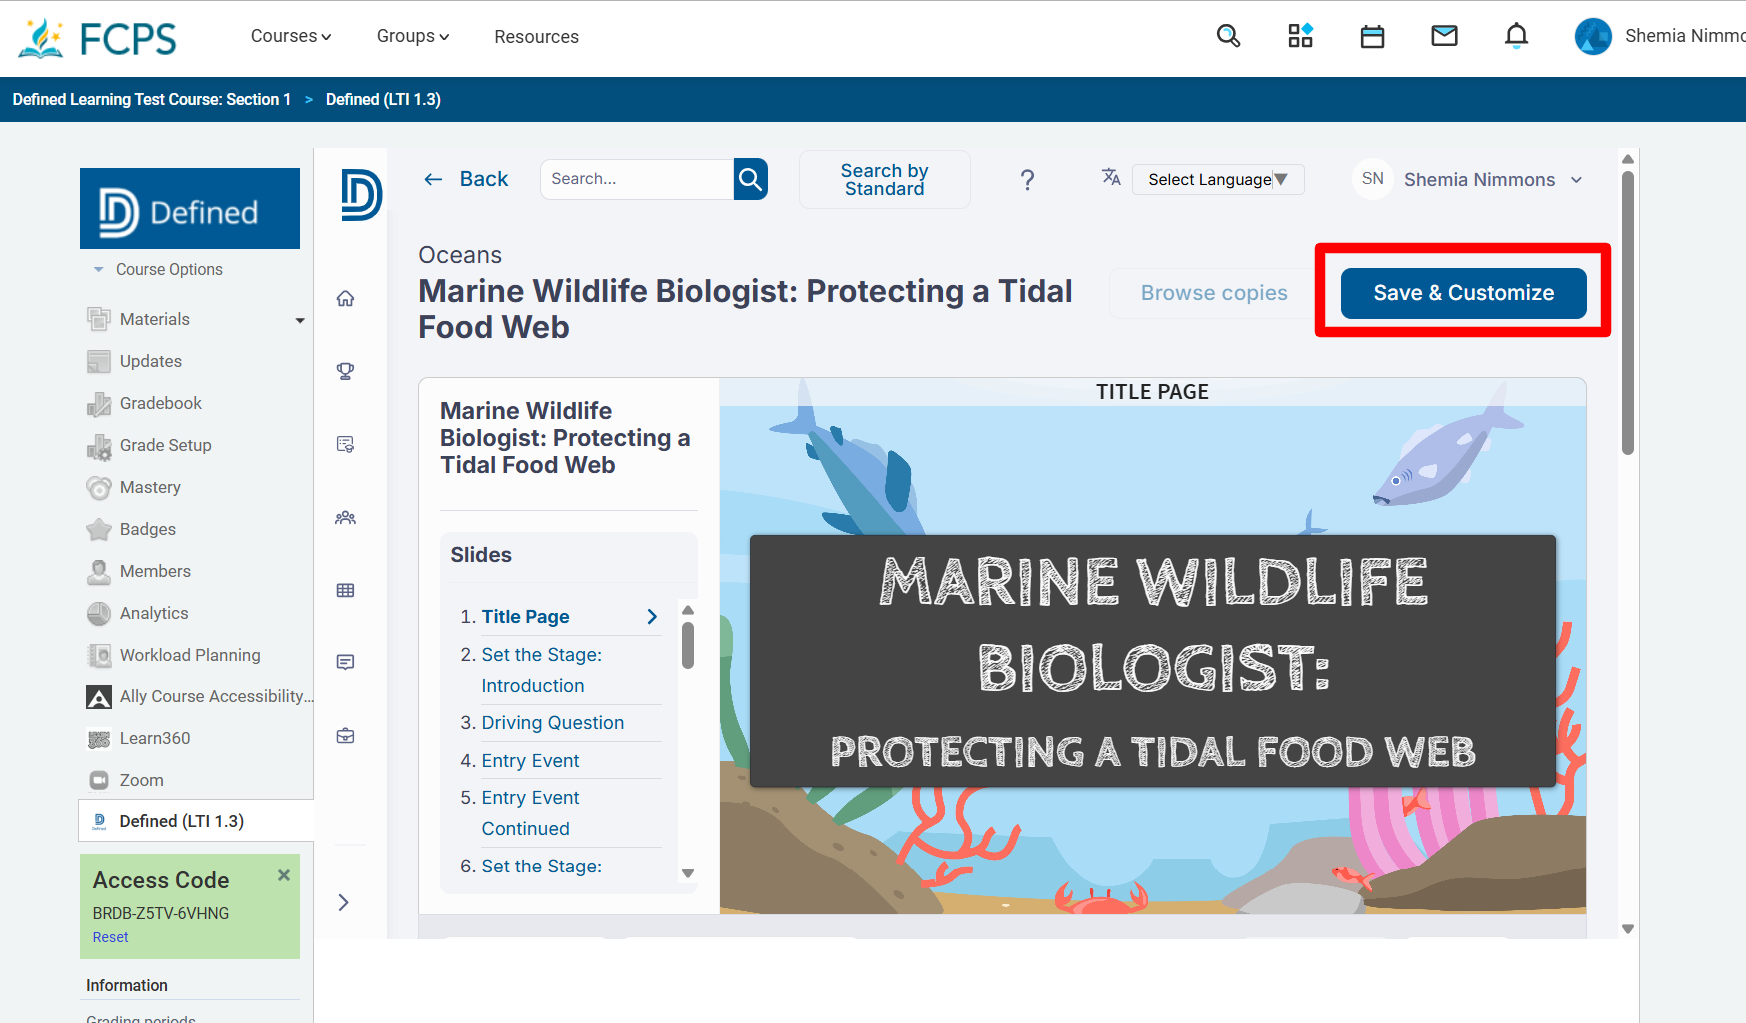
- Click Save & Customize to create an editable copy of the project.
- Make any desired modifications.
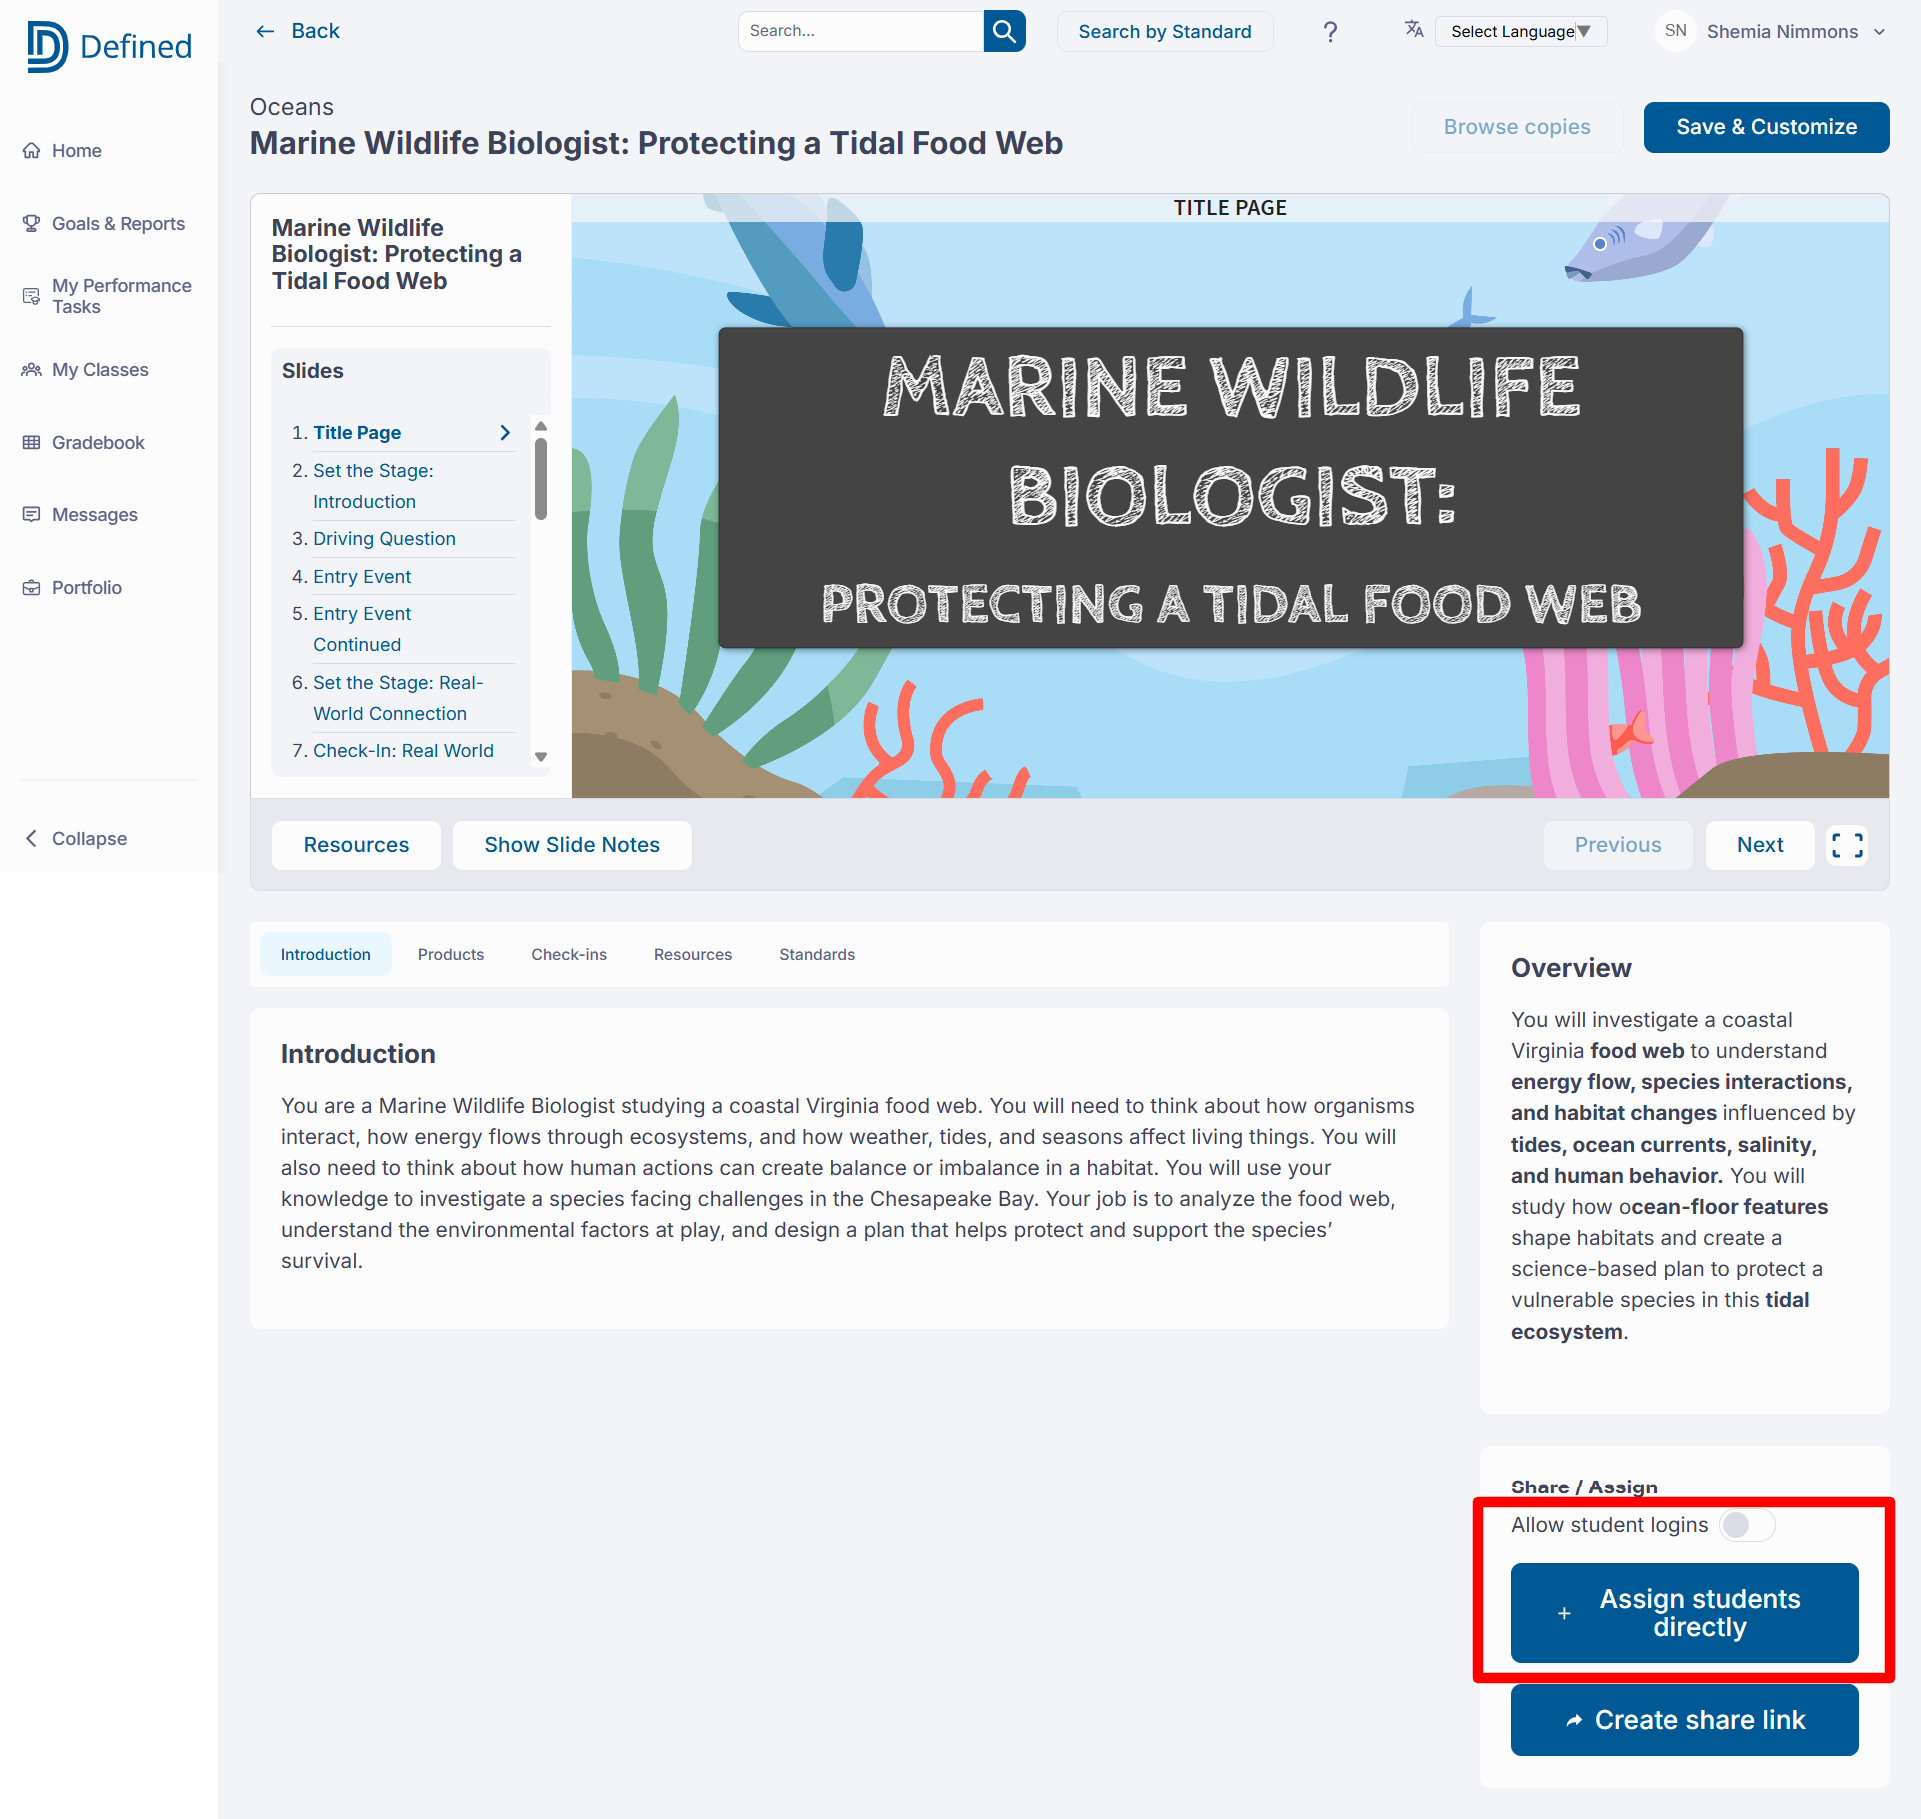
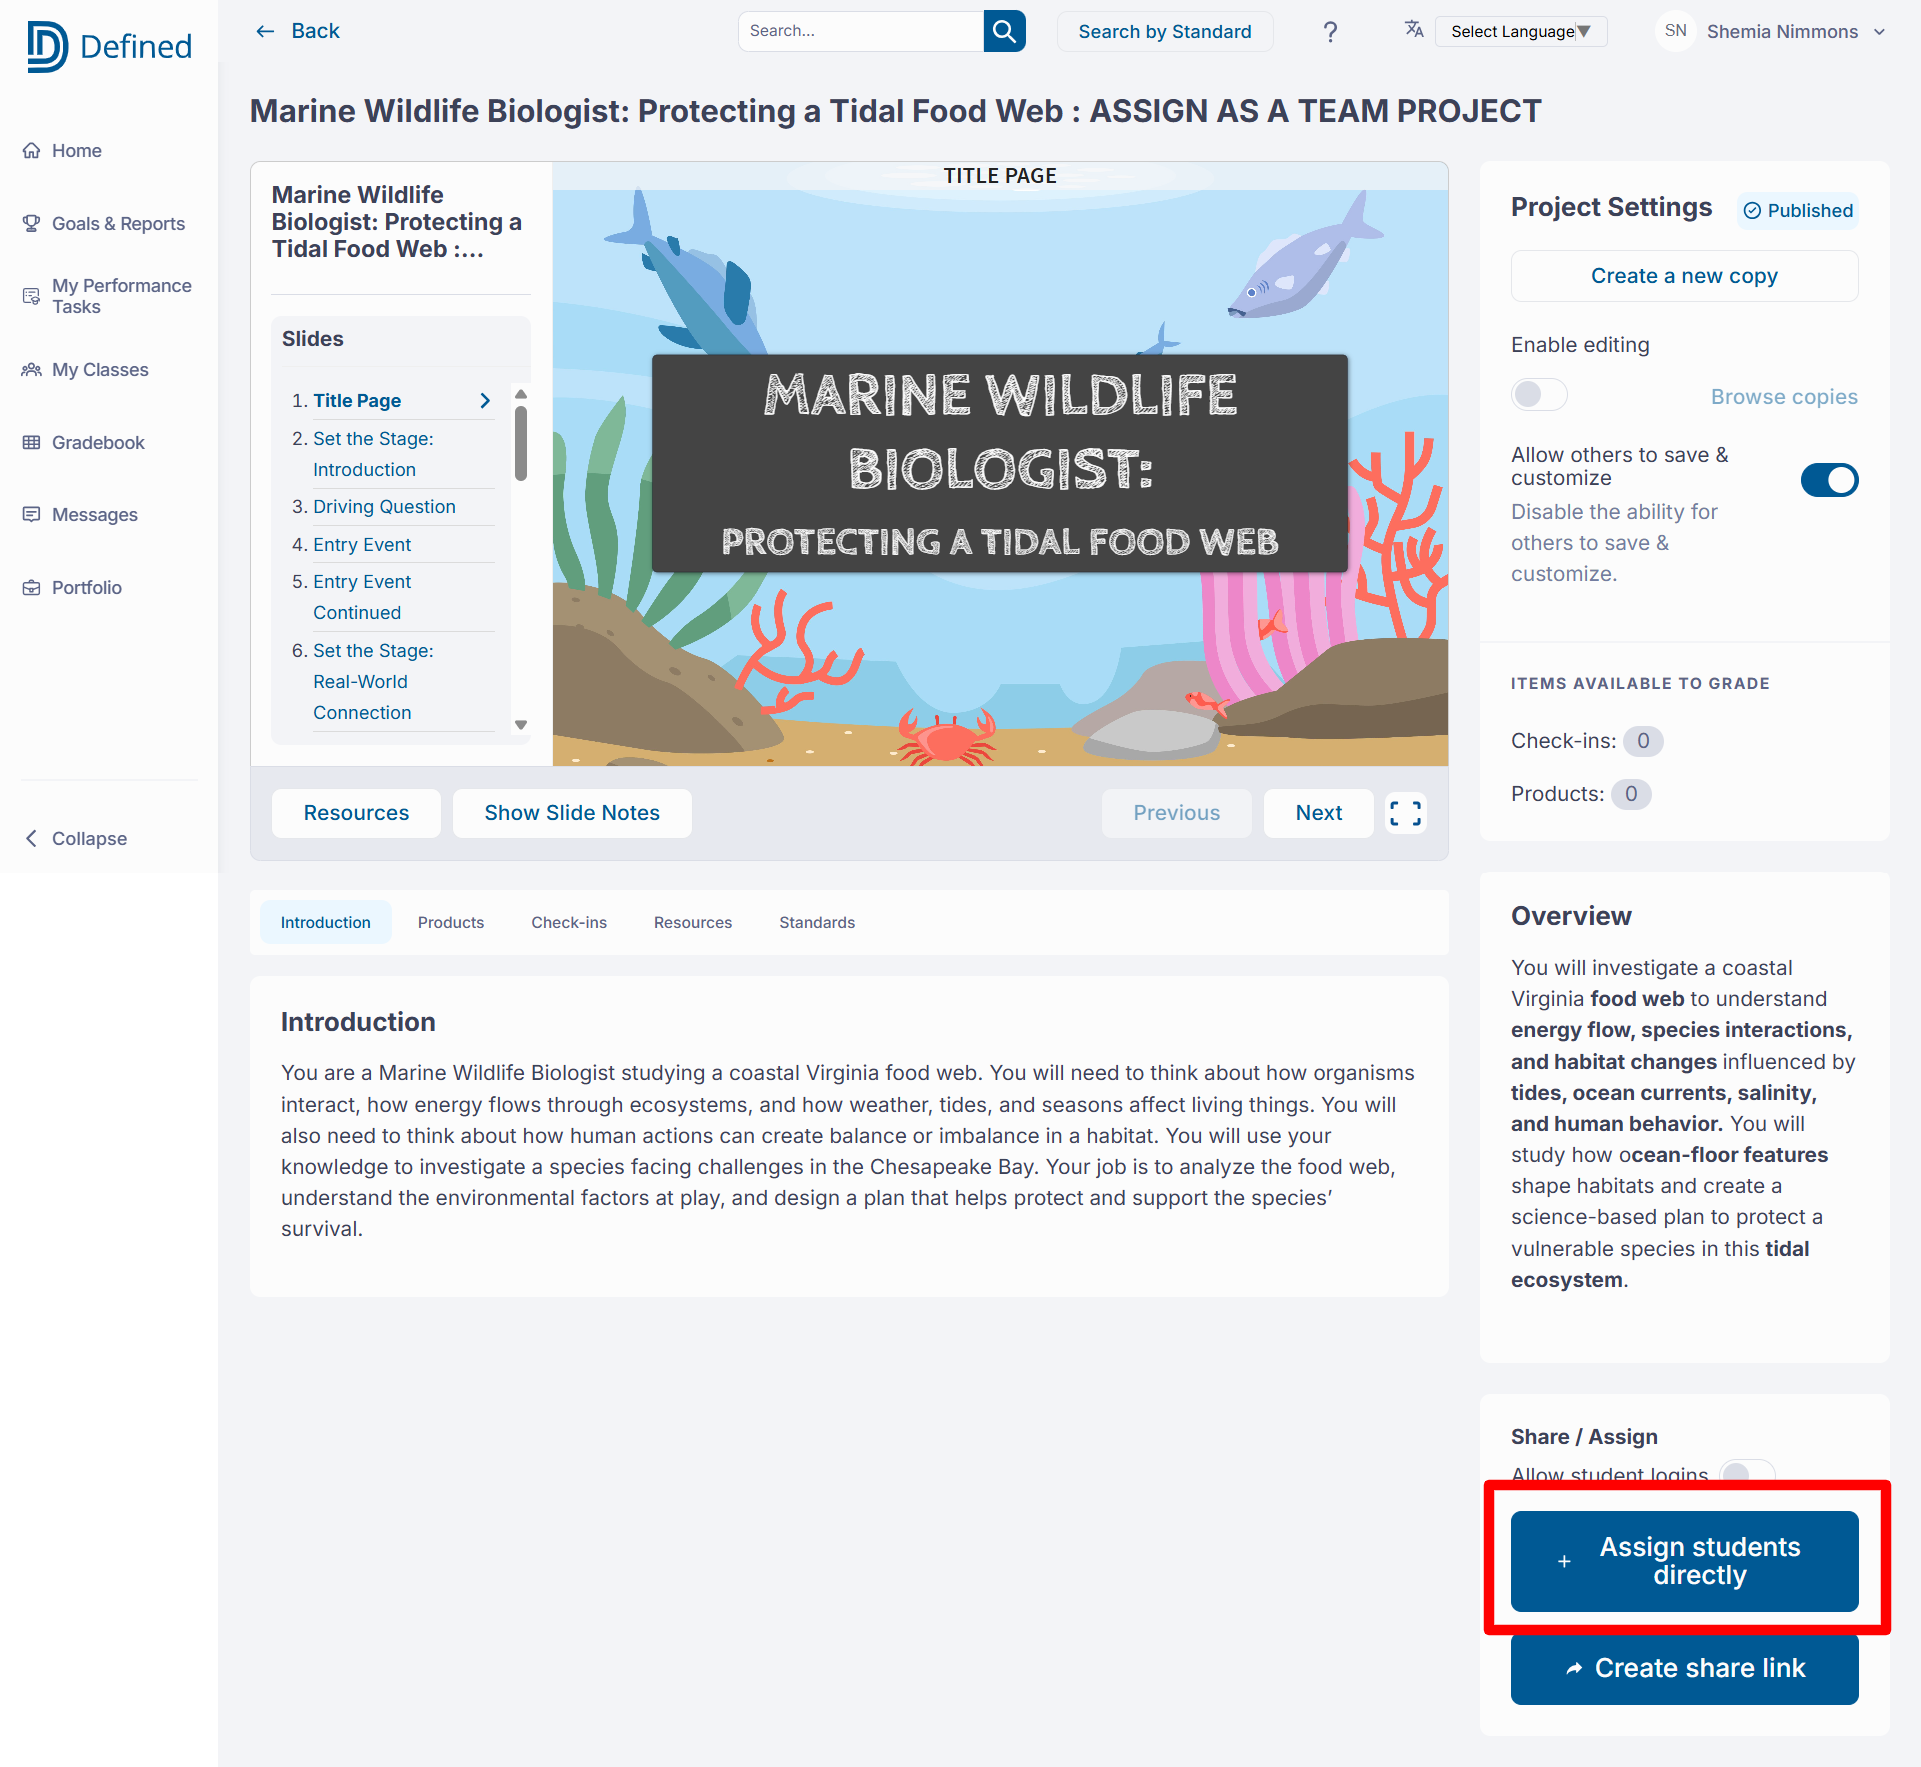
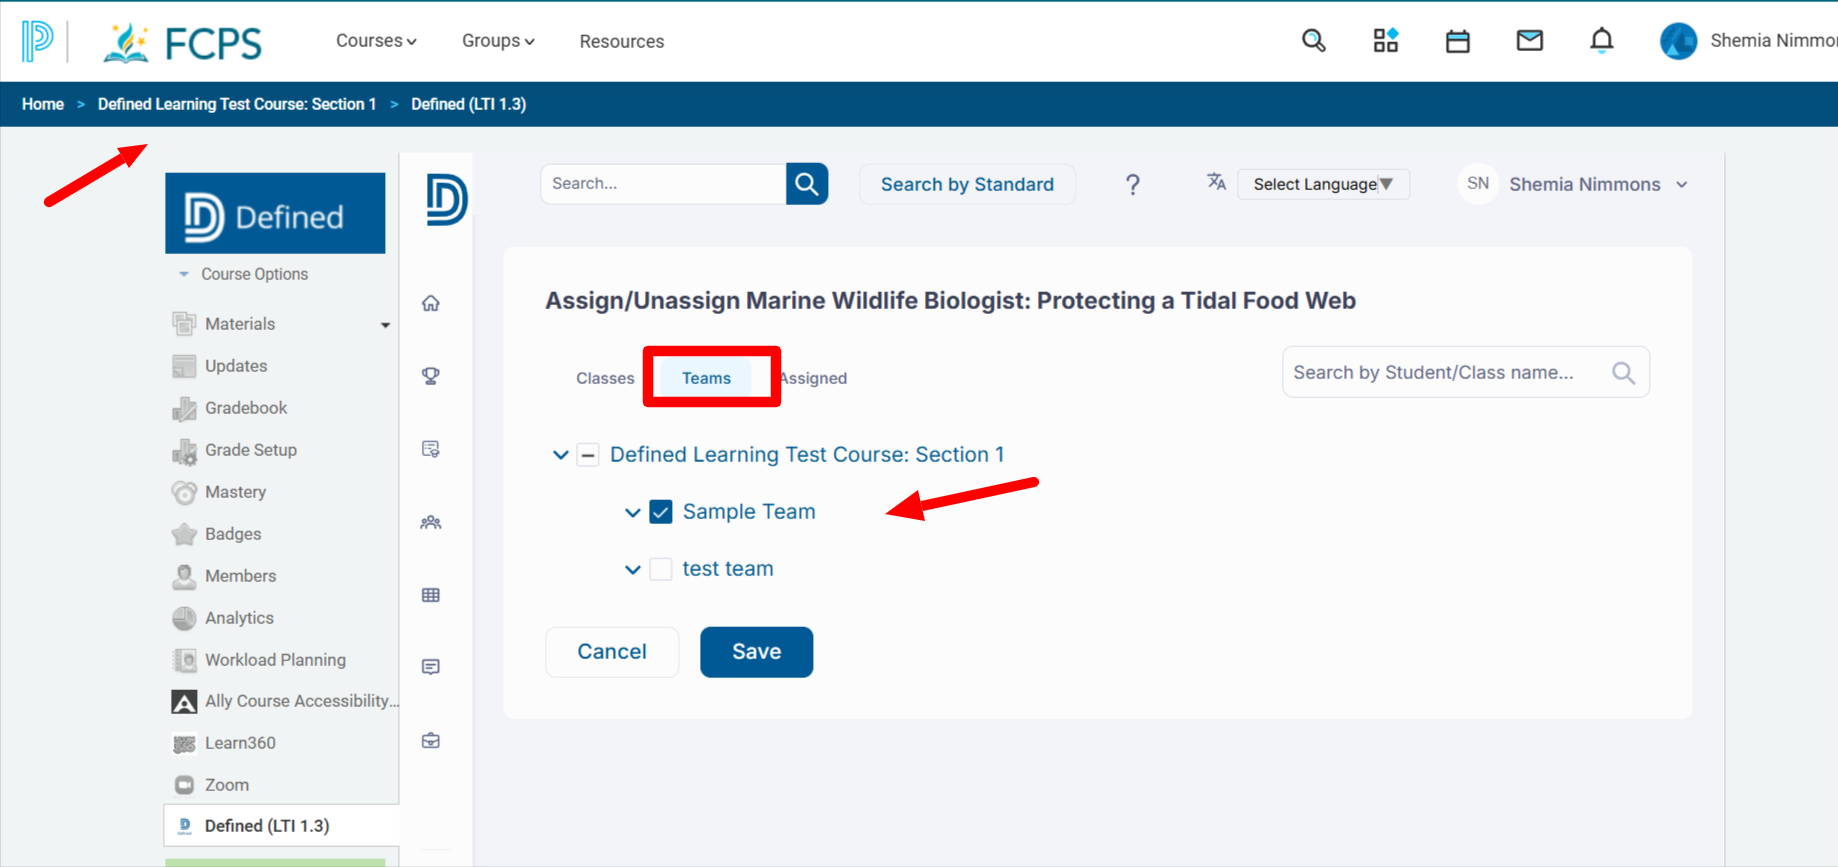
- Scroll to the lower-right corner of the page and click Assign Students Directly.
- Select the Teams tab.
- Use the class dropdown menu to select the appropriate class.
- Select the team that should receive the assignment.
- Save your changes.
Note: Assigning the project to a team within Defined Learning does not automatically create a Schoology assignment. You must still create a Schoology assignment to provide student access and enable grade passback.
Once the project has been assigned to a student team within Defined Learning, return to your Schoology course by clicking your Course Name at the top of the left-hand navigation panel.
Step 3: Assign the Team Project
- Click Add Materials > Defined (LTI 1.3).
- Select the My Projects tab to find your newly customized version.
- Select the specific task and product, then follow the standard steps to Enable Grade Passback.
Best Practices for Team Assignments
- Create student teams before customizing and assigning projects.
- Assign projects to teams within Defined Learning before creating the Schoology assignment.
- Always create the corresponding Schoology assignment
- Verify that a grading category has been selected to ensure successful grade passback.
- Use the My Projects tab when locating customized team assignments.
5. Student Experience & Submission
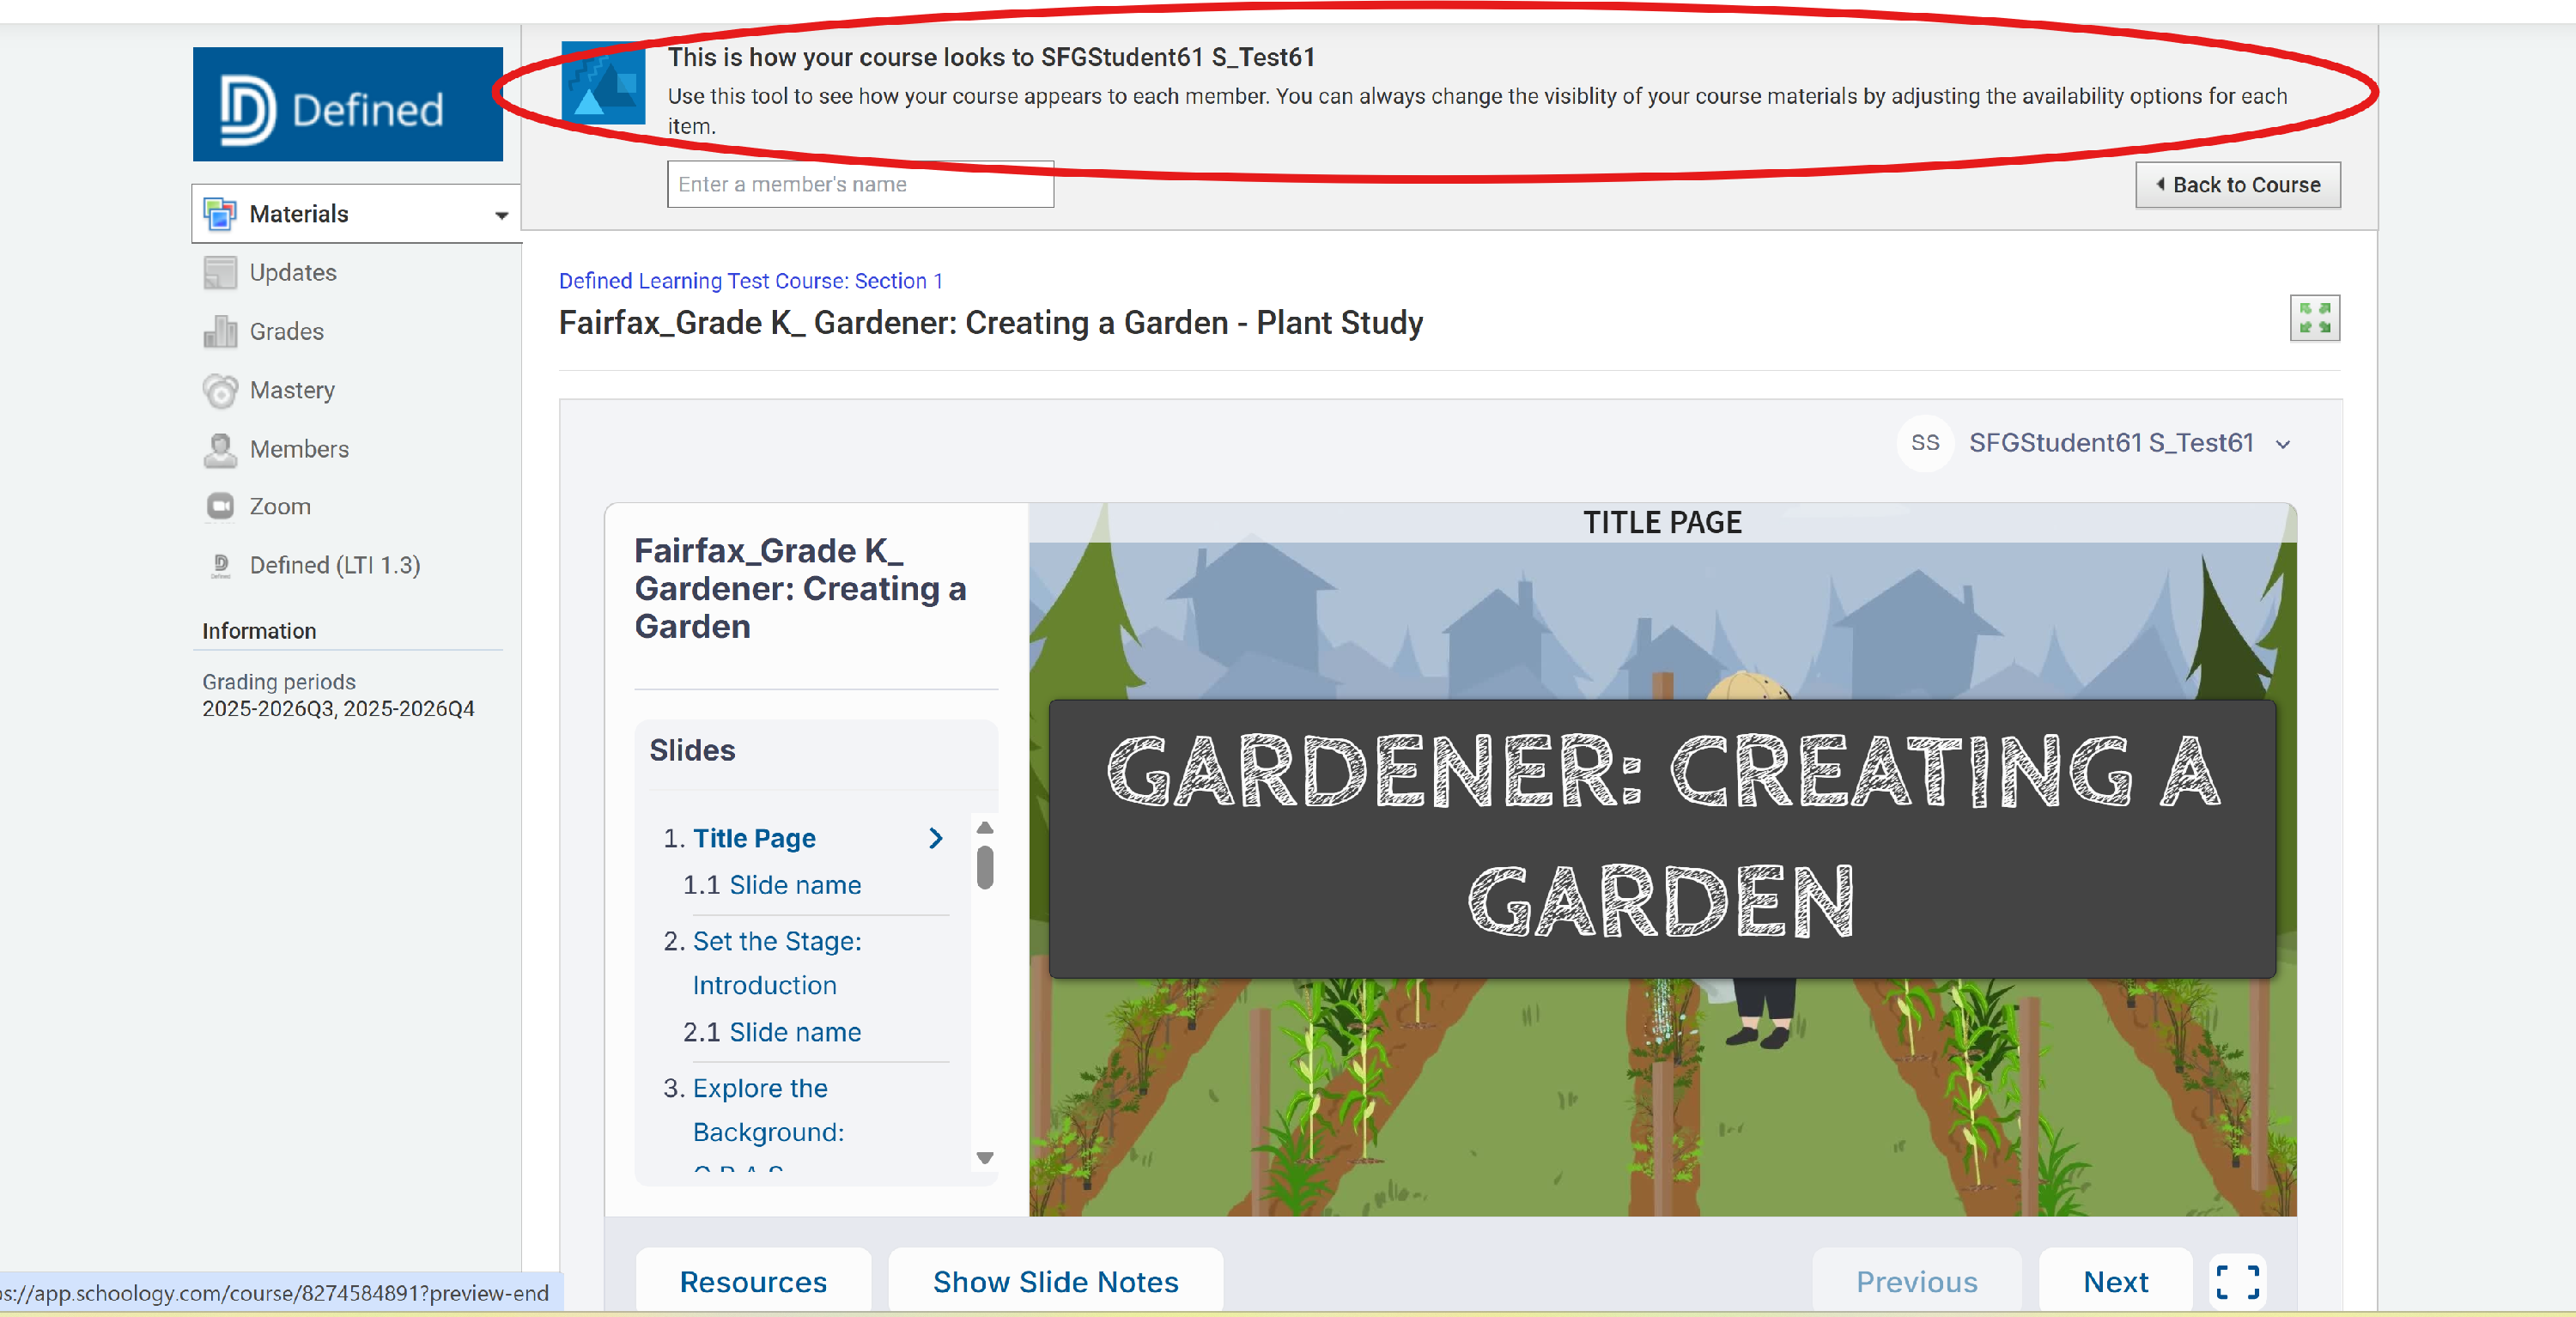
To view as a student:
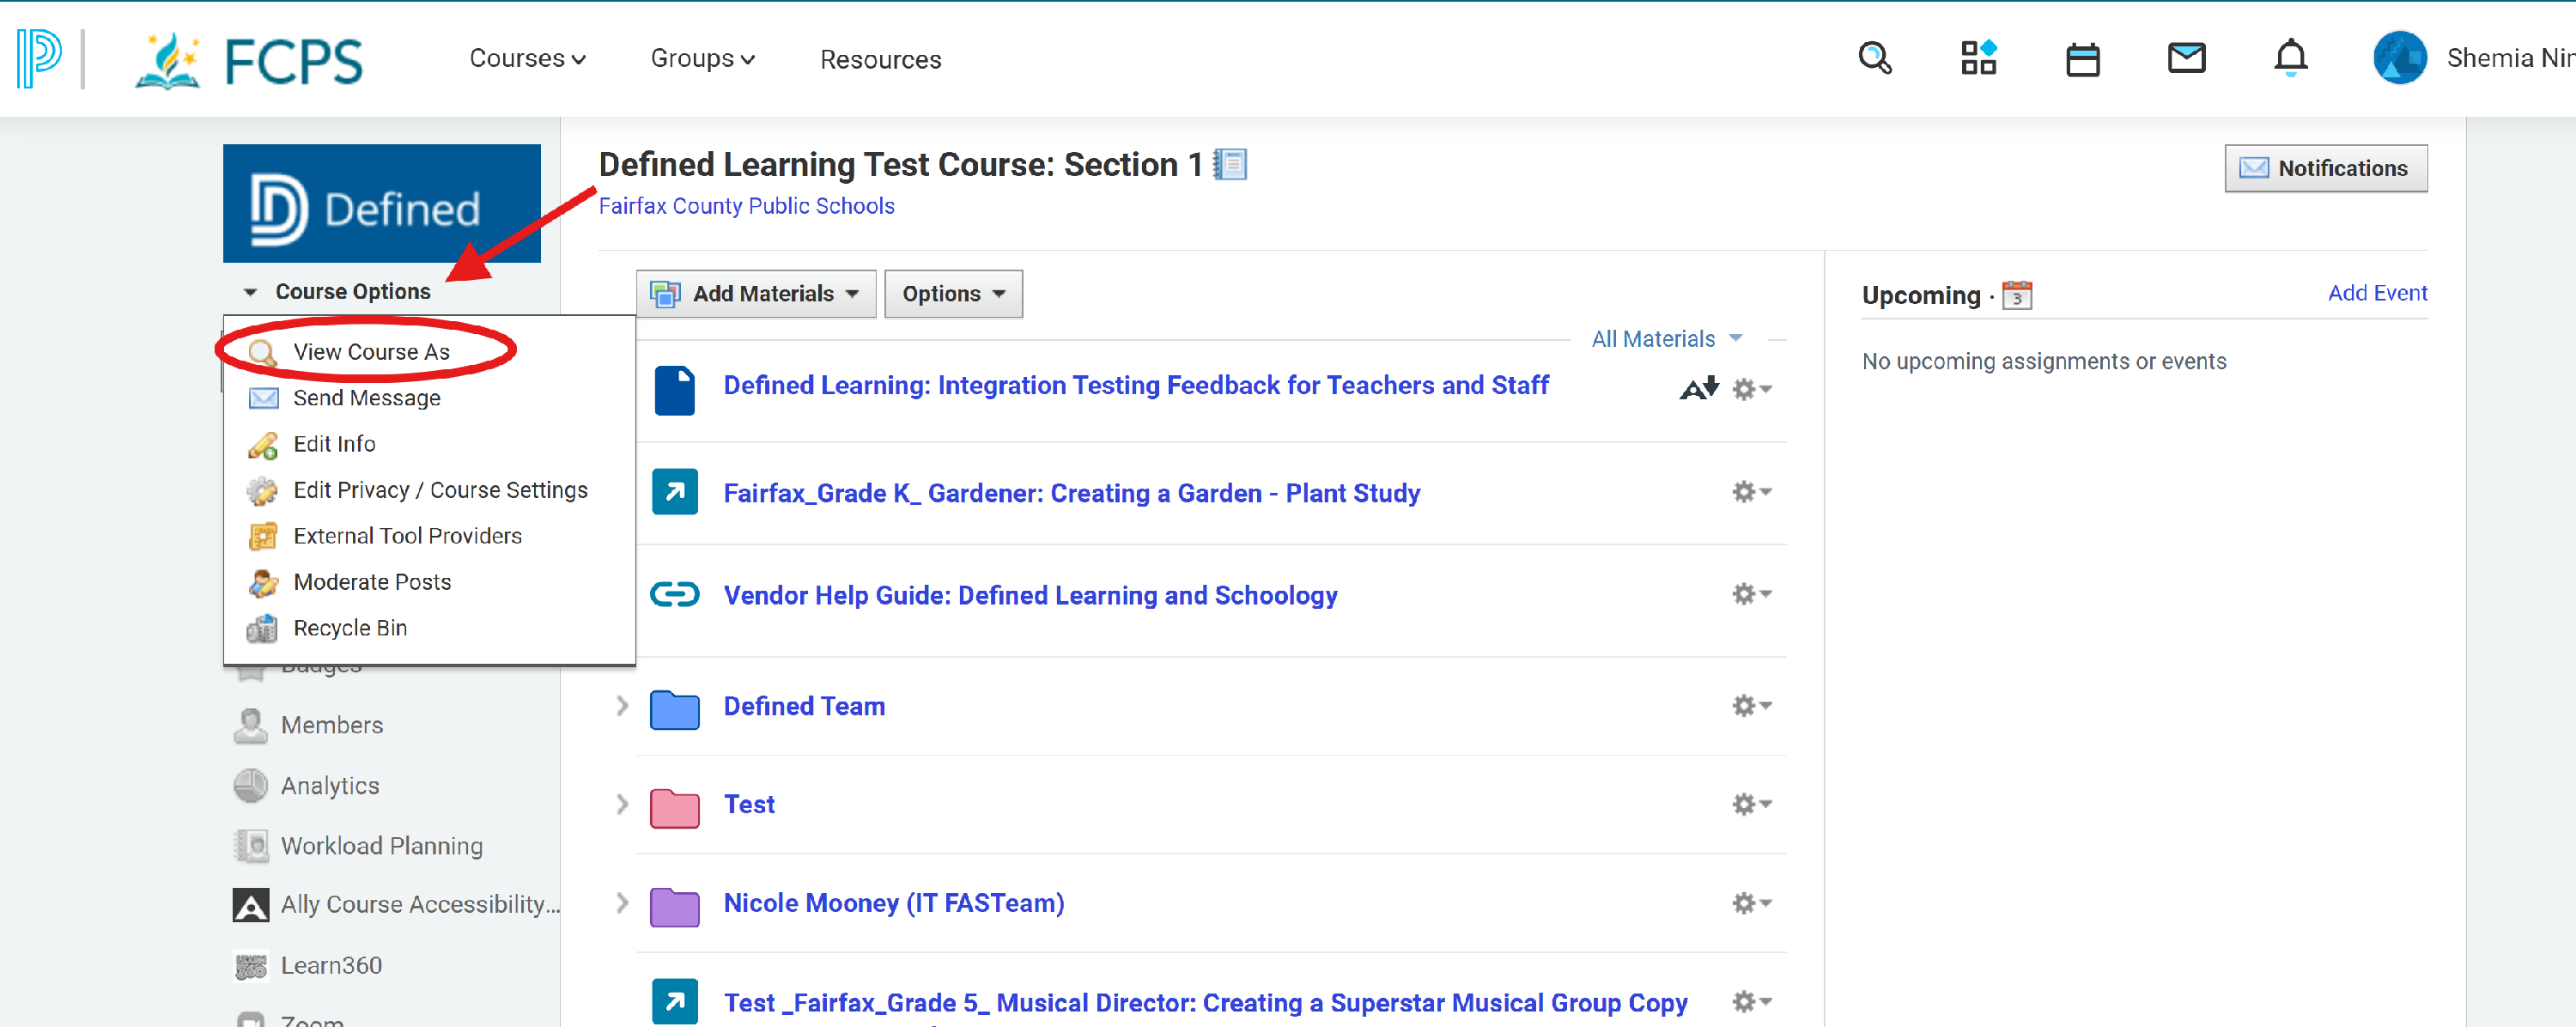
Click Course Options > View Course As.
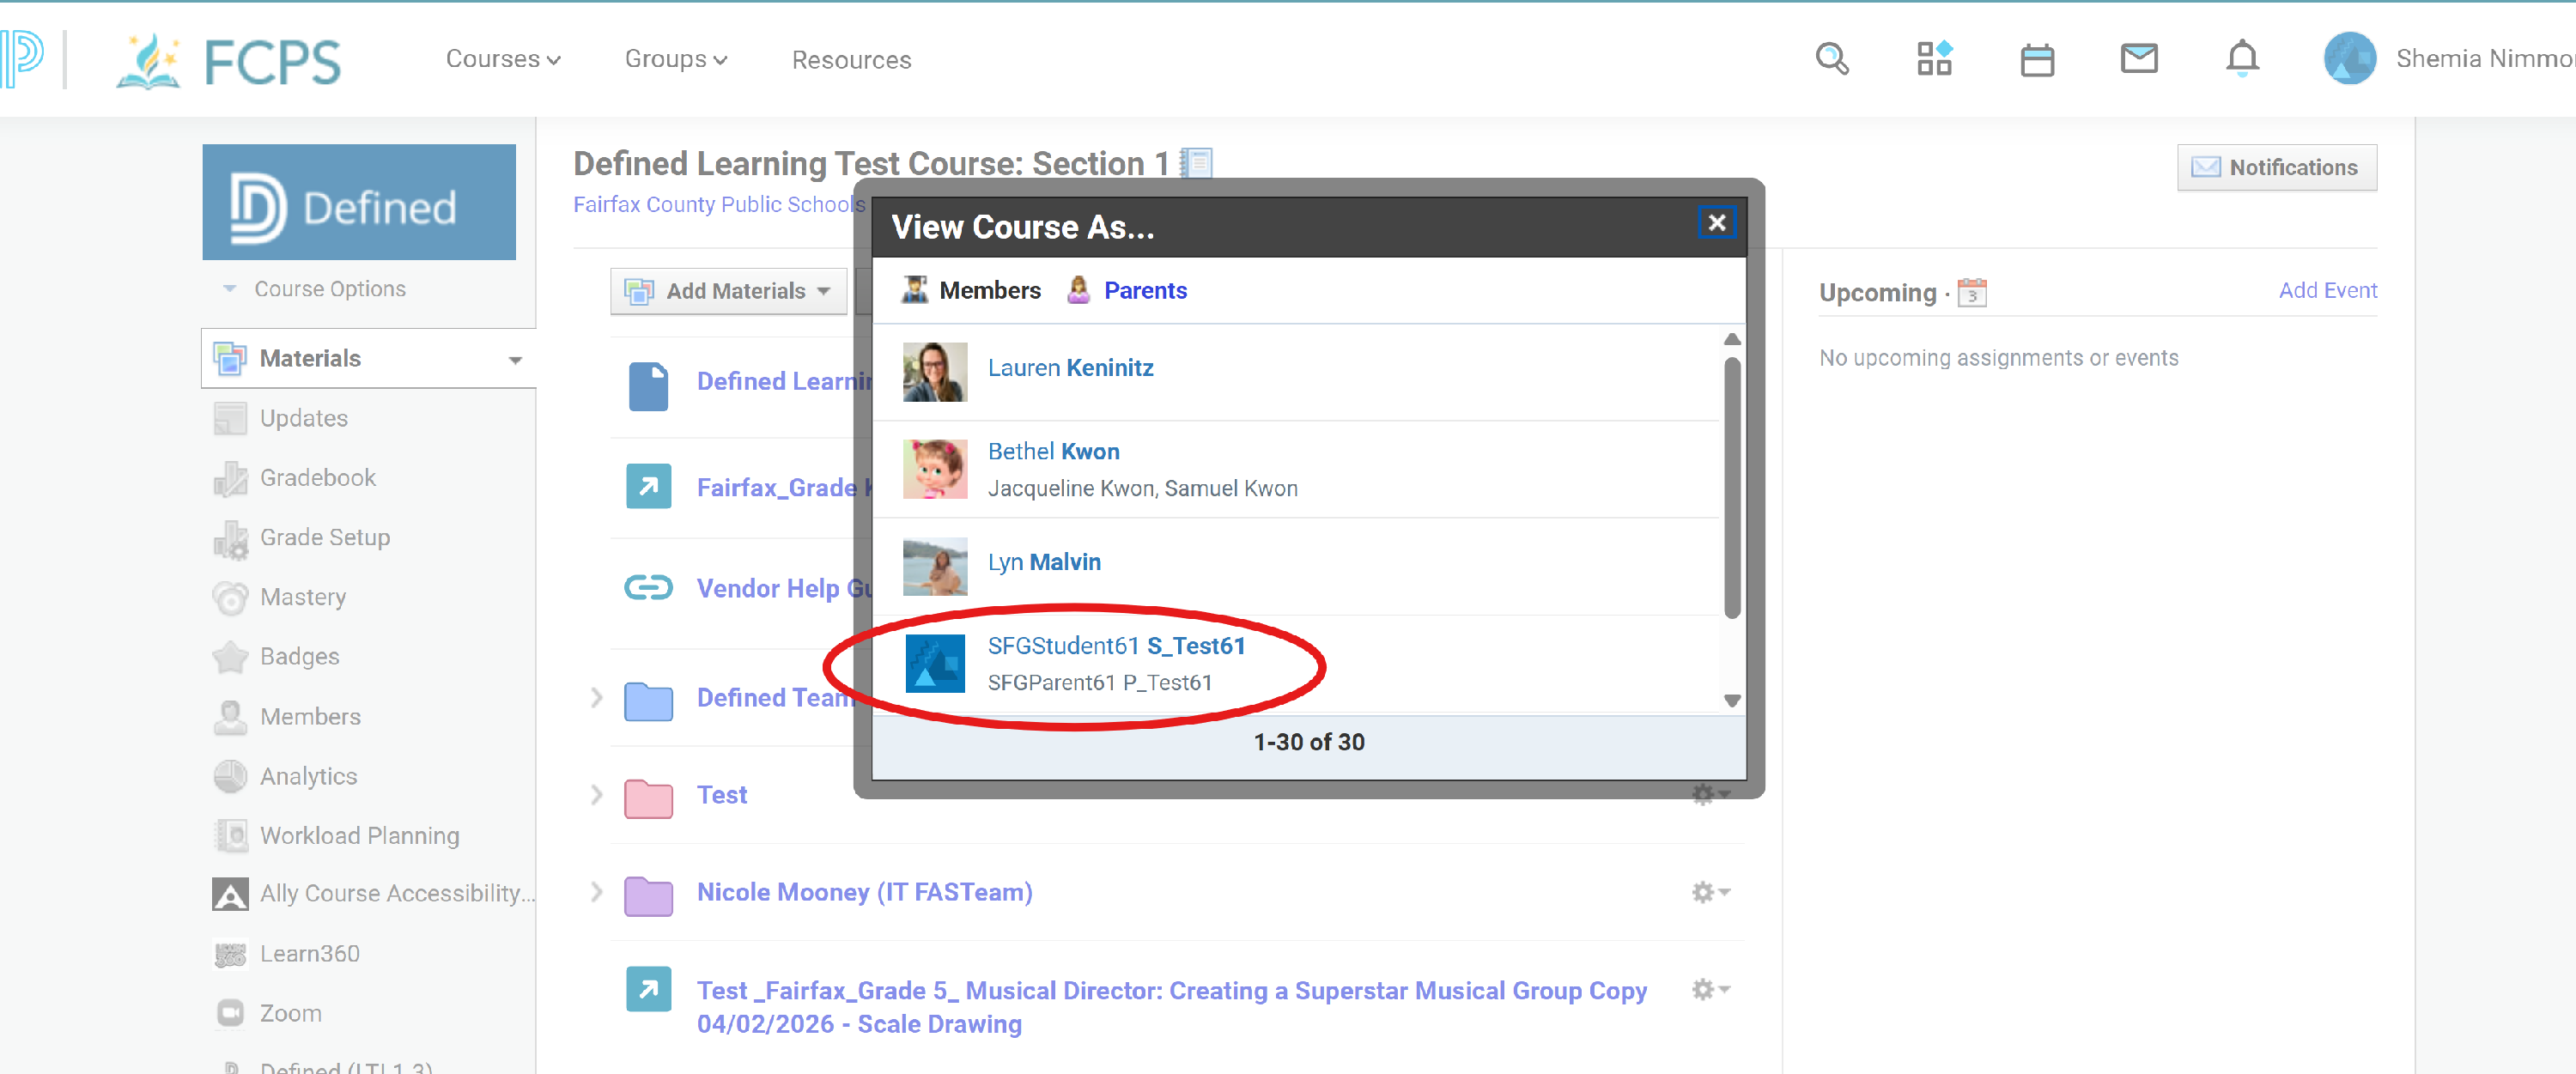
Select a student from the list.
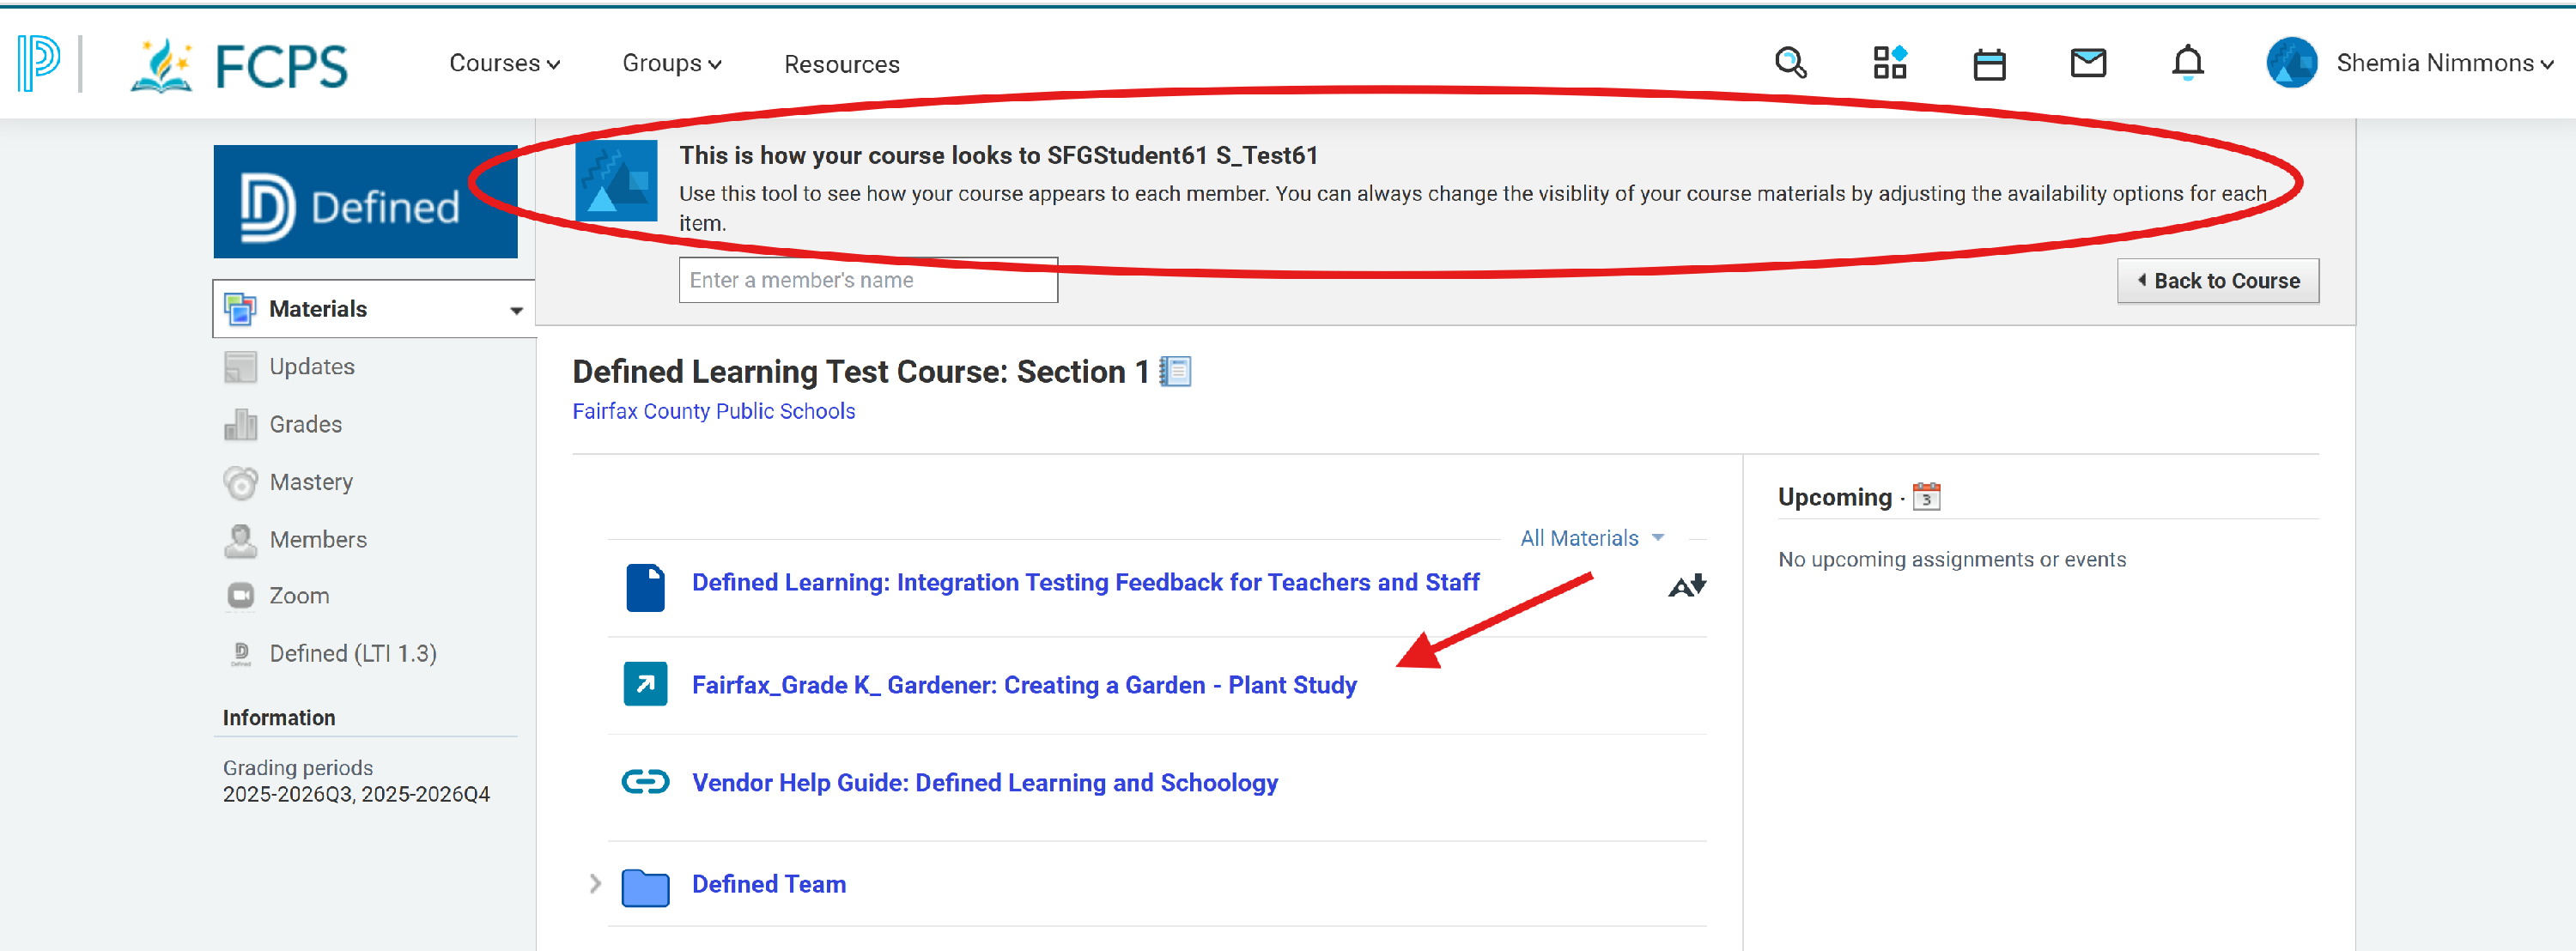
Students will see the project interface where they can:
- Progress through instructional slides.
- Answer check-in questions.
- Upload their completed "Product" file. Click Submit.
- A final confirmation slide will appear once students have gone through the entire project.
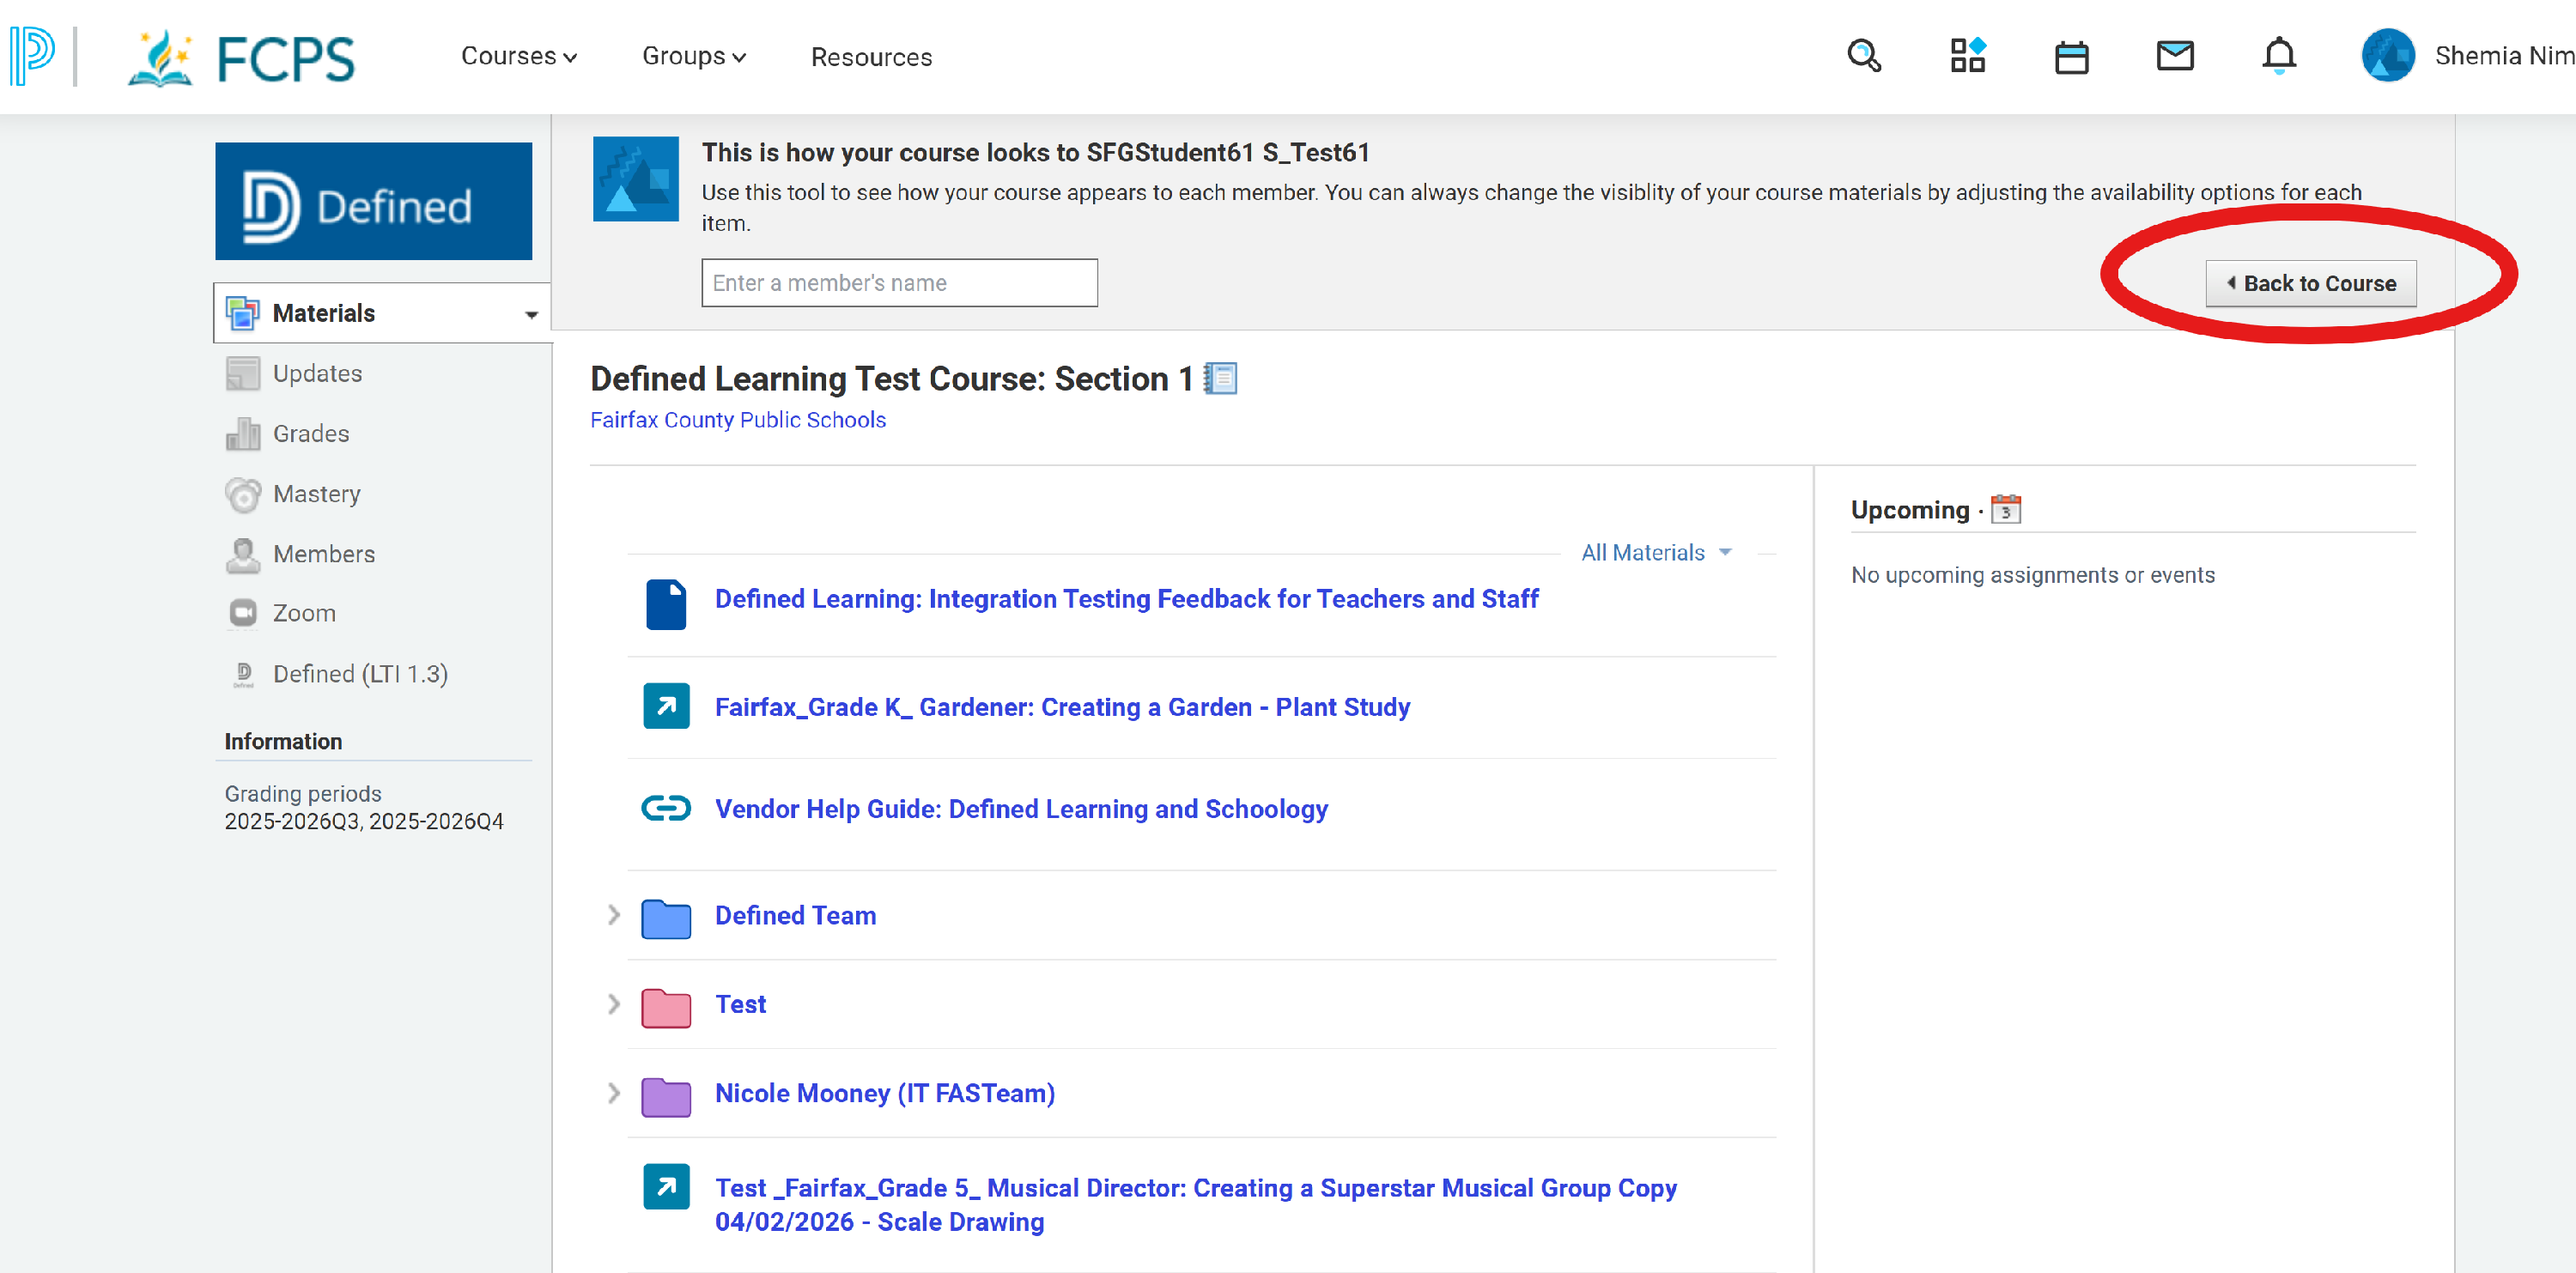
- To leave the student view and return back to your course, you can click "Back to Course" on the upper left hand side of the page.
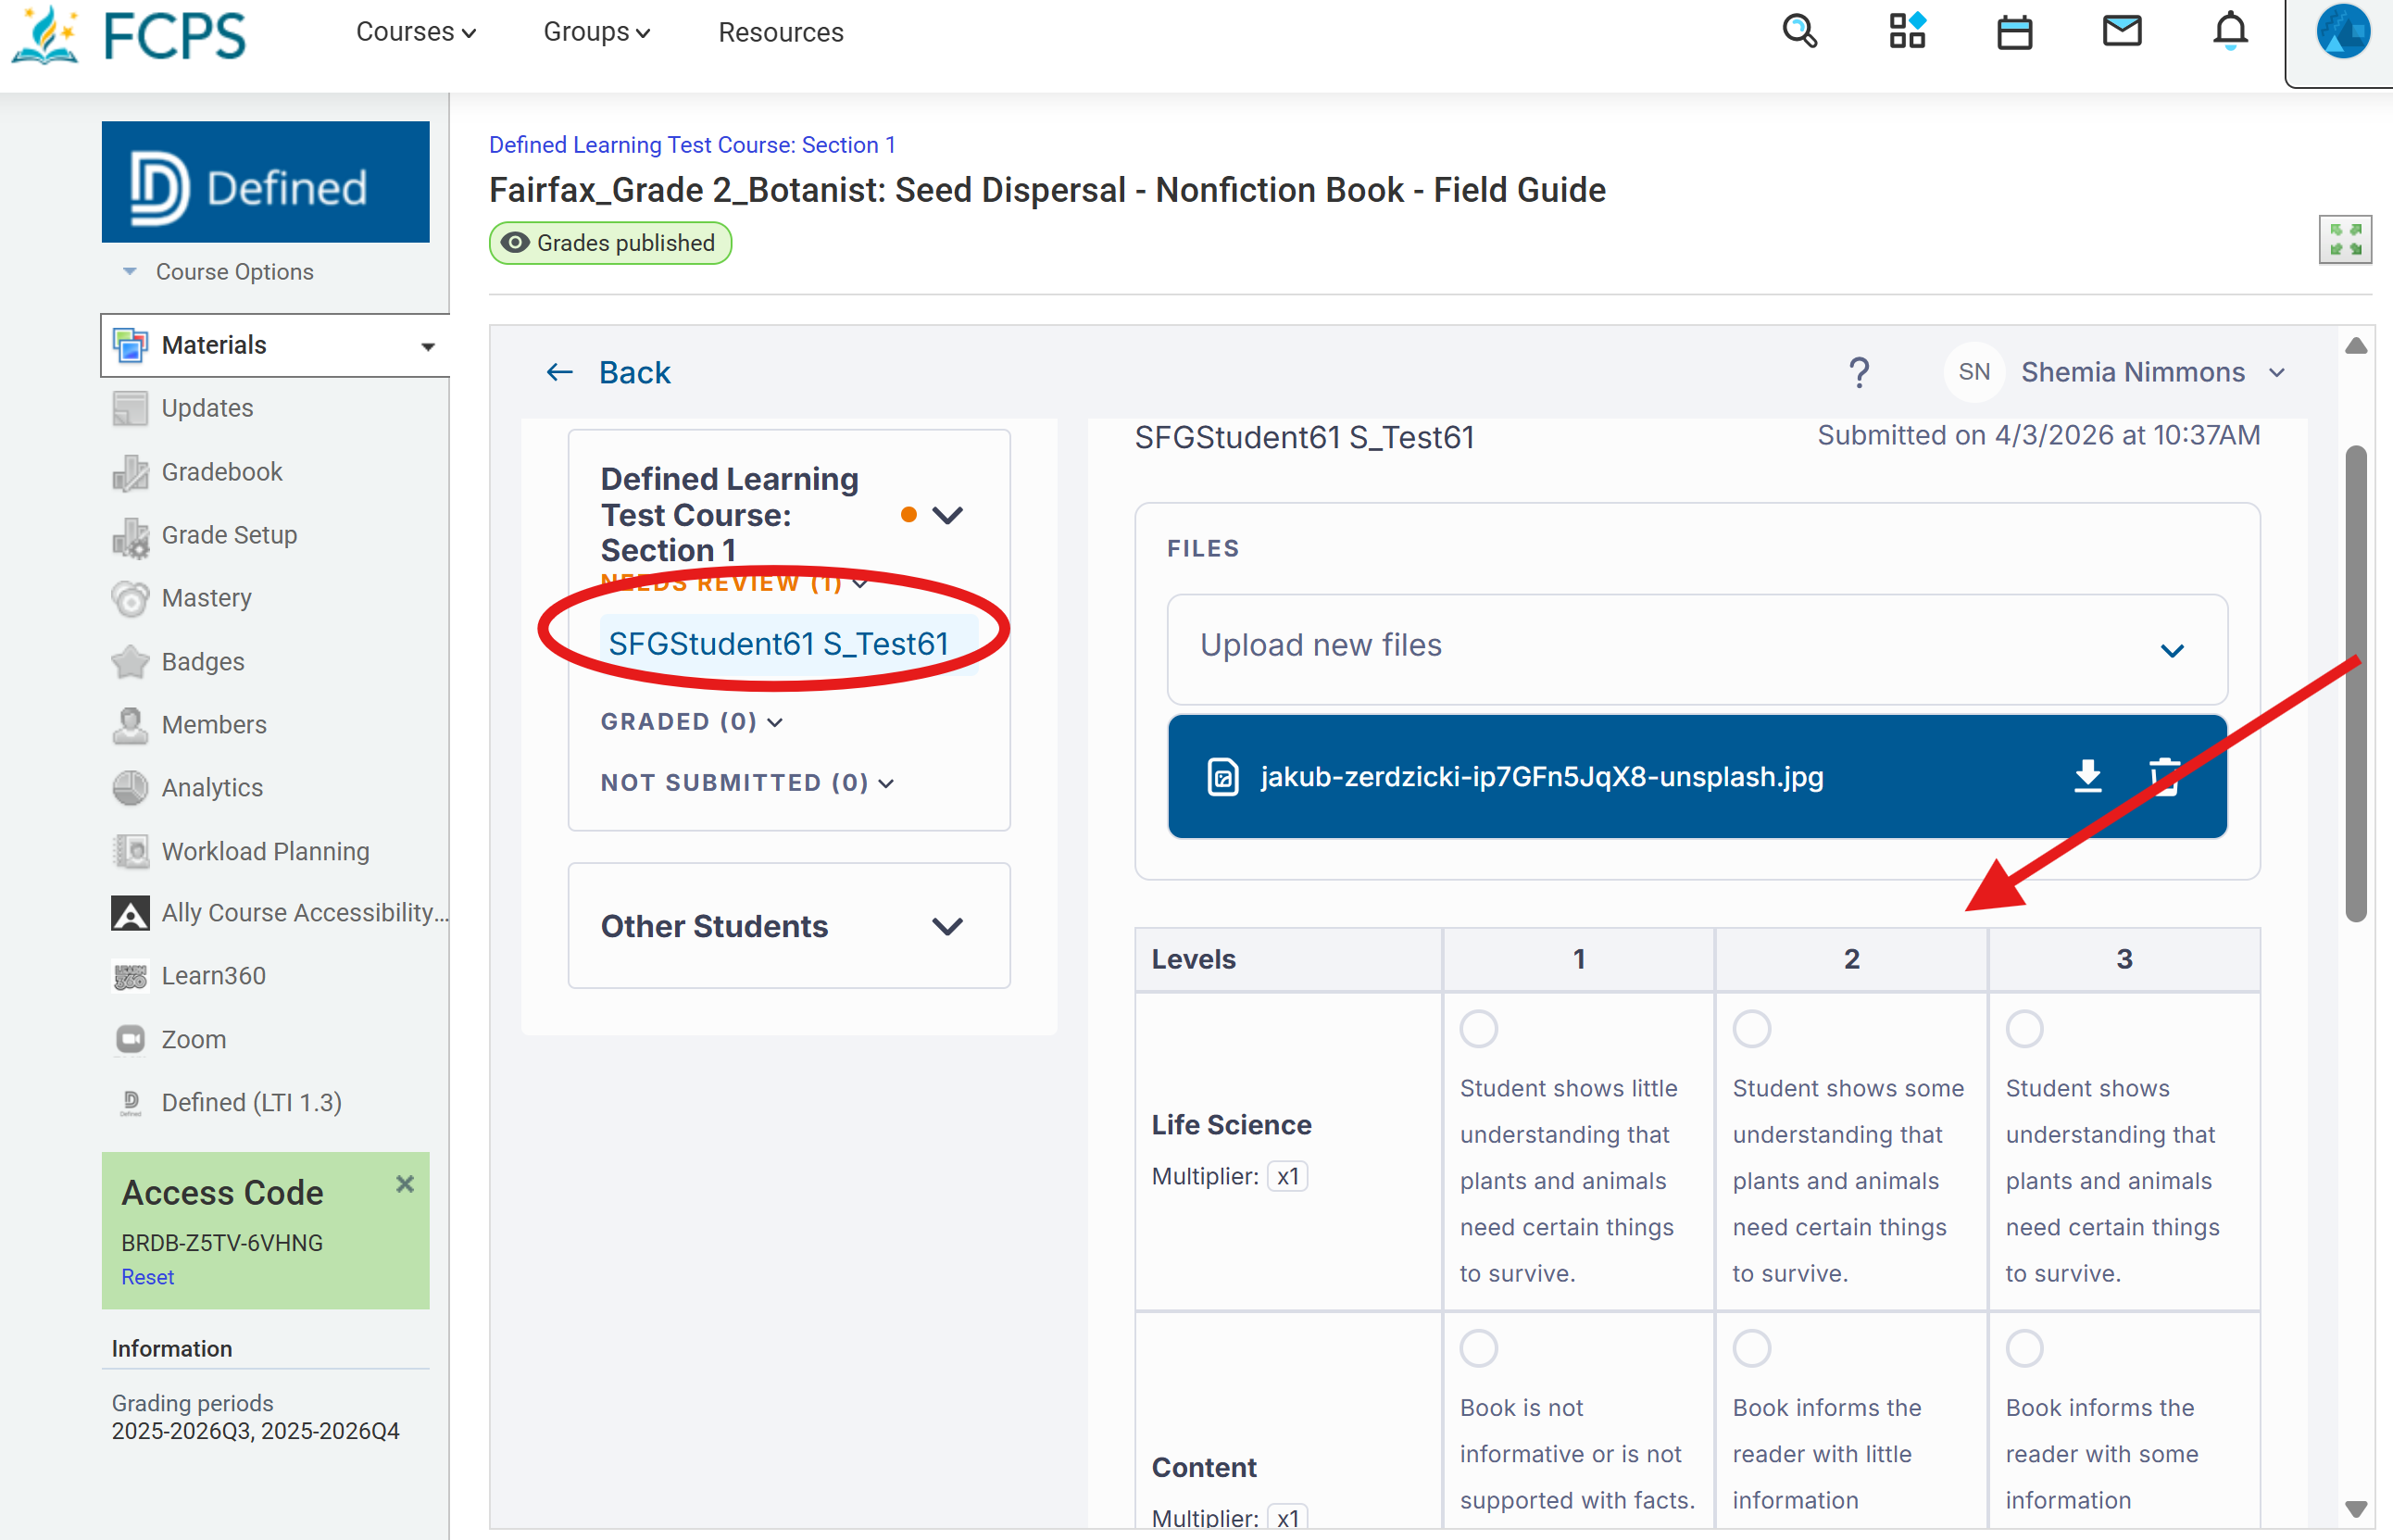
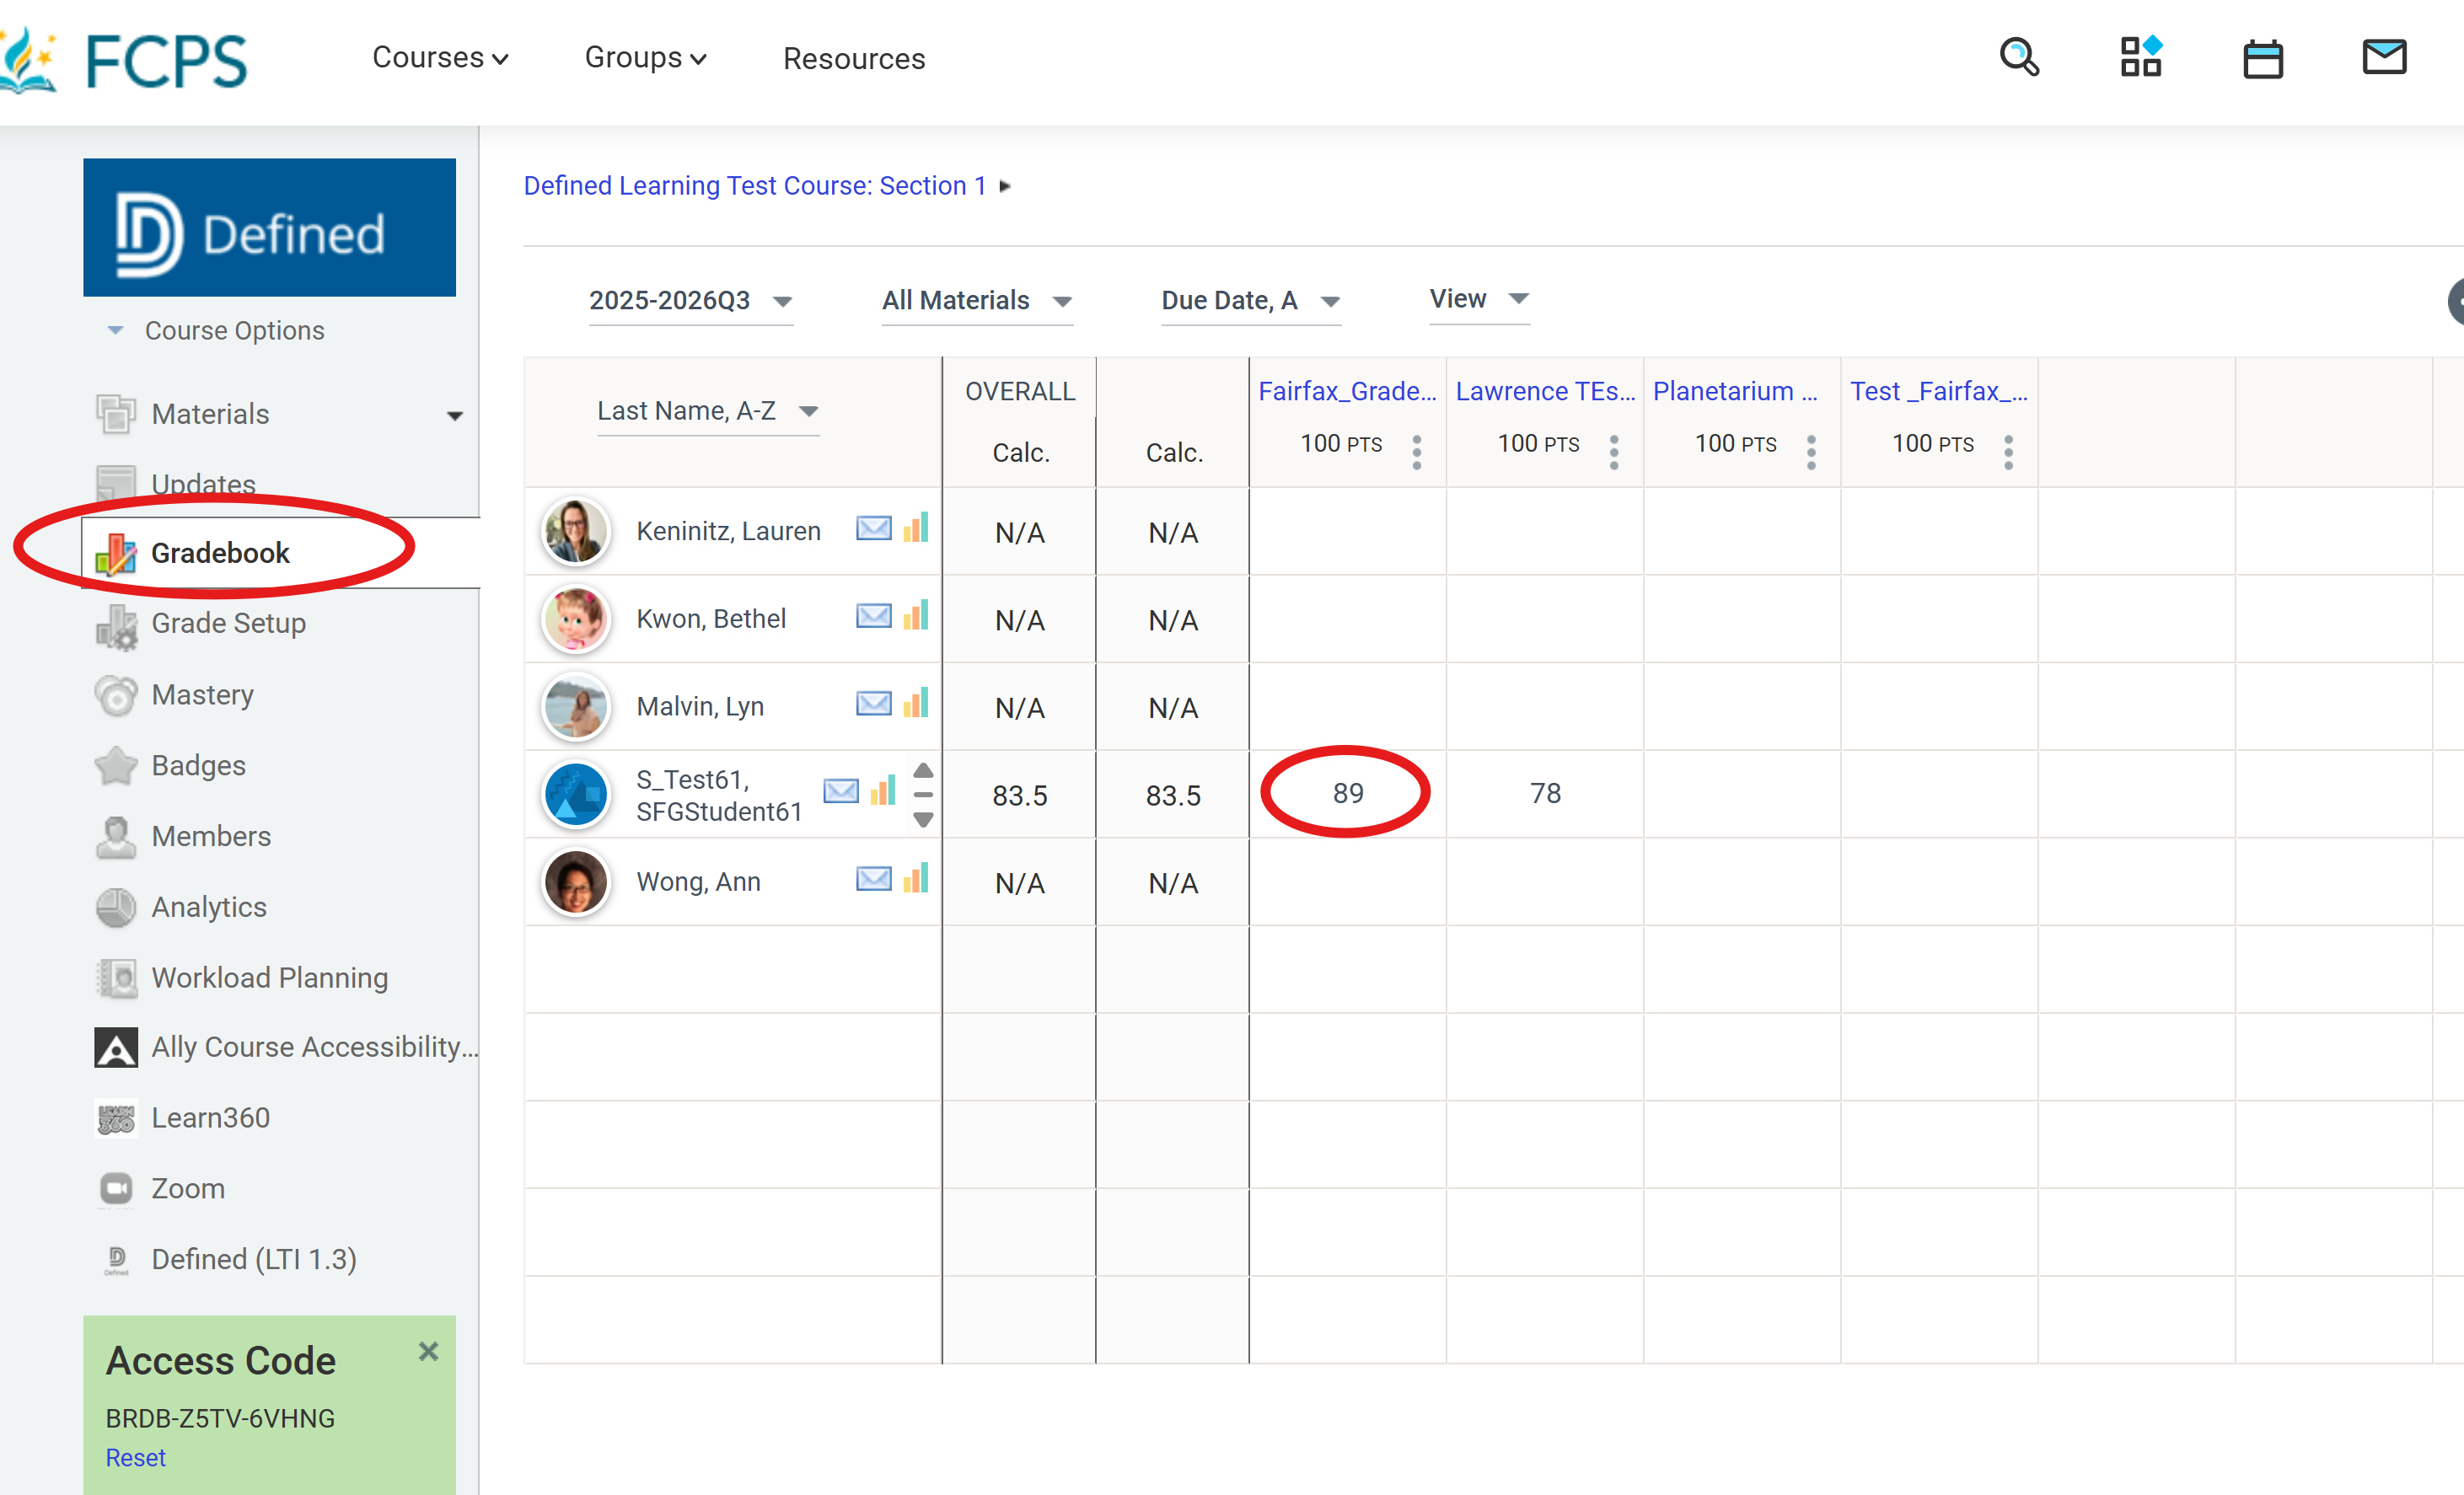
6. Grading & Syncing Scores
Grading is handled within the Defined interface but synced to Schoology.
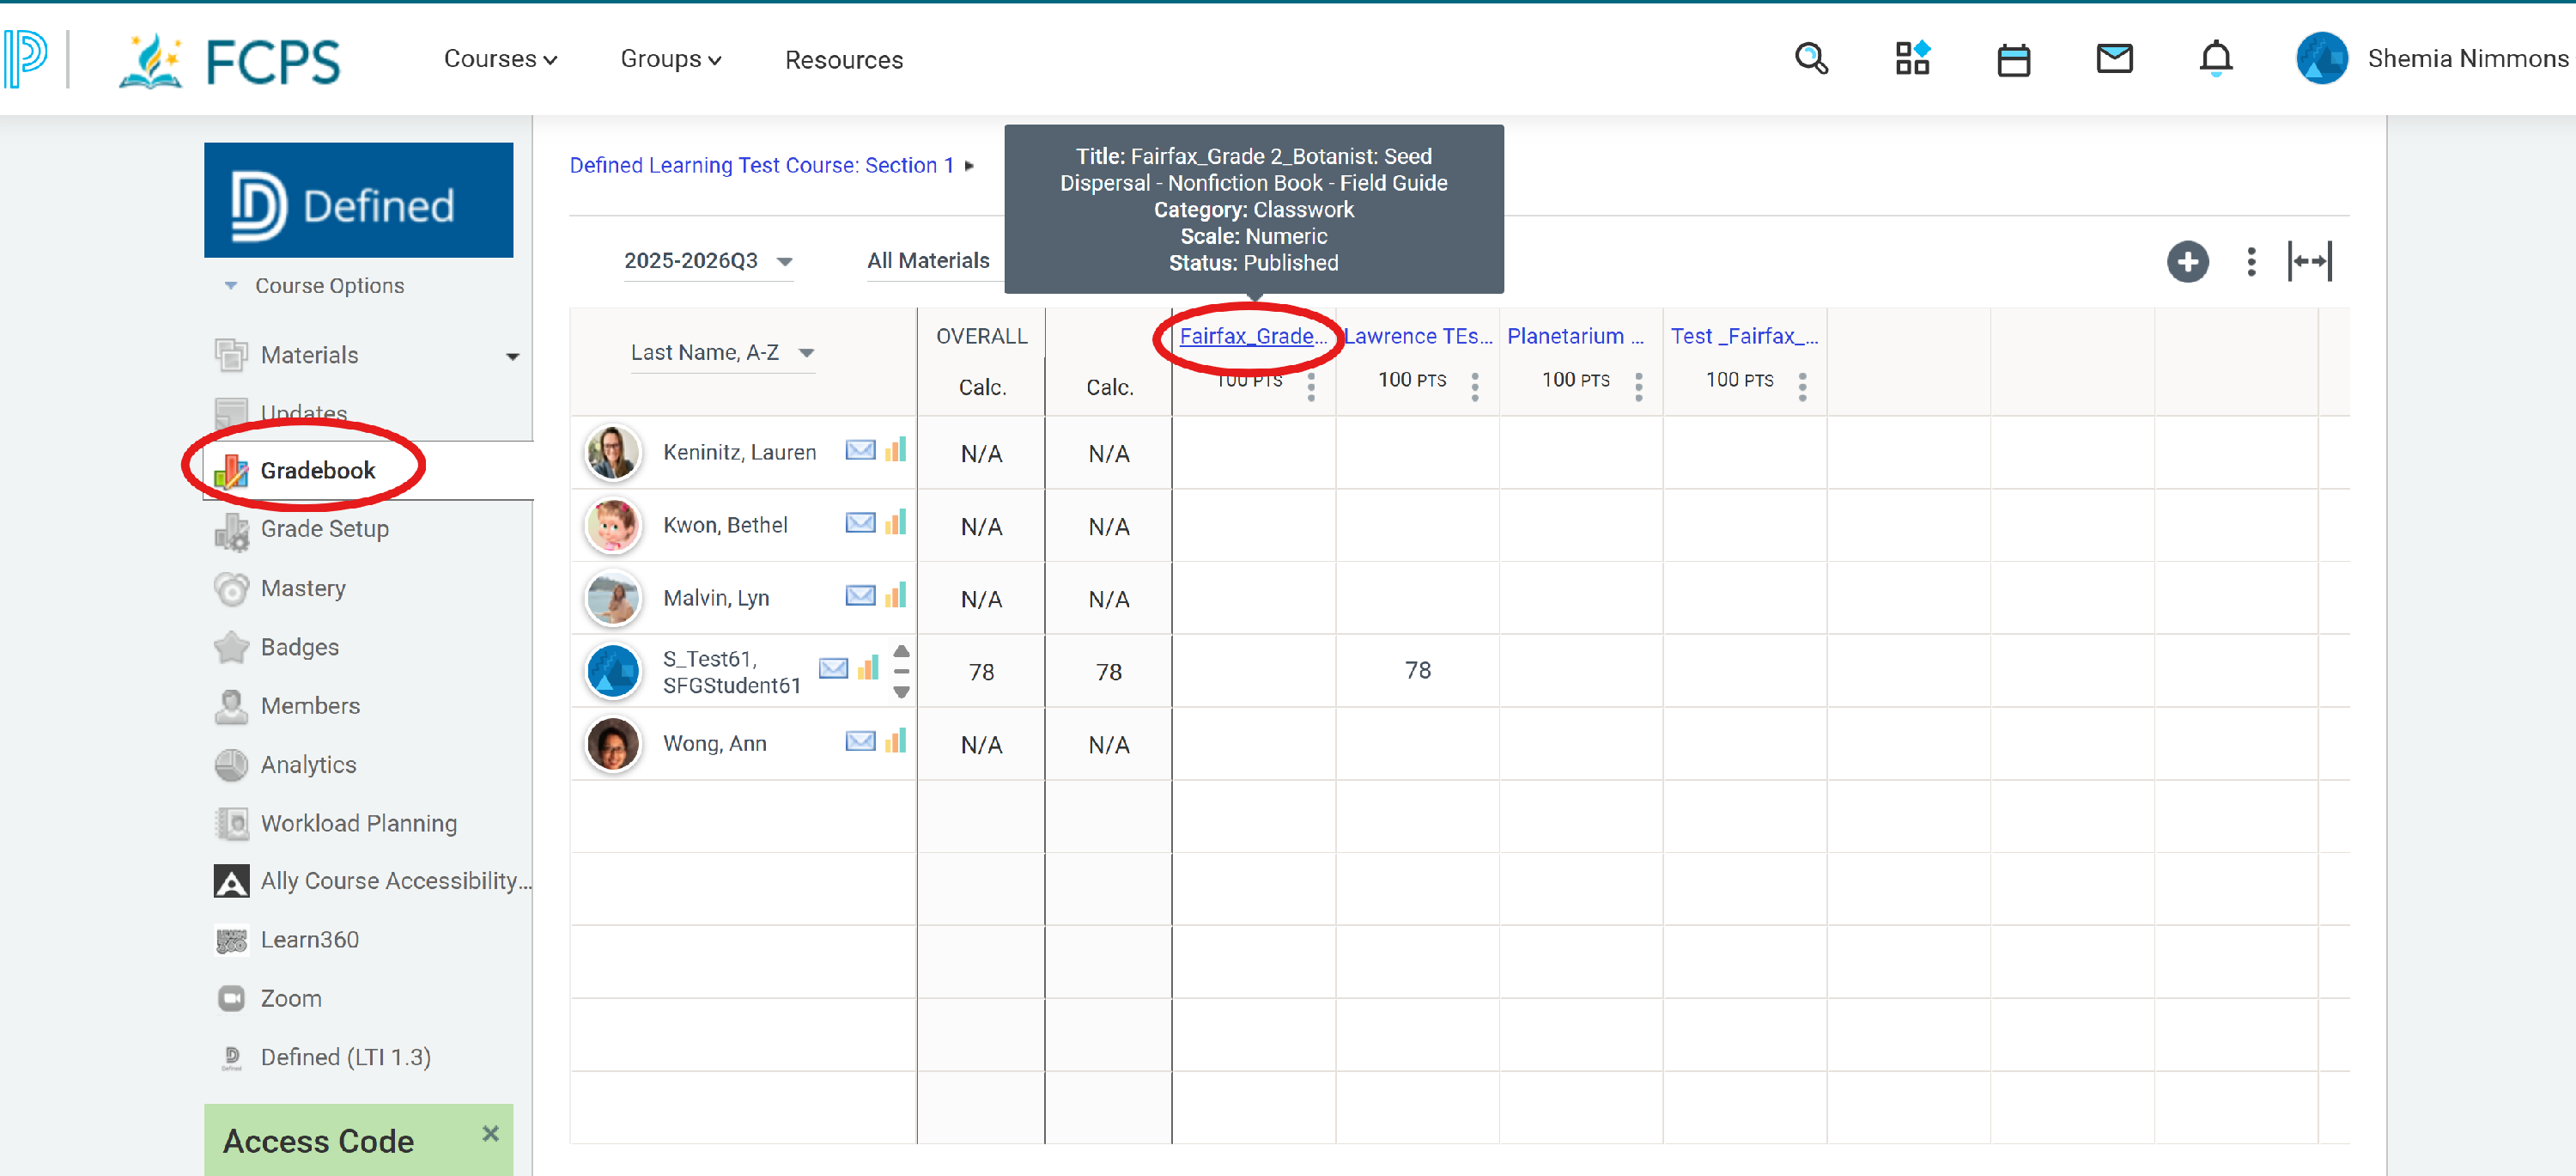
- Open your Schoology Gradebook.
- Click on the specific assignment title.
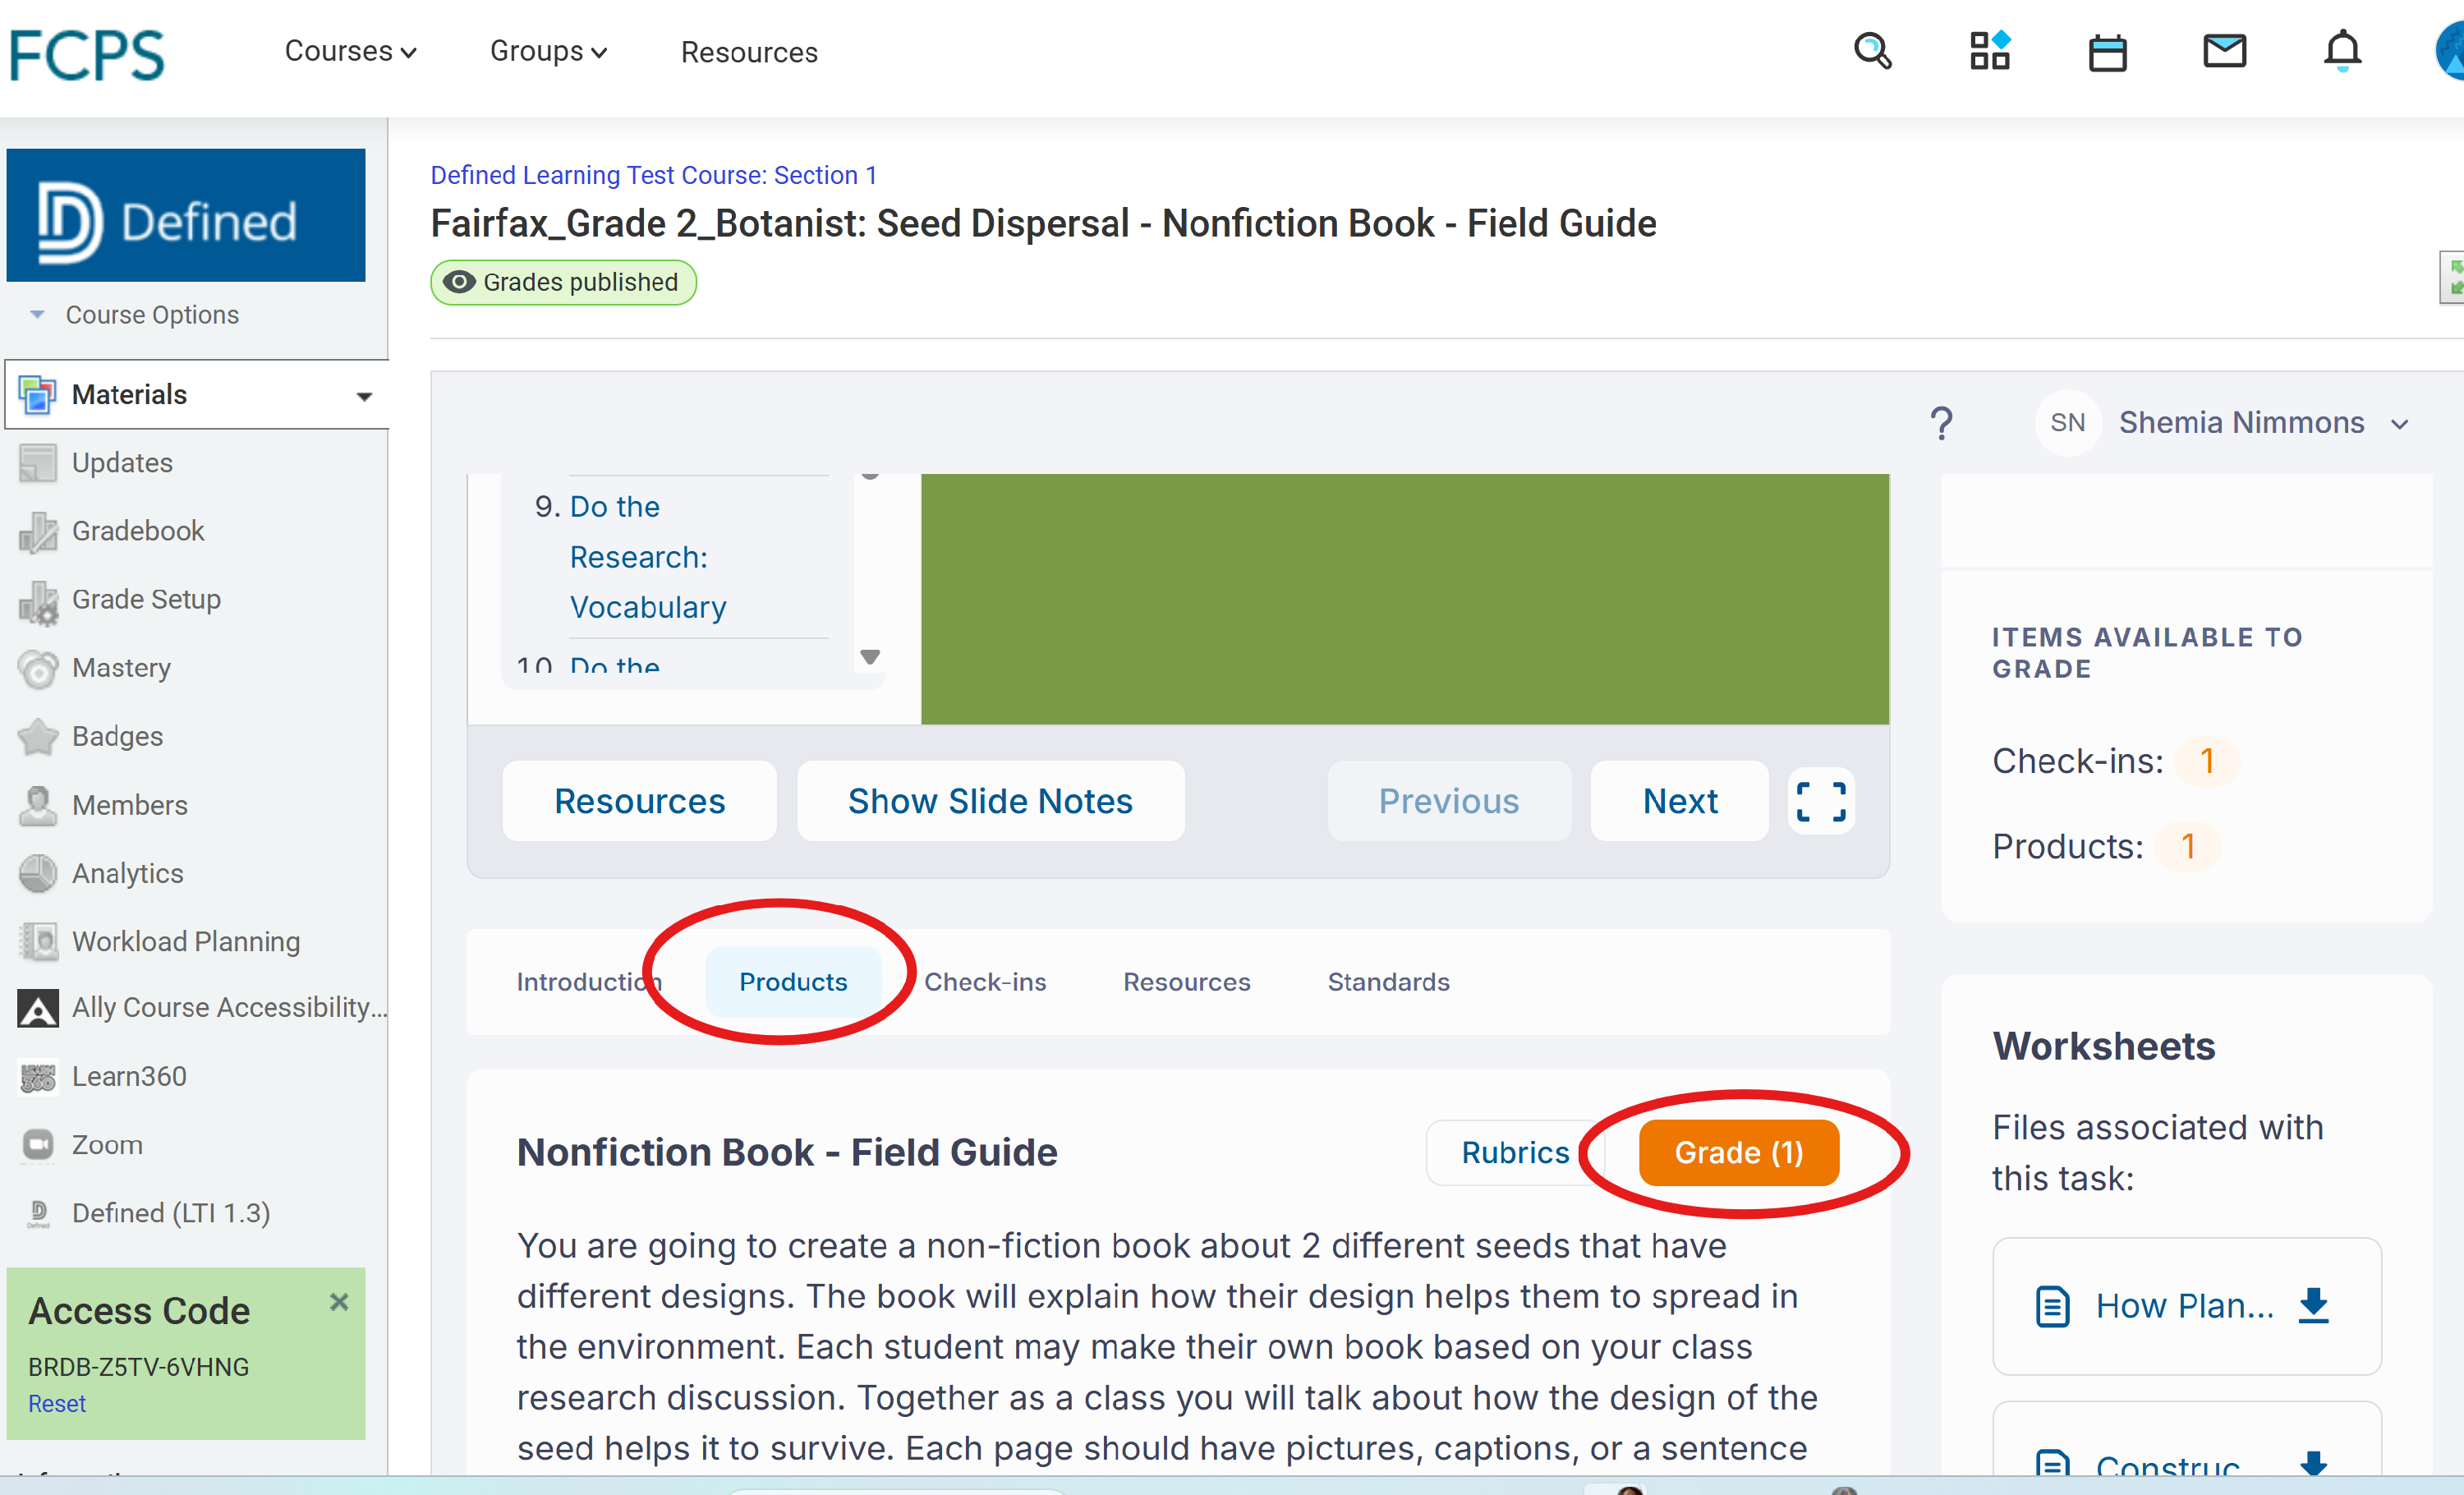
- Within the assignment view, click the Products tab.
- Click the orange Grade button next to the student's submission.
- Use the rubric cells to evaluate the work.
- Click Save. The score will automatically update in the Schoology Gradebook.
Related Troubleshooting
Missing Assignment in Gradebook
Ensure a grading Category has been selected in the Schoology assignment settings. Without a category, grade passback cannot occur.
Student Access Issues
Verify that the Defined (LTI 1.3) application is enabled within the course settings.
Grades Not Syncing to Schoology
- Confirm that the assignment was launched through Schoology.
- Verify that a grading category has been assigned.
Ensure the assignment was created using Defined (LTI 1.3) and not through a direct Defined Learning link.
Team Assignment Not Appearing for Students
- Verify that students have been added to the correct team.
- Confirm that the project was assigned to the team within Defined Learning.
Ensure that a corresponding Schoology assignment has also been created and published.
Customized Project Cannot Be Found
- Check the My Projects tab within Defined Learning. All customized projects are stored there and must be selected when creating assignments in Schoology.